The Ultimate Fun Vanilla Unicorn Birthday Cake for 8-Inch Pans
Fun Vanilla Unicorn Birthday Cake For 8 Inch Round Pans Recipe
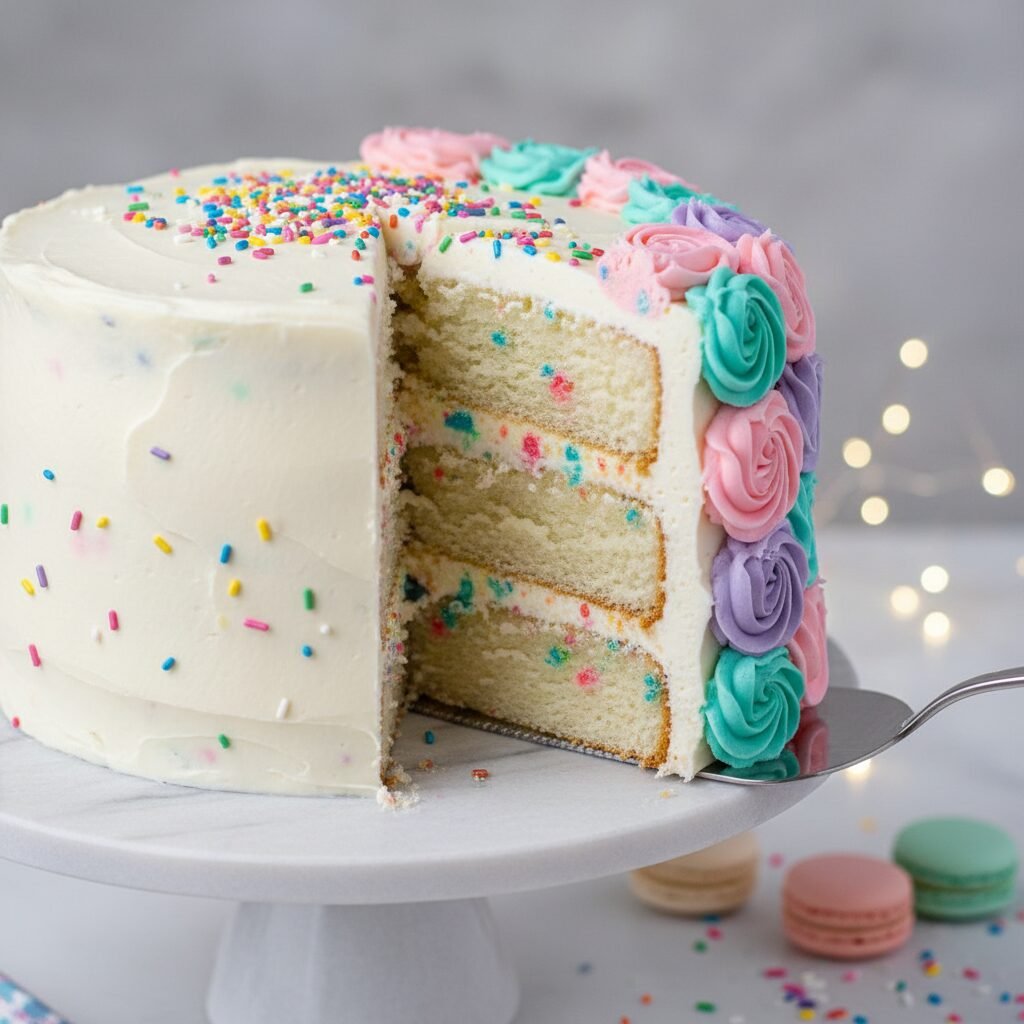
Bring a touch of magic to your next celebration with this spectacular Vanilla Unicorn Birthday Cake! Featuring tender, moist vanilla layers, dreamy pastel buttercream swirls, and a hidden explosion of sprinkles, this 8-inch masterpiece is as delicious as it is enchanting.
45 minutes
35 minutes
3 hours (includes cooling and decorating)
12-16 servings
Dessert
Baking
American
Vegetarian
There is something undeniably magical about a birthday cake that transcends age, but when you add the whimsical charm of the unicorn trend, you elevate a simple celebration into a fairytale event. This Fun Vanilla Unicorn Birthday Cake is designed specifically for 8-inch round pans, creating that perfect, towering bakery-style silhouette that looks impressive on any dessert table. But this cake isn’t just about looks; at its heart, it is a deeply flavorful, tender vanilla cake that rivals any high-end wedding confection. We use a combination of butter and oil to ensure the crumb remains moist for days while retaining that classic buttery mouthfeel we all crave. The vanilla flavor is boosted with high-quality vanilla bean paste, offering those gorgeous little black specks that signal true quality.
The frosting is an American Buttercream that has been whipped to an airy cloud-like consistency, then tinted with soft pastel gels to create the unicorn mane. Whether you are baking for a child’s 5th birthday or a nostalgic adult who simply loves color, this recipe delivers joy in every slice. The structure of the 8-inch rounds allows for a sturdy stack, perfect for supporting the weight of fondant horns, ears, or a mountain of glittery sprinkles. We will walk you through every step, from achieving the perfect flat cake tops to mastering the rosettes that make up the unicorn’s mane. Get ready to bake the most Instagrammable, Pinterest-perfect cake of the year right in your own kitchen.
History & Origins
The concept of the birthday cake has deep historical roots, tracing back to the ancient Romans who celebrated birthdays with cakes made of flour, nuts, yeast, and honey. However, the modern birthday cake as we know it—sweet, frosted, and lit with candles—began to take shape in 18th-century Germany during ‘Kinderfest,’ a celebration for children. It wasn’t until the Industrial Revolution that ingredients like sugar and baking powder became affordable enough for the masses to bake these treats regularly.
The specific ‘Unicorn’ food trend, however, is a much more recent cultural phenomenon. It exploded onto the culinary scene around 2016 and 2017, largely fueled by social media platforms like Instagram and Pinterest. This aesthetic movement was characterized by pastel rainbow colors, edible glitter, sprinkles, and whimsical iconography. The trend reached a fever pitch with the release of unicorn-themed beverages by major coffee chains, which solidified the aesthetic in the public consciousness. While many food trends burn out quickly, the Unicorn Cake has shown remarkable staying power, particularly in the realm of children’s birthday parties. It represents a shift in home baking towards ‘edible art,’ where the visual impact of the food is just as important as the taste. The design typically features closed eyes with eyelashes on the front of the cake and a flowing ‘mane’ of buttercream rosettes, topped with a gold or fondant horn. It has become a modern classic, symbolizing innocence, joy, and the freedom to be a little extra.
Why This Recipe Works
This recipe succeeds where many others fail because it meticulously balances the chemistry required for a structural yet tender cake. Many fun-fetti or unicorn cakes rely on boxed mixes which lack density, or scratch recipes that turn out dry and crumbly. This recipe utilizes the ‘reverse creaming’ method (or a modified version thereof) combined with sour cream. The sour cream introduces acidity, which tenderizes the gluten strands, ensuring the cake is soft but sturdy enough to be stacked and decorated without collapsing.
Furthermore, the choice of 8-inch pans is deliberate. A 9-inch pan often produces thinner layers that dry out faster and look less impressive. The 8-inch diameter with this volume of batter creates a taller, more majestic rise, giving you that professional bakery look. We also use a specific ratio of egg whites to whole eggs. By using mostly egg whites, we preserve the pale, white color of the crumb—essential for a ‘unicorn’ look so the colorful sprinkles pop—while the addition of a little yolk or oil ensures the cake doesn’t taste like a dry sponge. The buttercream recipe is also tweaked to crust slightly on the outside, which is crucial for piping defined rosettes that hold their shape at room temperature.
Why You’ll Love This Recipe
- ✓Achieves a professional, tall bakery-style height with 8-inch pans.
- ✓Uses a blend of butter and oil for the ultimate moist texture.
- ✓Pastel buttercream mane is easy to pipe even for beginners.
- ✓Sturdy crumb supports heavy decorations and fondant toppers.
- ✓Bursting with vanilla bean flavor and colorful sprinkles.
- ✓Perfectly sweet without being cloying.
Equipment You’ll Need
- ✓Three 8-inch round cake pans
- ✓Stand mixer with paddle and whisk attachments
- ✓Large mixing bowls
- ✓Rubber spatula
- ✓Offset spatula
- ✓Piping bags
- ✓Open star piping tip (e.g., Wilton 1M or 2D)
- ✓Cake turntable (optional but recommended)
- ✓Bench scraper
Ingredients
- ✓3 cups cake flour, sifted
- ✓2 1/2 cups granulated sugar
- ✓1 tablespoon baking powder
- ✓1/2 teaspoon baking soda
- ✓1 teaspoon salt
- ✓1 cup unsalted butter, room temperature, cut into cubes
- ✓1/2 cup vegetable oil (or canola oil)
- ✓1 cup whole milk, room temperature
- ✓1/2 cup full-fat sour cream, room temperature
- ✓5 large egg whites, room temperature
- ✓1 tablespoon vanilla bean paste (or high-quality extract)
- ✓3/4 cup rainbow jimmies (sprinkles), not nonpareils
- ✓FOR THE BUTTERCREAM: 2 cups unsalted butter, softened
- ✓7-8 cups powdered sugar, sifted
- ✓1 tablespoon vanilla extract
- ✓4-5 tablespoons heavy cream
- ✓Pinch of salt
- ✓Gel food coloring (Pink, Purple, Teal, Yellow)
- ✓Gold luster dust or fondant for the horn/ears
Instructions
- Preheat your oven to 350°F (175°C). Grease three 8-inch round cake pans with butter, line the bottoms with parchment paper, and dust with flour. Tap out excess flour.
- In the bowl of a stand mixer fitted with the paddle attachment, combine the sifted cake flour, granulated sugar, baking powder, baking soda, and salt. Mix on low speed for 30 seconds to blend.
- Add the cubed, room-temperature butter and the vegetable oil to the dry ingredients. Mix on low speed until the mixture resembles coarse sand or damp crumbs. This coats the flour in fat, inhibiting gluten formation.
- In a separate medium bowl or large measuring cup, whisk together the milk, sour cream, egg whites, and vanilla bean paste until smooth.
- With the mixer on low, slowly pour in about half of the liquid mixture. Increase speed to medium-high and beat for exactly 2 minutes to build structure and aerate the batter.
- Scrape down the sides and bottom of the bowl. Add the remaining liquid mixture and beat on medium speed for another 30 seconds. Do not overmix.
- Remove the bowl from the mixer and gently fold in the rainbow sprinkles by hand using a rubber spatula. Do not use the mixer for this, or the colors may bleed.
- Divide the batter evenly among the three prepared pans. Use a kitchen scale for precision if desired.
- Bake for 30-35 minutes, or until a toothpick inserted into the center comes out clean or with just a few moist crumbs. The tops should spring back when lightly touched.
- Allow the cakes to cool in the pans for 10 minutes, then carefully turn them out onto a wire rack to cool completely before frosting.
- While cakes cool, make the buttercream: Beat the butter on medium-high speed for 5-7 minutes until pale and creamy. Gradually add powdered sugar, one cup at a time, mixing on low.
- Add vanilla, salt, and heavy cream. Whip on high for 3-5 minutes until fluffy and white.
- To assemble, level the tops of the cakes if domed. Place the first layer on a cake board. Pipe a layer of white buttercream. Repeat with the second and third layers.
- Apply a thin ‘crumb coat’ of white frosting all over the cake to seal in crumbs. Chill for 20 minutes.
- Divide the remaining buttercream into 4 bowls. Tint them pastel pink, purple, teal, and yellow. Leave some white if desired.
- Fit a piping bag with a 1M tip. You can stripe the bag with different colors or do one color at a time. Pipe rosettes and swirls on top of the cake and cascading down one side to create the ‘mane’.
- Add fondant ears and a horn (or a plastic topper) to the top center. Finish with extra sprinkles or edible glitter.
Expert Cooking Tips
- ✓Ensure all ingredients (butter, eggs, milk, sour cream) are at room temperature. This creates a smooth emulsion and prevents the batter from breaking.
- ✓Do not use ‘nonpareils’ (the tiny round ball sprinkles) inside the batter; they will bleed and turn your lovely white cake a muddy gray. Use ‘jimmies’ (cylinder sprinkles).
- ✓Weigh your flour if possible (approx. 120g per cup) to avoid a dense, dry cake.
- ✓When tinting buttercream, use gel food coloring rather than liquid drops to avoid altering the consistency of the frosting.
- ✓If your kitchen is hot, chill the crumb-coated cake longer before piping the mane to ensure the decorations don’t slide off.
- ✓Tap the cake pans on the counter before baking to release any large air bubbles.
- ✓Use a cake turntable when frosting; it makes smoothing the sides and piping the mane significantly easier.
Substitutions and Variations
If you need to make this cake gluten-free, substitute the cake flour with a high-quality 1:1 gluten-free baking flour blend that includes xanthan gum. For a dairy-free version, use plant-based butter sticks (not tub margarine) and a high-fat dairy-free milk like oat milk or soy milk; replace sour cream with a dairy-free yogurt. If you don’t have cake flour, you can make a substitute: measure 1 cup of all-purpose flour, remove 2 tablespoons, and add 2 tablespoons of cornstarch. Sift together twice. If you prefer a less sweet frosting, you can swap the American buttercream for a Swiss Meringue Buttercream, though it is more technical to make. You can also replace the vegetable oil with melted coconut oil, though this may impart a slight coconut flavor.
Common Mistakes to Avoid
The most common mistake with this recipe is overmixing the batter after adding the wet ingredients, which leads to a dense, rubbery texture. Stop mixing as soon as the ingredients are combined. Another issue is trying to frost the cake while it is still slightly warm; this will cause the butter in the frosting to melt and the layers to slide apart. Always ensure the cakes are completely cool. Using liquid food coloring instead of gel can water down your frosting, making it impossible to pipe crisp rosettes. Finally, skipping the crumb coat often results in a messy final presentation with crumbs visible in the white frosting.
Serving Suggestions
This cake is a showstopper on its own, so it serves best as the centerpiece of a dessert table. Serve slices on simple white plates to let the colorful sprinkles and frosting pop. It pairs beautifully with cold glasses of milk for the kids or a glass of sparkling rosé or champagne for the adults. If you are hosting a party, consider serving it alongside unicorn-themed cake pops or sugar cookies. Cut the cake using a sharp knife dipped in hot water and wiped dry between cuts for the cleanest, most professional-looking slices.
Storage and Reheating Tips
Store the frosted cake at room temperature in a cake keeper for up to 2 days. The sugar and fat content keep it safe and moist. If you live in a very hot or humid climate, store it in the refrigerator, but bring it back to room temperature for at least 2 hours before serving, as cold butter cake can taste dry and hard. Leftover slices can be wrapped tightly in plastic wrap and then foil, and frozen for up to 3 months. Thaw frozen slices in the refrigerator overnight before enjoying.
Nutrition Facts (Estimated)
| Serving Size | 1 slice |
| Calories | 650 |
| Fat | 34g |
| Saturated Fat | 18g |
| Unsaturated Fat | 14g |
| Trans Fat | 0.5g |
| Cholesterol | 85mg |
| Sodium | 320mg |
| Carbohydrates | 82g |
| Fiber | 1g |
| Sugar | 55g |
| Protein | 6g |
Frequently Asked Questions
Can I use 9-inch pans instead of 8-inch pans?
Yes, you can, but the layers will be thinner, and the baking time will need to be reduced by about 5-8 minutes. Your cake won’t have the same tall, dramatic height as the 8-inch version.
How do I make the unicorn horn and ears?
You can mold them out of fondant or gum paste a few days in advance so they harden. Insert a toothpick into the base of the horn and ears to help anchor them into the cake. Alternatively, you can buy pre-made reusable plastic or paper unicorn cake topper kits online.
Can I make the cake layers ahead of time?
Absolutely. Bake the layers, let them cool completely, wrap them tightly in double layers of plastic wrap, and freeze them for up to a month. Frosting frozen cake layers is actually easier as they are firmer and produce fewer crumbs.
Why did my sprinkles sink to the bottom?
This usually happens if the batter is too thin or if you used heavy sprinkles. This batter is thick enough to suspend standard jimmies, but tossing your sprinkles in a teaspoon of flour before folding them in can help give them ‘grip’.
Can I use egg yolks instead of whites?
Using whole eggs (whites and yolks) will make the cake yellow. If you want that pure white interior to contrast with the sprinkles, you must use egg whites. The yolks add fat and richness, but also color.
How do I get the buttercream so white?
Whip the butter for a long time (5+ minutes) before adding sugar; this aerates it and lightens the color. You can also add a tiny drop of violet gel food coloring to counteract the yellow tones of the butter, or use clear vanilla extract.
My buttercream is too soft to pipe, what do I do?
If your kitchen is warm, the butter may be melting. Place the bowl of frosting in the fridge for 10-15 minutes to firm up, then re-whip briefly. You can also add a bit more powdered sugar to stiffen it.
Can I use this recipe for cupcakes?
Yes! This recipe will make approximately 24-30 standard cupcakes. Bake them at 350°F for 18-22 minutes.
Conclusion
Creating this Fun Vanilla Unicorn Birthday Cake is more than just following a recipe; it’s about crafting a memory. The process of mixing the batter, watching the layers rise, and swirling on that pastel mane is therapeutic and rewarding. When you finally slice into it and reveal the confetti-speckled interior, the smiles on your guests’ faces will be worth every minute of effort. It is a celebration of color, flavor, and joy wrapped up in a delicious, fluffy package. Whether you are a seasoned baker or trying your hand at your first layer cake, this recipe guides you to a magical result that tastes even better than it looks. Happy baking!