The Ultimate Fun Vanilla Unicorn Birthday Cake: A Magical 9×13 Sheet Pan Recipe
Fun Vanilla Unicorn Birthday Cake For 9×13 Pan Recipe
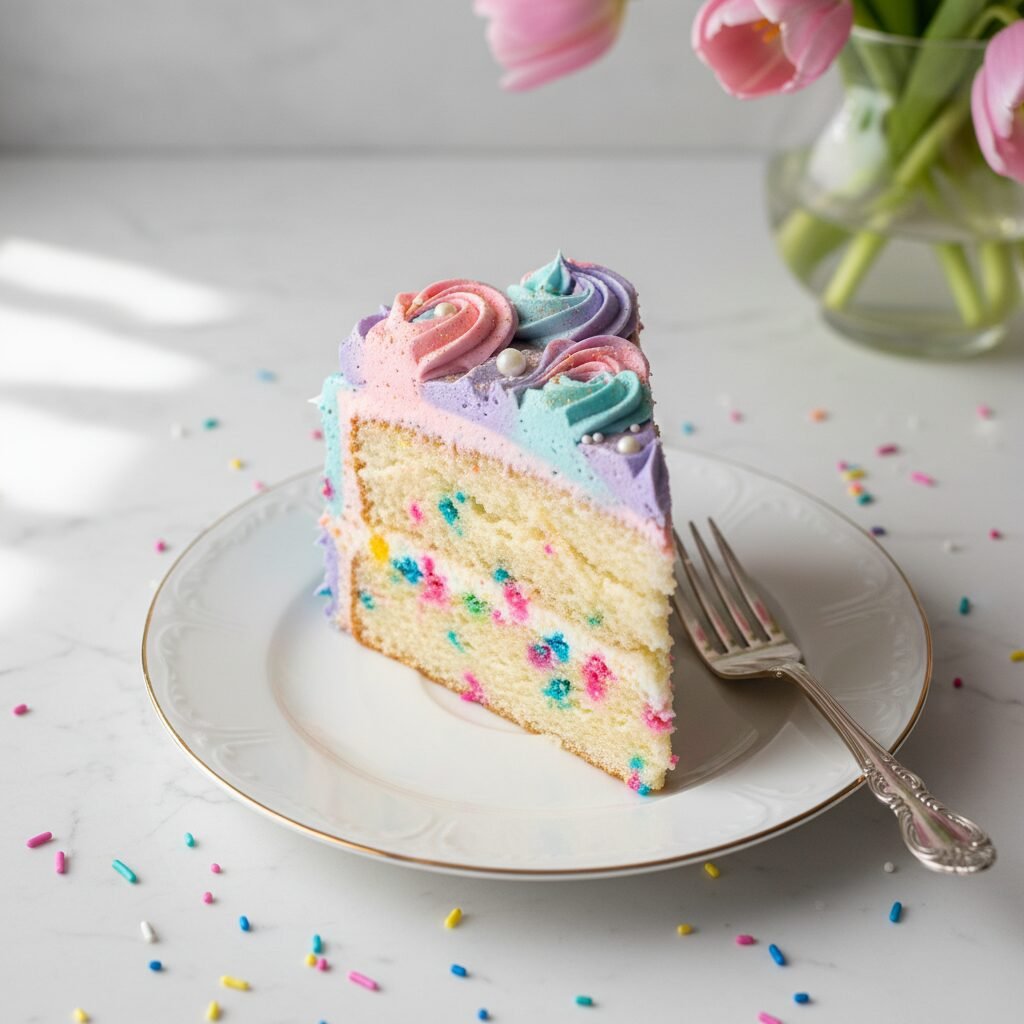
Bring a touch of magic to your next celebration with this effortless, one-pan Unicorn Birthday Cake. Featuring a tender, moist vanilla crumb packed with colorful sprinkles and topped with dreamy pastel-swirled buttercream, this 9×13 masterpiece is as delicious as it is photogenic.
25 minutes
35 minutes
1 hour 30 minutes (includes cooling)
12-15 servings
Dessert
Baking
American
Vegetarian
There is something undeniably nostalgic and heartwarming about a classic vanilla birthday cake. It is the centerpiece of childhood memories, the sweet ending to a year passed, and the hopeful beginning of a new one. But when you take that classic foundation and infuse it with the whimsical, vibrant energy of the ‘Unicorn’ trend, you get something truly spectacular. This Fun Vanilla Unicorn Birthday Cake isn’t just a dessert; it’s an experience. Designed specifically for a 9×13 sheet pan, this recipe champions the philosophy that you don’t need complicated layers, dowels, or fondant skills to create a showstopping centerpiece.
The texture of the cake is paramount—we are aiming for a crumb that is dense enough to hold a galaxy of sprinkles without them sinking to the bottom, yet tender enough to melt in your mouth. The flavor is a deep, aromatic vanilla, enhanced by the tang of buttermilk, which sets it miles apart from any boxed mix you might find on the grocery store shelf. But the real magic happens on top. We trade the stress of stacking layers for a sprawling canvas of fluffy American buttercream, tinted in soft pastel hues of pink, teal, and purple, swirled together to mimic a unicorn’s mane. Finished with a scattering of edible glitter and specialty sprinkles, this cake screams ‘celebration.’ whether you are hosting a party for a five-year-old dreaming of fairy tales or a thirty-five-year-old who simply loves the joy of color, this recipe delivers maximum impact with minimal stress. It is the perfect bake for busy parents, novice bakers, and anyone looking to inject a little bit of sparkle into their kitchen.
History & Origins
The concept of the ‘Unicorn’ aesthetic in food is a relatively modern phenomenon, exploding onto the scene in the mid-2010s. While unicorns have been mythical symbols of purity and grace for millennia—appearing in ancient Mesopotamian art and European folklore—their translation into the culinary world is a product of the social media age. The trend is characterized by pastel rainbows, iridescent glitters, and a sense of playful fantasy. It arguably reached its peak popularity around 2017, driven by viral Instagram posts and major coffee chains releasing unicorn-themed beverages. This aesthetic tapped into a collective desire for escapism and nostalgia, blending the Lisa Frank imagery of the 90s with modern food styling.
However, the culinary roots of this cake go back further to the invention of the ‘Funfetti’ cake. Introduced by Pillsbury in 1989, the idea of suspending colorful bits of candy within a white cake batter revolutionized the baking aisle. Before this, sprinkles were strictly a topping. The genius of the confetti cake was that it baked the celebration right into the slice. It became an instant icon of American birthday culture. Our Unicorn Sheet Pan Cake marries these two histories: the structural convenience of the American sheet cake—a staple of church potlucks and Texas kitchens since the mid-20th century—with the vibrant, confetti-filled joy of the late 80s and the pastel, magical aesthetic of the modern Unicorn trend. It is a dessert that honors the history of American home baking while fully embracing the visual language of the digital age.
Why This Recipe Works
This recipe succeeds where many others fail because it meticulously balances moisture with structure. A common problem with scratch-made ‘funfetti’ style cakes is that the sprinkles bleed into the batter, turning the crumb a muddy gray, or they sink to the bottom, creating a soggy crust. To combat this, we use a ‘reverse creaming’ inspired technique and a batter that is slightly thicker than a standard sponge. By using room-temperature butter and a combination of whole eggs and egg whites, we achieve a structure that suspends the ‘jimmies’ (the long, rod-shaped sprinkles) perfectly. We specifically avoid nonpareils (the tiny round balls) inside the batter because they bleed color instantly.
Furthermore, the use of buttermilk is non-negotiable in this recipe. The acidity in the buttermilk reacts with the baking soda and powder to tenderize the gluten strands, ensuring the cake remains soft for days. The 9×13 format is also a strategic choice. Layer cakes often suffer from dryness because the individual thin layers bake too quickly or dry out while waiting to be frosted. A sheet cake bakes in one go, retaining its steam and moisture more effectively. Finally, the frosting uses a high ratio of heavy cream to butter, which allows for that incredibly smooth, cloud-like consistency that swirls beautifully without tearing the surface of the cake.
Why You’ll Love This Recipe
- ✓No-stress 9×13 format eliminates the need for leveling and stacking layers.
- ✓Uses buttermilk for an incredibly tender, moist crumb that stays fresh for days.
- ✓The batter is engineered to suspend sprinkles evenly without them sinking.
- ✓Pastel swirl frosting creates a professional bakery look with just a spoon and knife.
- ✓Highly customizable colors to match any specific party theme.
- ✓Feeds a crowd easily, yielding up to 15 generous slices.
Equipment You’ll Need
- ✓9×13 inch baking pan (light metal preferred)
- ✓Stand mixer or handheld electric mixer
- ✓Large mixing bowls
- ✓Rubber spatula
- ✓Whisk
- ✓Measuring cups and spoons
- ✓Small bowls for mixing frosting colors
- ✓Offset spatula or back of a spoon
Ingredients
- ✓2 1/2 cups Cake Flour (spooned and leveled)
- ✓2 teaspoons Baking Powder
- ✓1/2 teaspoon Baking Soda
- ✓1 teaspoon Fine Sea Salt
- ✓3/4 cup Unsalted Butter, softened to room temperature
- ✓1 3/4 cups Granulated Sugar
- ✓3 Large Eggs, room temperature
- ✓1 tablespoon Pure Vanilla Extract
- ✓1 cup Buttermilk, room temperature
- ✓1/2 cup Rainbow Jimmies (sprinkles), plus more for topping
- ✓1 cup Unsalted Butter (for frosting), softened
- ✓4 cups Powdered Sugar
- ✓1/4 cup Heavy Cream
- ✓2 teaspoons Vanilla Bean Paste or Extract
- ✓Gel Food Coloring (Pink, Purple, Teal/Blue)
Instructions
- Preheat your oven to 350°F (175°C). Grease a 9×13 inch baking pan generously with butter or non-stick spray, and line the bottom with parchment paper for easy removal.
- In a medium bowl, whisk together the cake flour, baking powder, baking soda, and salt. Set this dry mixture aside.
- In the bowl of a stand mixer fitted with the paddle attachment (or a large bowl with a hand mixer), beat the 3/4 cup softened butter and granulated sugar on medium-high speed for about 3-4 minutes. The mixture should look pale, fluffy, and aerated.
- Reduce the mixer speed to medium-low. Add the eggs one at a time, beating well after each addition and scraping down the sides of the bowl. Stir in the 1 tablespoon of vanilla extract.
- With the mixer on low speed, add about one-third of the flour mixture. Mix just until combined. Pour in half of the buttermilk. Repeat, alternating between flour and buttermilk, ending with the flour. Stop mixing as soon as the last streaks of flour disappear. Do not overmix.
- Remove the bowl from the mixer. Gently fold in the 1/2 cup of rainbow jimmies by hand using a rubber spatula. Use a light touch to avoid breaking the sprinkles.
- Pour the batter into the prepared pan and smooth the top with an offset spatula. Tap the pan gently on the counter once to release large air bubbles.
- Bake for 30-35 minutes, or until a toothpick inserted into the center comes out clean or with just a few moist crumbs. The top should be a light golden brown.
- Remove the cake from the oven and place the pan on a wire rack. Allow the cake to cool completely in the pan. Frosting a warm cake will cause the butter to melt.
- While the cake cools, make the frosting. Beat the 1 cup of butter in a clean mixer bowl on medium-high speed for 5 minutes until it is incredibly pale and creamy.
- Reduce speed to low and gradually add the powdered sugar, one cup at a time. Once incorporated, increase speed to high and beat for 2 minutes.
- Add the heavy cream, vanilla bean paste, and a pinch of salt. Beat on medium-high for another 2-3 minutes until the frosting is light and airy.
- Divide the frosting into 4 bowls. Leave one white, and tint the others pink, purple, and teal using small drops of gel food coloring.
- Dollop spoonfuls of the different colored frostings randomly over the cooled cake. Using an offset spatula or the back of a spoon, gently swirl the colors together. Do not over-swirl, or the colors will turn muddy; you want distinct ribbons of color.
- Immediately top with extra sprinkles, edible glitter, or unicorn-themed candies before the frosting crusts over. Slice and serve.
Expert Cooking Tips
- ✓Use ‘Jimmies’ not ‘Nonpareils’: The long rod-shaped sprinkles hold their shape and color during baking. The tiny balls will dissolve and turn your batter gray.
- ✓Room Temperature Ingredients are Key: Ensure your butter, eggs, and buttermilk are all at room temp. This creates an emulsion that traps air, leading to a fluffy cake.
- ✓Don’t Overmix: Once the flour is added, mix gently. Overworking the gluten will result in a tough, rubbery cake.
- ✓Cool Completely: This cannot be stressed enough. Even a slightly warm cake will melt the buttercream, ruining your beautiful swirls.
- ✓Gel Food Coloring: Use gel instead of liquid drops. Liquid food coloring can alter the consistency of your frosting, making it runny.
- ✓Cake Flour Substitute: If you don’t have cake flour, measure 2 1/2 cups all-purpose flour, remove 5 tablespoons, and replace them with 5 tablespoons of cornstarch. Sift twice.
Substitutions and Variations
If you need to make dietary adjustments or are missing ingredients, there are several swaps you can make. For a gluten-free version, use a high-quality 1:1 gluten-free baking flour blend that contains xanthan gum; the texture will be slightly denser but still delicious. If you don’t have buttermilk, you can make a ‘sour milk’ substitute by adding 1 tablespoon of white vinegar or lemon juice to a measuring cup and filling it to the 1-cup line with regular whole milk; let it sit for 5 minutes before using. You can replace the butter in the cake batter with a neutral oil (like vegetable or canola) for an even moister cake, though you will lose some of that rich buttery flavor. For the frosting, if you find it too sweet, swop half the butter for cream cheese for a tangy cream cheese frosting base.
Common Mistakes to Avoid
The most common mistake with this cake is using the wrong type of sprinkles. As mentioned, nonpareils are the enemy of a clean batter. Another frequent error is opening the oven door too often to check on the cake; this releases heat and can cause the center of the cake to sink. Trust the timer and only check at the 30-minute mark. Additionally, many bakers rush the creaming process. Beating the butter and sugar for the full 3-4 minutes is essential for incorporating air. If you skimp on this step, your cake will be dense and heavy. Finally, when swirling the frosting, stop sooner than you think. It is easy to get carried away and mix the colors until they become a singular brownish-purple blob.
Serving Suggestions
This cake is a party in itself, but it pairs beautifully with a scoop of vanilla bean ice cream or a tart raspberry sorbet to cut through the sweetness. For a true unicorn theme, serve it alongside ‘pink milk’ (strawberry milk) or a sparkling lemonade garnished with cotton candy. If you are serving this for a birthday, consider using tall, metallic gold candles to mimic unicorn horns. You can also garnish the plate with fresh berries to add a fresh element to the rich dessert.
Storage and Reheating Tips
Because of the buttercream frosting, this cake is best stored at room temperature in an airtight container (or covered tightly with plastic wrap) for up to 3 days. The sugar acts as a preservative. If your kitchen is particularly hot or humid, store the cake in the refrigerator, but be sure to bring it back to room temperature before serving, as cold buttercream has a waxy texture. You can also freeze individual slices wrapped tightly in plastic wrap and then foil for up to 3 months. Thaw on the counter for a quick sweet treat.
Nutrition Facts (Estimated)
| Serving Size | 1 slice (1/15 of cake) |
| Calories | 420 |
| Fat | 22g |
| Saturated Fat | 14g |
| Unsaturated Fat | 8g |
| Trans Fat | 0.5g |
| Cholesterol | 65mg |
| Sodium | 210mg |
| Carbohydrates | 54g |
| Fiber | 0.5g |
| Sugar | 38g |
| Protein | 4g |
Frequently Asked Questions
Can I make this cake ahead of time?
Yes! You can bake the cake the day before. Let it cool completely, cover it tightly, and leave it at room temperature. Make the frosting and decorate on the day of serving for the freshest taste.
Why did my sprinkles sink to the bottom?
This usually happens if the batter is too thin or if the cake was overmixed. Our recipe uses a sturdy batter to prevent this. Also, ensure you are using ‘jimmies’ (rods) rather than heavier candy pieces.
Can I use this recipe to make cupcakes?
Absolutely. This batter will yield approximately 24 cupcakes. Bake them at 350°F for 18-22 minutes.
My frosting is too stiff to swirl. What do I do?
Add more heavy cream, one teaspoon at a time, and beat on high until it reaches a spreadable consistency.
Can I use salted butter instead of unsalted?
Yes, but if you do, omit the extra salt listed in the ingredients to keep the flavor balanced.
How do I get the swirls to look like the pictures?
The trick is not to mix the colors in the bowl. Place dollops of different colors next to each other on the cake and use your spatula to drag them into one another gently.
Is vanilla bean paste necessary?
It’s not strictly necessary, but it adds those lovely black specks and a deeper flavor. Regular vanilla extract works perfectly fine too.
Can I use natural food coloring?
Yes, there are many plant-based food colorings available. Just be aware that the colors might be more muted or ‘earthy’ compared to synthetic gels.
Conclusion
The Fun Vanilla Unicorn Birthday Cake is more than just a sugar rush; it’s a celebration of color, creativity, and the simple joy of baking. By ditching the complex layers for a reliable 9×13 pan, you free yourself up to enjoy the process—and the party! Whether you are an experienced baker or trying your hand at scratch-baking for the first time, this recipe promises a result that is as magical to look at as it is to eat. So grab your sprinkles, whip up that pastel buttercream, and get ready to slice into a little bit of magic.