Ultimate Tall Chocolate Drip Cake With Sprinkles: The Birthday Showstopper
Tall Chocolate Drip Cake With Sprinkles Recipe
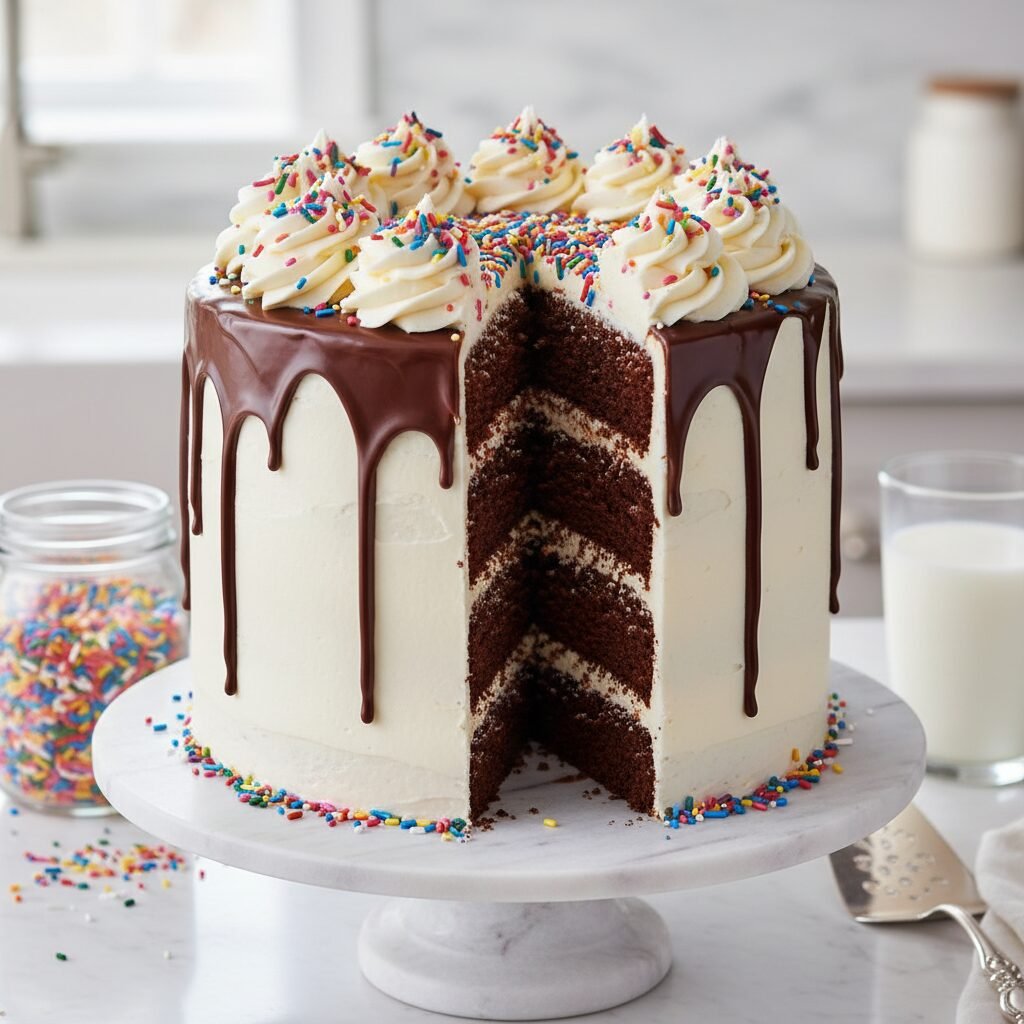
This show-stopping tall chocolate drip cake features four layers of moist, rich chocolate sponge, silky buttercream frosting, and a glossy ganache drip. Finished with a vibrant explosion of sprinkles, it is the ultimate celebration centerpiece that tastes just as incredible as it looks.
1 hour 30 minutes
35 minutes
4 hours (includes cooling)
12-16 servings
Dessert
Baking
American
Vegetarian
There is something undeniably magical about a tall, towering cake. It commands attention the moment it enters the room, promising indulgence and celebration in every slice. This Tall Chocolate Drip Cake with Sprinkles is not just a dessert; it is an architectural marvel of baking that combines the deep, soulful richness of cocoa with the whimsical joy of a classic birthday party. Unlike standard sheet cakes or humble two-layer creations, this four-layer beauty offers a dramatic height that allows for an ideal ratio of cake to frosting, ensuring that every bite is perfectly balanced. The cake layers themselves are engineered to be sturdy enough to stack high without being dense; they remain incredibly moist, tender, and deeply chocolaty, thanks to the inclusion of both buttermilk and hot coffee in the batter.
The exterior is where the real fun begins. Coated in a smooth, vanilla bean Swiss meringue buttercream, the stark white canvas provides a stunning contrast to the dark, luxurious chocolate ganache drip that cascades down the sides. Achieving that perfect drip—not too runny, not too thick—is an art form that we have simplified into a foolproof science for this recipe. To top it all off, a crown of colorful sprinkles adds a festive crunch and a pop of color that makes this cake impossible to resist. Whether you are celebrating a milestone birthday, a special anniversary, or simply the joy of baking, this cake is designed to impress. It is a labor of love that rewards you with ‘oohs’ and ‘aahs’ from guests and a flavor profile that lingers in the best way possible. Prepare to channel your inner pastry chef and create a masterpiece that is as delicious as it is photogenic.
History & Origins
The concept of the ‘Drip Cake’ is a relatively modern phenomenon in the long and storied history of cake decorating, though its roots lie in classic techniques. Chocolate cake itself dates back to the mid-18th century, though it was vastly different from the fluffy sponges we know today. It wasn’t until the introduction of baking powder and the availability of processed cocoa powder in the late 19th and early 20th centuries that the modern chocolate cake began to take shape. For decades, cake decorating was dominated by rigid fondant work, intricate royal icing piping, and the pursuit of flawless, smooth finishes.
However, around the mid-2010s, a shift occurred in the baking world, largely driven by Australian bakers and the rise of visual social media platforms like Instagram and Pinterest. Bakers like Katherine Sabbath popularized a more playful, ‘perfectly imperfect’ aesthetic. The drip cake emerged as a rebellion against the stiff formality of fondant wedding cakes. It celebrated the appetizing nature of the ingredients themselves—letting chocolate look like melting chocolate. The technique involves pouring a ganache or glaze over the top of a chilled, buttercream-frosted cake and allowing it to run down the sides in controlled droplets. This style quickly became a global sensation because it looked effortlessly chic yet undeniably appetizing.
The addition of sprinkles, or ‘jimmies’ as they are known in some parts of the United States, adds a nostalgic nod to the classic American birthday cake. Sprinkles have their own murky history, with origins claimed by both Dutch confectioners (hagelslag) and American candy companies in the early 20th century. By combining the modern, trendy drip aesthetic with the retro, feel-good vibe of sprinkles, this cake bridges the gap between high-end pastry art and childhood nostalgia, making it a modern classic in American home baking.
Why This Recipe Works
This recipe succeeds because it addresses the two main challenges of making tall cakes: structural integrity and moisture retention. Many chocolate cakes are delicious but too fragile to stack four layers high. This recipe utilizes a reverse-creaming method (or a modified wet-dry mix) and includes oil alongside butter. The butter provides the classic flavor, while the oil ensures the cake stays moist for days, even when refrigerated. The addition of hot coffee blooms the cocoa powder, intensifying the chocolate flavor and breaking down the cocoa butter to ensure a smooth, lump-free batter.
Furthermore, the frosting choice is critical. We use a Swiss Meringue Buttercream rather than a standard American Buttercream. Swiss Meringue is much more stable at room temperature and sets firm when chilled, which is essential for creating a sharp edge and a cold surface for the warm ganache drip. If the cake isn’t cold or the frosting is too soft, the heavy ganache will drag the frosting down, creating a mess. The ganache ratio in this recipe is specifically tuned for a ‘drip’ consistency—typically a 1:1 ratio of chocolate to cream, but slightly adjusted depending on the chocolate’s cocoa percentage, ensuring it flows but stops midway down the cake. Finally, the height of the cake isn’t just for looks; it allows for thinner slices that are easier to eat, providing a manageable portion of rich dessert without being overwhelming.
Why You’ll Love This Recipe
- ✓Stunning visual presentation with a professional-quality chocolate drip.
- ✓Four layers of ultra-moist, deep dark chocolate cake.
- ✓Silky smooth Swiss Meringue Buttercream that isn’t overly sweet.
- ✓Stable structure perfect for stacking tall without sliding.
- ✓customizable sprinkle blends to match any party theme.
- ✓Detailed instructions ensure the ganache drip is foolproof.
Equipment You’ll Need
- ✓Four 6-inch round cake pans
- ✓Stand mixer with paddle and whisk attachments
- ✓Offset spatula
- ✓Bench scraper (icing smoother)
- ✓Turntable (lazy Susan)
- ✓Squeeze bottle or teaspoon (for the drip)
- ✓Digital kitchen scale
- ✓Wire cooling racks
- ✓Parchment paper
- ✓Cake board (6-inch and 8-inch)
Ingredients
- ✓2 1/2 cups All-purpose flour
- ✓2 1/2 cups Granulated sugar
- ✓1 cup Unsweetened cocoa powder (high quality Dutch-processed)
- ✓2 1/2 tsp Baking soda
- ✓1 tsp Baking powder
- ✓1 tsp Salt
- ✓3 Large eggs, room temperature
- ✓1 1/2 cups Buttermilk, room temperature
- ✓1/2 cup Vegetable oil
- ✓1 1/2 tsp Vanilla extract
- ✓1 cup Hot brewed coffee (strong)
- ✓5 large Egg whites (for buttercream)
- ✓1 1/2 cups Granulated sugar (for buttercream)
- ✓2 cups Unsalted butter, cubed and cool room temperature (for buttercream)
- ✓1/2 cup Semi-sweet chocolate chips or chopped chocolate (for drip)
- ✓1/2 cup Heavy cream (for drip)
- ✓1/2 cup Fancy sprinkles blend
Instructions
- 1. Preheat your oven to 350°F (175°C). Grease four 6-inch round cake pans, line the bottoms with parchment paper, and dust the sides with cocoa powder.
- 2. In the bowl of a stand mixer, sift together the flour, sugar, cocoa powder, baking soda, baking powder, and salt. Mix on low speed briefly to combine.
- 3. In a separate medium bowl, whisk together the eggs, buttermilk, oil, and vanilla extract until fully combined.
- 4. With the mixer on low speed, slowly pour the wet ingredients into the dry ingredients. Mix until just combined, scraping down the sides of the bowl as needed.
- 5. Carefully pour in the hot coffee while the mixer is running on low speed. The batter will be very thin and liquid; this is normal. Mix only until combined.
- 6. Divide the batter evenly among the four prepared pans (using a scale helps ensure even layers).
- 7. Bake for 30-35 minutes, or until a toothpick inserted into the center comes out clean or with just a few moist crumbs.
- 8. Allow the cakes to cool in the pans for 10 minutes, then turn them out onto a wire rack to cool completely. Once cool, wrap them in plastic wrap and freeze for 30 minutes to make stacking easier.
- 9. While cakes chill, prepare the Swiss Meringue Buttercream. Whisk egg whites and sugar in a heatproof bowl over a pot of simmering water until the mixture reaches 160°F (71°C) and sugar is dissolved.
- 10. Transfer to a stand mixer with the whisk attachment and whip on high speed until stiff peaks form and the bowl feels cool to the touch (about 10-15 minutes).
- 11. Switch to the paddle attachment. Add the cubed butter one piece at a time, mixing on medium speed. Once all butter is added, increase speed to high and beat until smooth and creamy. Add vanilla.
- 12. To assemble, place a dab of buttercream on a cake board. Place the first cake layer down. Top with 1/2 cup of buttercream and smooth. Repeat with remaining layers.
- 13. Apply a thin ‘crumb coat’ of frosting all over the cake to trap crumbs. Refrigerate for 20 minutes.
- 14. Apply the final thick coat of buttercream. Use a bench scraper to get the sides perfectly smooth and straight. Refrigerate the cake for at least 30 minutes until the frosting is cold and firm.
- 15. Make the ganache: Place chocolate chips in a heatproof bowl. Heat heavy cream until it just begins to simmer, then pour over the chocolate. Let sit for 5 minutes, then stir gently until smooth. Let it cool until it is slightly thickened but still pourable (around 90°F).
- 16. Using a squeeze bottle or spoon, carefully drip the ganache down the edges of the cold cake, spacing them out for a dramatic look. Fill in the top of the cake with the remaining ganache and smooth with a spatula.
- 17. Immediately apply sprinkles around the base or on top of the cake before the ganache sets completely.
- 18. Chill the cake for 15 minutes to set the drip before serving.
Expert Cooking Tips
- ✓Weigh your ingredients using a kitchen scale for the most accurate baking results, especially for the flour and sugar.
- ✓Do not skip the hot coffee; you won’t taste coffee in the final product, but it blooms the cocoa for a richer chocolate taste.
- ✓Ensure your butter is at cool room temperature for the buttercream. If it’s too warm, the frosting will be soupy; if too cold, it will be curdy.
- ✓Chill your cake layers before stacking. Cold cake is firmer and less likely to break or slide while you are frosting it.
- ✓Test your ganache consistency on the side of a glass or bowl before applying it to the cake. If it runs too fast, let it cool longer.
- ✓Use a squeeze bottle for the drips to have maximum control over the length and placement of each drip.
- ✓Clean your knife with hot water and wipe it dry between every slice to get those perfect, professional-looking cross-sections.
Substitutions and Variations
If you do not have buttermilk, you can make a quick substitute by adding 1 tablespoon of lemon juice or white vinegar to 1.5 cups of whole milk and letting it sit for 5 minutes. For the oil, melted coconut oil or canola oil works perfectly fine. If you want to avoid coffee due to caffeine sensitivity, you can use hot water or decaf coffee, though the flavor won’t be quite as deep. For the buttercream, if Swiss Meringue intimidates you, a standard American Buttercream (butter and powdered sugar) can be used, though it will be sweeter and crusts over. You can substitute the semi-sweet chocolate in the drip for white chocolate (use a 3:1 ratio of chocolate to cream as white chocolate is softer) or dark chocolate (use 1:1 ratio). Gluten-free all-purpose flour blends that contain xanthan gum can generally be swapped 1:1 for the regular flour in this recipe.
Common Mistakes to Avoid
The most common mistake with tall cakes is rushing the cooling process. If the cake layers are even slightly warm when you try to frost them, the butter in the buttercream will melt, causing the layers to slide off and the structure to collapse. Another frequent error is adding the drip when the cake is not cold enough or the ganache is too hot. The cake must be chilled so the cold buttercream shocks the ganache, slowing it down. If the ganache is too hot, it will melt the buttercream and run all the way to the platter, ruining the aesthetic. Additionally, over-mixing the batter after adding the flour can lead to a dense, rubbery cake rather than a tender crumb. Always mix on low speed and stop as soon as the ingredients are combined.
Serving Suggestions
This tall chocolate drip cake is a centerpiece on its own, but it pairs beautifully with specific accompaniments. Serve thin, tall slices on dessert plates with a dollop of lightly sweetened whipped cream or a scoop of vanilla bean ice cream to cut through the richness. Fresh berries, such as strawberries or raspberries, make an excellent garnish on the plate, as their tartness balances the sweet chocolate and buttercream. For a beverage pairing, a glass of cold milk is classic, but a hot espresso or a glass of bold red wine, like a Cabernet Sauvignon or Merlot, complements the dark chocolate notes perfectly. If serving for a birthday, ensure you have tall candles that match the scale of the cake.
Storage and Reheating Tips
Because this cake is frosted with Swiss Meringue Buttercream, it can stay at room temperature for up to 2 days, provided the kitchen isn’t too hot (above 73°F/23°C). However, for longer storage, keep it in the refrigerator. A cake keeper or a large overturned bowl works well to protect it. The cake is best eaten at room temperature, so if refrigerated, remove it 2-3 hours before serving to allow the butter in the frosting and cake to soften. Cold cake will taste dry and waxy. Slices can be individually wrapped in plastic wrap and foil, then frozen for up to 3 months. Thaw frozen slices in the fridge overnight and bring to room temperature before enjoying.
Nutrition Facts (Estimated)
| Serving Size | 1 slice (1/14th of cake) |
| Calories | 650 |
| Fat | 38g |
| Saturated Fat | 22g |
| Unsaturated Fat | 14g |
| Trans Fat | 0.5g |
| Cholesterol | 95mg |
| Sodium | 320mg |
| Carbohydrates | 78g |
| Fiber | 4g |
| Sugar | 45g |
| Protein | 8g |
Frequently Asked Questions
Can I make this cake in 8-inch pans instead of 6-inch pans?
Yes, you can use two or three 8-inch pans instead of four 6-inch pans. The baking time may need to be adjusted slightly (likely increased by 5-10 minutes), and the cake will not be as tall, but the volume of batter is sufficient.
Why is my ganache drip too runny?
Ganache that is too runny is usually either too hot or has too much cream. Let the ganache cool to around 90°F (32°C) before using. If it is still too thin, melt a bit more chocolate and stir it in to thicken the mixture.
Do I really need a cake turntable?
While not strictly required, a turntable makes achieving smooth sides and a clean drip significantly easier. If you don’t have one, you can place your cake plate on a lazy Susan or simply walk around the cake as you frost it.
Can I use store-bought frosting?
You can, but store-bought frosting is much softer and sweeter than homemade buttercream. It may not hold up the weight of a four-layer cake as well. If you use it, consider thickening it with extra powdered sugar.
How do I get the sprinkles to stick to the side?
If you want sprinkles on the sides of the buttercream (not just the top), apply them immediately after the final coat of frosting while it is still tacky. Gently press handfuls of sprinkles against the base of the cake.
Why did my cake sink in the middle?
Cakes usually sink if the oven door was opened too early, causing a temperature drop, or if the cake was underbaked. Ensure your oven temperature is accurate (use an oven thermometer) and don’t open the door until at least 25 minutes have passed.
Can I make the cake layers in advance?
Absolutely. In fact, the cake is easier to assemble if the layers are made a day ahead. Wrap the cooled layers tightly in plastic wrap and store them in the fridge for up to 3 days or freeze for up to a month.
What is the best way to cut a tall cake?
Instead of cutting traditional wedges, use the ‘cutting board method.’ Slice a slab across the entire width of the cake, lay that slab onto a cutting board, and then cut that slab into rectangular strips. This provides neat portions.
Conclusion
Mastering the Tall Chocolate Drip Cake with Sprinkles is a milestone for any home baker. It combines technical skills—like leveling cakes, masking with buttercream, and controlling ganache temperature—with the pure creative joy of decoration. While it may seem like a project reserved for professionals, breaking it down into manageable steps makes it entirely achievable in a home kitchen. The result is more than just a dessert; it is a memory maker. The gasp of delight when you bring this towering creation to the table, the contrast of the crisp chocolate shell against the soft buttercream, and the deep, satisfying crumb of the cake make every minute of effort worth it. So, gather your ingredients, preheat your oven, and get ready to bake the most impressive birthday cake of your life.