Ultimate Tall Chocolate Drip Cake With Ombre Frosting
Tall Chocolate Drip Cake With Ombre Frosting Recipe
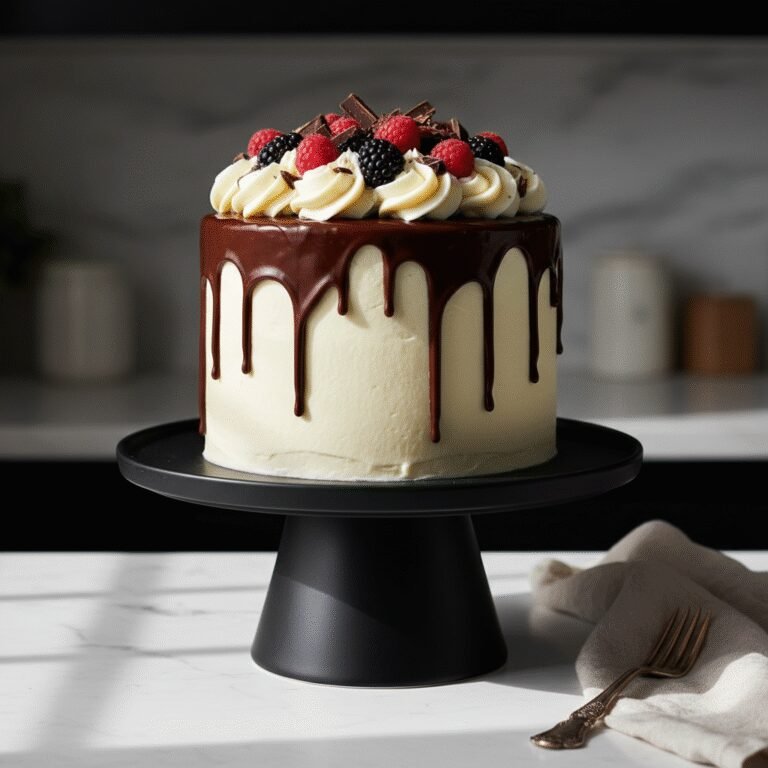
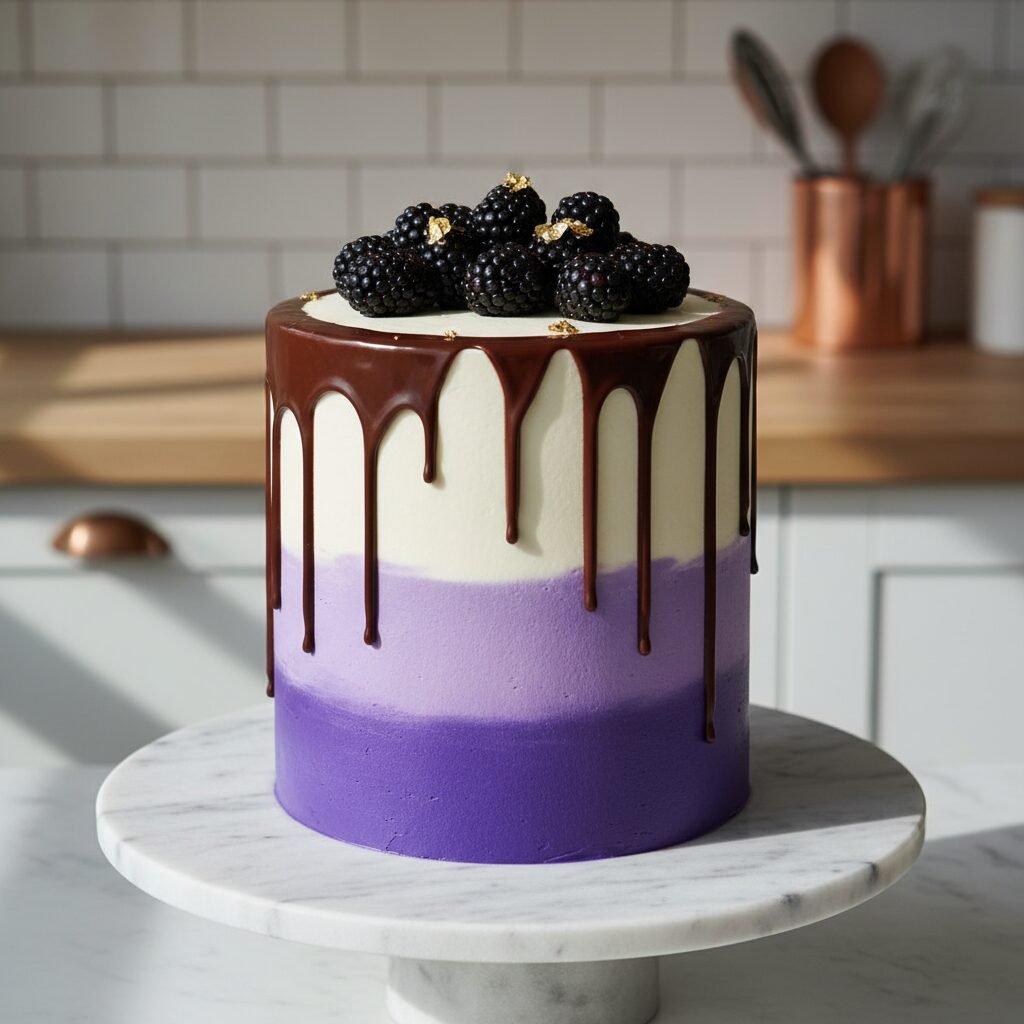
Elevate your baking game with this showstopping Tall Chocolate Drip Cake. Featuring four layers of moist, decadent chocolate sponge sandwiched between silky Swiss Meringue Buttercream in a stunning purple ombre gradient, this cake is finished with a glossy dark chocolate ganache drip. It is the perfect centerpiece for birthdays, weddings, or any celebration requiring a touch of elegance.
1 hour 30 minutes
35 minutes
4 hours (includes cooling)
12-16 servings
Dessert
Baking
Modern American
Vegetarian
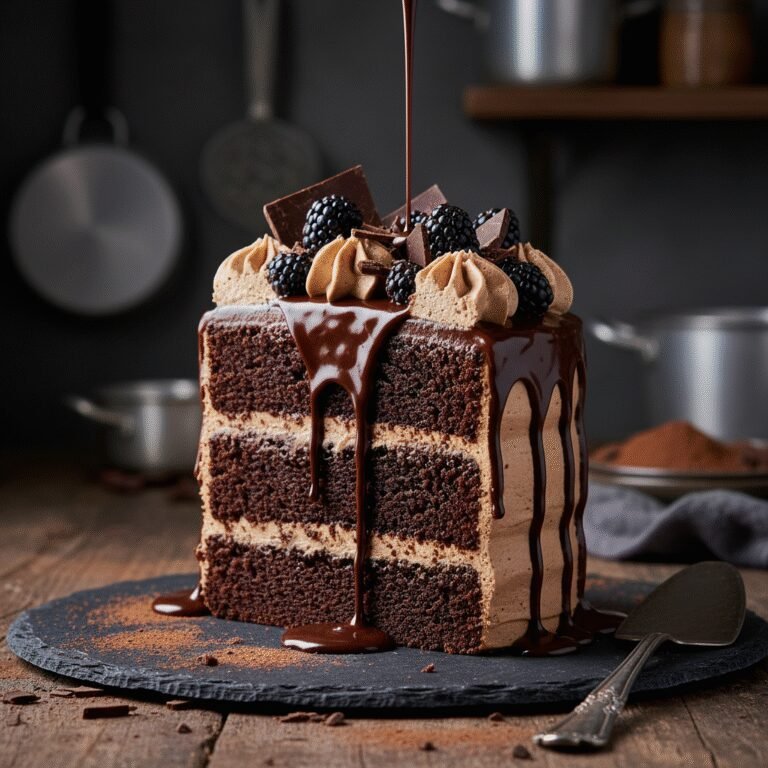
Welcome to the ultimate guide for creating a bakery-style masterpiece right in your own kitchen. There is something undeniably magical about a tall, architectural cake. It stands proudly on the dessert table, commanding attention with its stature and promising a slice of pure indulgence. This Tall Chocolate Drip Cake with Ombre Frosting is not just a dessert; it is a work of edible art designed to impress. At its heart lies a deeply rich, almost fudge-like chocolate cake that owes its incredible moisture to a combination of buttermilk and hot coffee. Unlike dry sponges that rely heavily on syrup for texture, this cake stands on its own, boasting a tender crumb that melts in your mouth. But the real visual drama comes from the decoration. We are using Swiss Meringue Buttercream, known for its silky, non-gritty texture and stability, to create a seamless ombre effect. Transitioning from a deep, regal violet at the base to a pristine white at the crown, the frosting draws the eye upward to the crowning glory: the chocolate drip. The drip technique, while intimidating to beginners, is surprisingly forgiving when you understand the temperature dynamics of ganache. This recipe walks you through every step, ensuring that your drips are luscious and controlled, rather than messy and runny. Whether you are an aspiring pastry chef or a home baker looking to conquer a new challenge, this recipe provides the detailed roadmap you need to create a Pinterest-worthy confection that tastes even better than it looks.
History & Origins
The concept of the ‘tall’ cake is a relatively modern phenomenon in the timeline of baking history, diverging from the traditional broad, two-layer cakes that dominated American households for decades. The roots of the chocolate cake itself date back to the mid-19th century when chemists discovered how to extract cocoa butter from cacao beans, making baking chocolate more accessible. However, the specific lineage of this recipe traces back to the ‘Devil’s Food’ cakes of the early 20th century, which were characterized by their reddish hue and intense chocolate flavor, often achieved through the reaction of baking soda and non-alkalized cocoa powder. The modern ‘drip cake’ trend, however, is widely attributed to the creative explosion in Australian cake decorating around the mid-2010s. Pioneers like Katherine Sabbath popularized the playful, slightly chaotic, yet highly stylized aesthetic of ganache dripping down the sides of a perfectly smoothed buttercream canvas. This style rebelled against the rigid perfection of fondant-covered wedding cakes, embracing the appetizing nature of real buttercream and chocolate. Simultaneously, the ‘barrel’ or ‘tall’ cake trend emerged, where bakers began stacking four, six, or even eight layers of cake with smaller diameters (often 6 inches) to create a towering silhouette. This verticality allows for more surface area to display techniques like the ombre effect—a gradient color transition borrowed from the textile and hair industries—which became a staple in cake design for its elegant and mesmerizing visual appeal.
Why This Recipe Works
This recipe succeeds where others fail due to a careful balance of structural integrity and moisture content. Building a tall cake requires a sponge that is sturdy enough to support the weight of multiple upper layers without compressing into a dense brick, yet moist enough to remain palatable. We achieve this by using a ‘reverse creaming’ influenced method where oil provides lasting moisture while butter provides flavor. The addition of hot coffee is scientifically crucial; the heat ‘blooms’ the cocoa powder, releasing its full flavor potential and dissolving the cocoa solids for a smoother batter, while the acidity in the coffee and buttermilk reacts vigorously with the baking soda for a powerful lift. For the frosting, we steer clear of American Buttercream, which can be too sweet and crusty for intricate ombre work. Instead, we utilize Swiss Meringue Buttercream (SMBC). SMBC is an emulsion of butter and meringue that is incredibly stable at room temperature and sets firm in the fridge. This stability is vital for the ‘drip’ technique. By chilling the frosted cake until the butter in the SMBC solidifies, we create a cold canvas. When the slightly warm ganache hits the cold cake, it begins to set immediately, allowing us to control the length and thickness of the drips. If the cake were room temperature, the ganache would simply run to the bottom plate. This interplay of temperatures is the secret to the perfect drip.
Why You’ll Love This Recipe
- ✓Achieves a professional bakery-style height using 6-inch pans
- ✓Swiss Meringue Buttercream offers a silky, not-too-sweet finish
- ✓Hot coffee in the batter ensures deep chocolate flavor and moisture
- ✓Step-by-step ombre technique creates a stunning visual gradient
- ✓Stable structure suitable for transport and longer display times
- ✓Versatile design that can be adapted to any color palette
Equipment You’ll Need
- ✓3 x 6-inch round cake pans
- ✓Stand mixer with paddle and whisk attachments
- ✓Digital kitchen scale
- ✓Cake turntable
- ✓Bench scraper or icing smoother
- ✓Offset spatula
- ✓Piping bags
- ✓Squeeze bottle (for the drip)
- ✓Candy thermometer
Ingredients
- ✓2 cups (400g) granulated sugar
- ✓1 3/4 cups (220g) all-purpose flour
- ✓3/4 cup (75g) dark unsweetened cocoa powder
- ✓1 1/2 tsp baking powder
- ✓1 1/2 tsp baking soda
- ✓1 tsp salt
- ✓2 large eggs, room temperature
- ✓1 cup (240ml) whole milk
- ✓1 tbsp white vinegar (or sub buttermilk for milk+vinegar)
- ✓1/2 cup (120ml) vegetable oil
- ✓2 tsp vanilla extract
- ✓1 cup (240ml) boiling hot coffee
- ✓1 1/2 cups (300g) granulated sugar (for frosting)
- ✓6 large egg whites (for frosting)
- ✓1 1/2 cups (340g) unsalted butter, cubed and cool room temp
- ✓Purple gel food coloring
- ✓1/2 cup (85g) semi-sweet chocolate chips
- ✓1/3 cup (80ml) heavy cream
Instructions
- Preheat oven to 350°F (175°C). Grease three 6-inch cake pans and line the bottoms with parchment paper.
- In a large bowl, whisk together sugar, flour, cocoa, baking powder, baking soda, and salt.
- In the bowl of a stand mixer, combine eggs, buttermilk (or milk+vinegar mixture), oil, and vanilla. Mix on medium speed until combined.
- Reduce speed to low and gradually add the dry ingredients to the wet ingredients. Mix just until moistened.
- Carefully pour in the boiling hot coffee while the mixer is running on low. The batter will be very thin and liquid; this is normal.
- Divide batter evenly between the three prepared pans. Bake for 30-35 minutes, or until a toothpick comes out clean.
- Cool cakes in pans for 10 minutes, then turn out onto a wire rack to cool completely. Wrap in plastic and freeze for 30 minutes to firm up before stacking.
- To make the frosting: Whisk egg whites and sugar over a double boiler until sugar is dissolved and mixture reaches 160°F (71°C).
- Whip the egg white mixture in the stand mixer on high until stiff, glossy peaks form and the bowl feels cool to the touch (about 10 mins).
- Switch to paddle attachment. Add butter one cube at a time on low speed. Once incorporated, beat on high until smooth and silky.
- Divide frosting into three bowls. Leave one white, tint one light purple, and tint the last one deep purple.
- Stack the cake layers with white frosting between them. Crumb coat the entire cake with a thin layer of white frosting and chill for 20 minutes.
- Apply the deep purple frosting to the bottom third of the cake, the light purple to the middle, and the white to the top.
- Use a bench scraper to smooth the sides while rotating the turntable, blending the colors to create the ombre effect. Chill the cake for at least 30 minutes.
- Make the ganache: Pour hot heavy cream over chocolate chips. Let sit for 5 minutes, then stir until smooth. Let cool until it thickens slightly but is still pourable.
- Using a squeeze bottle or spoon, drip the ganache down the cold edges of the cake, then fill in the top. Top with swirls or sprinkles if desired.
Expert Cooking Tips
- ✓Ensure your butter for the frosting is not too soft; it should be cool to the touch or the buttercream will be soupy.
- ✓Don’t skip the boiling water/coffee step; it blooms the cocoa and ensures the cake isn’t dry.
- ✓Chill the cake thoroughly before applying the drip. A cold cake shocks the ganache, stopping the drips halfway down for a controlled look.
- ✓If your buttercream looks curdled after adding butter, keep whipping! It will come together.
- ✓Use gel food coloring instead of liquid drops to avoid altering the consistency of the frosting.
- ✓Weigh your ingredients for the most accurate results, especially the flour and sugar.
Substitutions and Variations
If you do not consume coffee, you can substitute it with boiling water, though the chocolate flavor will be slightly less intense. For a gluten-free version, swap the all-purpose flour for a high-quality 1:1 gluten-free baking flour blend that contains xanthan gum. If you don’t have buttermilk, make a sour milk substitute by adding 1 tablespoon of vinegar or lemon juice to 1 cup of whole milk and letting it sit for 5 minutes. For the buttercream, if you are intimidated by Swiss Meringue, you can use American Buttercream, though it will be sweeter and crust faster, making the ombre blending a bit more time-sensitive. You can substitute the vegetable oil with melted coconut oil or canola oil. For the drip, white chocolate ganache (3 parts chocolate to 1 part cream) can be used and colored with oil-based candy colors for a different look.
Common Mistakes to Avoid
The most common mistake is rushing the cooling process. If you try to frost warm cakes, the butter in the frosting will melt, causing the layers to slide and the structure to collapse. Another frequent issue is the ganache temperature. If the ganache is too hot, it will melt the buttercream and run all the way to the plate, creating a puddle. If it is too cold, it won’t drip at all. Test a single drip on the back of the cake first. Over-mixing the cake batter after adding the flour can lead to tunneling and a tough texture; mix only until combined. Finally, failing to level the cake layers (cutting off the domes) will result in a crooked tower that is unstable and difficult to frost smoothly.
Serving Suggestions
This cake is best served at room temperature. While it needs to be stored in the fridge due to the butter content, remove it from the refrigerator 1 to 2 hours before serving to allow the buttercream and cake to soften. Serve with a side of fresh blackberries or raspberries to cut through the richness of the chocolate. A glass of cold milk or a hot espresso pairs perfectly with the deep cocoa flavors. For a party, slice the cake into tall, thin wedges—because of its height, a thin slice provides a substantial serving.
Storage and Reheating Tips
Store the fully frosted cake in the refrigerator for up to 4 days. A cake keeper or a large overturned bowl helps protect the frosting from absorbing fridge odors. If you have cut the cake, press a piece of plastic wrap or parchment paper directly against the exposed cake sponge to prevent it from drying out. The cake layers can be baked ahead and frozen (wrapped tightly in plastic wrap) for up to a month. Leftover buttercream can also be frozen for up to 3 months; just thaw and re-whip before using. The finished cake freezes well too; freeze individual slices on a baking sheet until solid, then wrap them in foil and place in a freezer bag.
Nutrition Facts (Estimated)
| Serving Size | 1 slice |
| Calories | 650 |
| Fat | 38g |
| Saturated Fat | 22g |
| Unsaturated Fat | 14g |
| Trans Fat | 0.5g |
| Cholesterol | 85mg |
| Sodium | 320mg |
| Carbohydrates | 72g |
| Fiber | 3g |
| Sugar | 45g |
| Protein | 6g |
Frequently Asked Questions
Why did my ganache drip run all the way to the bottom?
This usually happens because the ganache was too hot or the cake wasn’t cold enough. The cake must be chilled so the cold buttercream can set the ganache as it travels down the side.
Can I use 8-inch pans instead of 6-inch pans?
Yes, but the cake will be shorter and wider, and you will likely only get 2 layers unless you double the recipe. Baking time may need to be adjusted slightly.
My Swiss Meringue Buttercream looks like cottage cheese. Is it ruined?
No! This is a normal stage called ‘breaking’. It happens if the butter was too cold. Just keep whipping on high speed, and it will eventually emulsify into a smooth cream. If it’s very cold, you can wrap a warm towel around the bowl while whipping.
Can I make this cake ahead of time?
Absolutely. The cake layers are actually easier to handle when they have been baked a day ahead and chilled. You can assemble the whole cake the day before and keep it refrigerated.
Do I really need a turntable?
While not strictly mandatory, a turntable makes achieving smooth sides and a seamless ombre gradient significantly easier. It allows you to hold your scraper steady while the cake spins.
What if I don’t have a stand mixer?
You can make the cake batter with a hand mixer or whisk. However, making Swiss Meringue Buttercream with a hand mixer is very labor-intensive and takes a long time to cool down the meringue, but it is possible.
Why is there hot coffee in the recipe?
Hot liquid helps ‘bloom’ the cocoa powder, releasing flavor, and ensures the batter is liquid enough for a moist crumb. The coffee flavor enhances the chocolate without making the cake taste like a latte.
How do I transport a tall cake?
Transport the cake well-chilled. The cold buttercream acts as a cement. Place the cake box on a flat surface in the car (like the floor mat), not on a slanted seat, and drive carefully.
Can I use store-bought frosting?
Store-bought frosting is generally too soft to support a tall 4-layer cake and won’t smooth out well for the ombre effect. Homemade buttercream is highly recommended for structural stability.
How do I cut a tall cake?
Use a sharp, warm knife. You can cut traditional wedges, or for a cleaner party serve, cut the cake grid-style or slice a plank across the whole cake and then divide that plank into portions.
Conclusion
Creating this Tall Chocolate Drip Cake is a journey that rewards patience and precision with a dessert that is truly spectacular. From the first whisk of the dark chocolate batter to the final satisfying pour of the glossy ganache, every step brings you closer to a confection that looks like it came straight from a high-end patisserie. The combination of the moist, coffee-infused sponge and the luxurious, cloud-like Swiss Meringue Buttercream creates a flavor profile that is sophisticated yet universally loved. Don’t be intimidated by the height or the decoration techniques; with the tips provided, you have everything you need to succeed. So, preheat your oven, cue up your favorite playlist, and get ready to bake a cake that will be the highlight of your next celebration.