Ultimate Chocolate Peanut Butter Pull-Apart Cupcake Cake
Fun Chocolate Peanut Butter Birthday Cake For Cupcake Pull Apart Cake Recipe
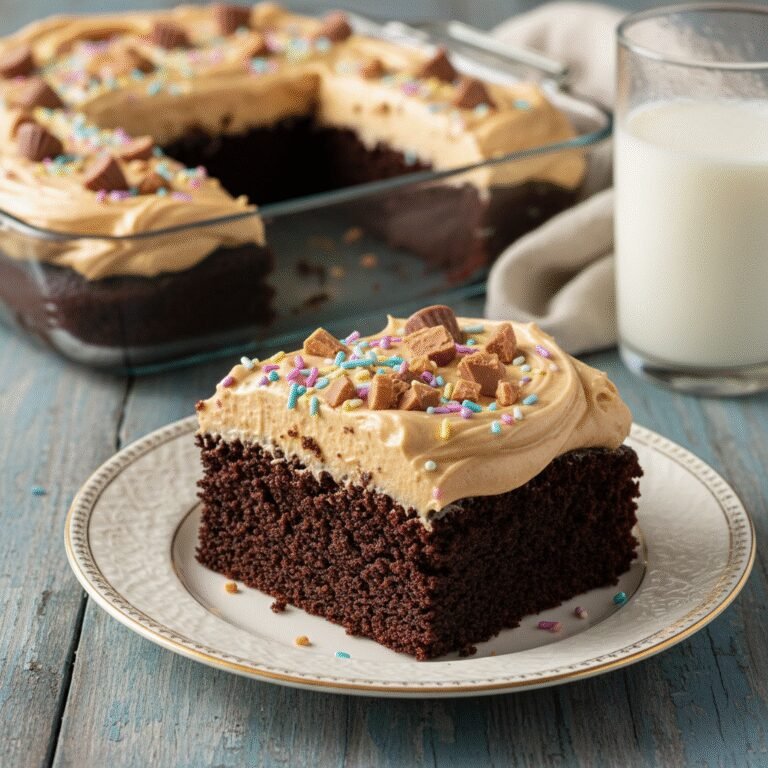
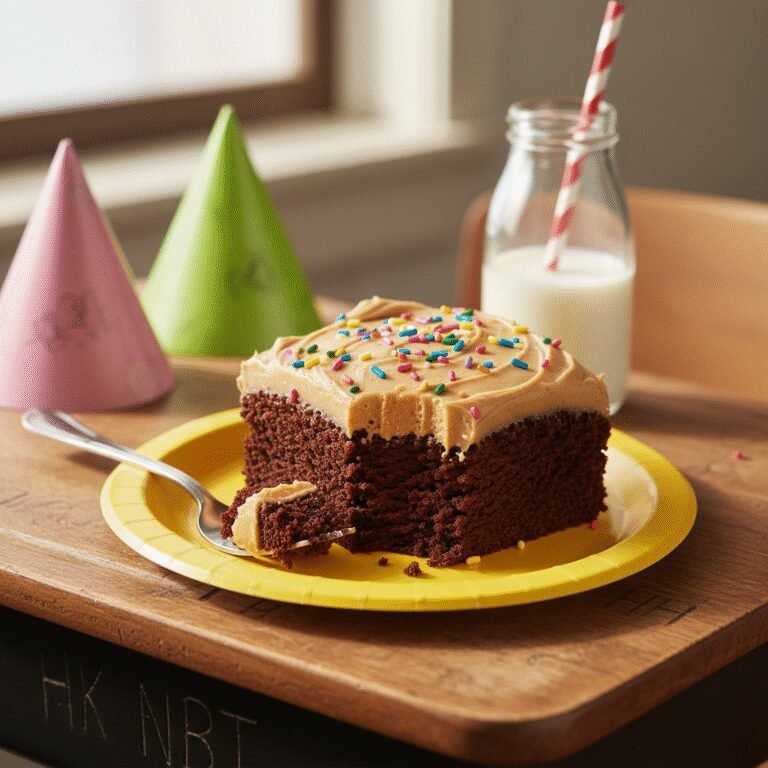
Combine the convenience of cupcakes with the stunning presentation of a sheet cake in this fun pull-apart recipe! Featuring ultra-moist dark chocolate cupcakes topped with a creamy, cloud-like peanut butter frosting, this dessert is the perfect centerpiece for birthdays that requires absolutely no slicing.
30 minutes
20 minutes
1 hour 15 minutes
24 Cupcakes
Dessert
Baking
American
Vegetarian
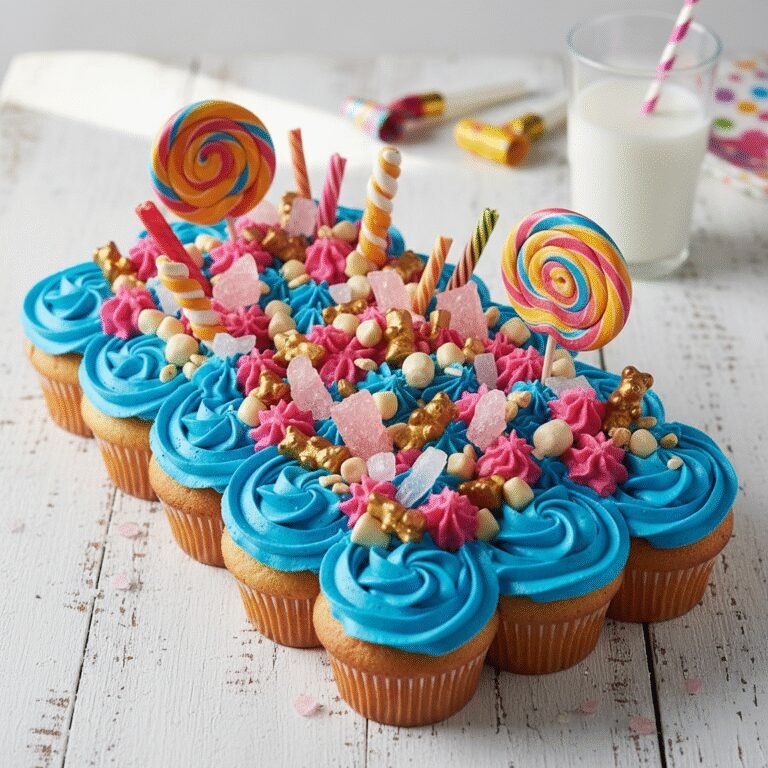
There is something undeniably nostalgic about a birthday cake. The candles, the singing, the anticipation of that first slice. However, the reality of serving a traditional cake at a crowded party often involves a frantic search for a clean knife, messy slicing, and crumbling pieces that never quite make it to the plate intact. Enter the genius of the Pull-Apart Cupcake Cake. This concept bridges the gap between the grab-and-go ease of a cupcake and the cohesive, decorative canvas of a traditional sheet cake. It is the ultimate party hack that doesn’t sacrifice an ounce of elegance or flavor.
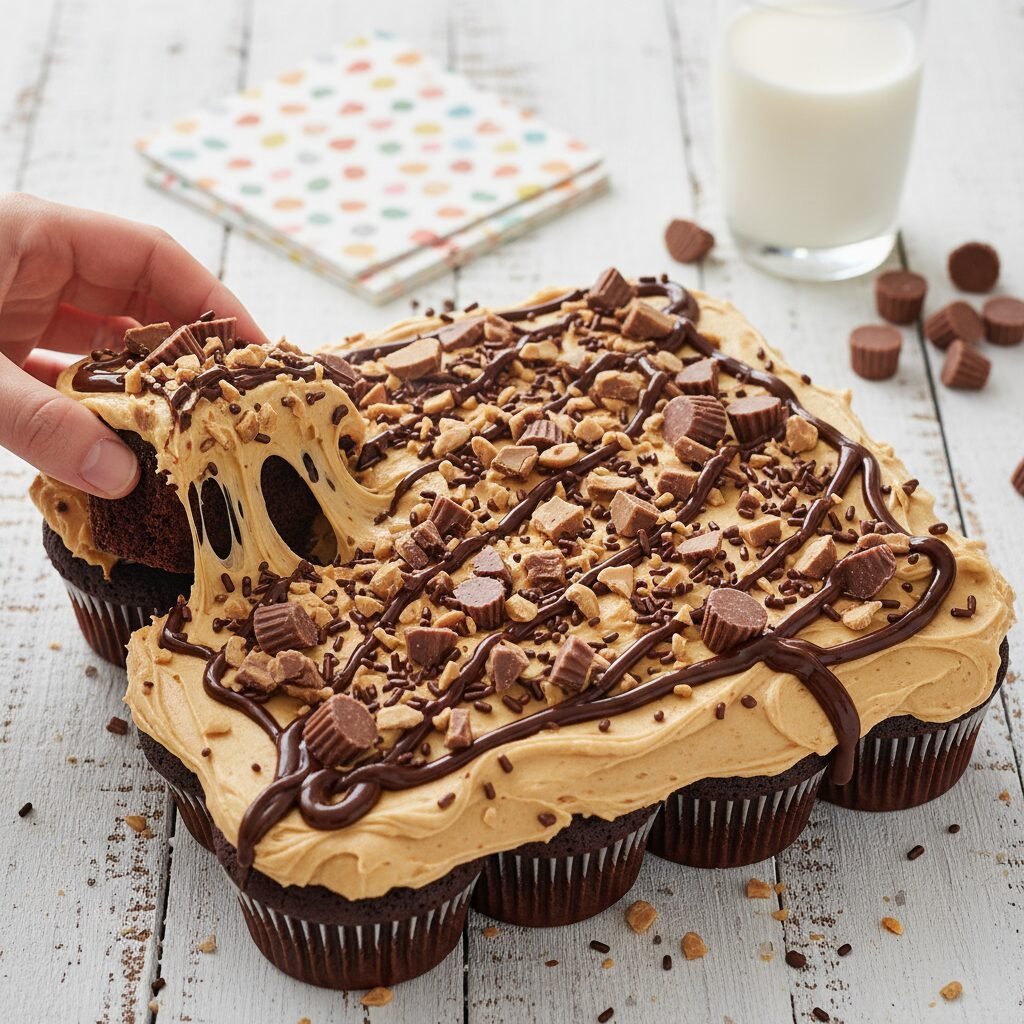
For this specific recipe, we are tackling the undisputed heavyweight champion of flavor combinations: Chocolate and Peanut Butter. We aren’t talking about a dry sponge with waxy frosting. We are creating a deep, dark, devil’s food style chocolate base that uses hot coffee to bloom the cocoa powder, resulting in an intense, fudgy crumb. This is paired with a peanut butter buttercream that is whipped to an airy consistency, striking the perfect balance between salty and sweet. When you arrange these cupcakes on a board and frost them as one unit, you get a stunning visual that delights guests. The best part? When it’s time to eat, everyone simply grabs a cupcake and pulls. No knives, no mess, just pure, unadulterated joy. Whether you are celebrating a child’s birthday, a milestone event, or just a Tuesday night craving, this Chocolate Peanut Butter Pull-Apart Cake is guaranteed to be the star of the show.
History & Origins
The history of this dessert is a fascinating convergence of three distinct culinary evolutions: the cupcake, the commercialization of peanut butter, and the modern trend of ‘convenience baking.’ The cupcake itself dates back to 1796, with a recipe for ‘a cake to be baked in small cups’ appearing in Amelia Simmons’ ‘American Cookery.’ However, the term ‘cupcake’ wasn’t coined until the 19th century. Originally designed to save time because small cakes baked faster in hearth ovens than large loaves, they became a staple of American home baking.
Peanut butter, while having roots in Aztec culture, found its modern American footing at the 1904 St. Louis World’s Fair. By the 1920s, with the invention of hydrogenation to prevent oil separation, peanut butter became a shelf-stable household staple. The marriage of chocolate and peanut butter is largely credited to the H.B. Reese Candy Company in the late 1920s, solidifying a flavor profile that is uniquely American.
The ‘Pull-Apart Cake’ or ‘Cupcake Cake’ is a much more recent phenomenon, gaining significant traction in the early 2000s with the rise of supermarket bakeries and later, Pinterest culture. Supermarkets realized they could sell cupcakes at a premium if they were arranged and frosted to look like a cartoon character or a number. Home bakers quickly adopted this technique, realizing it offered the best of both worlds: the decorating surface of a cake with the portion control of a muffin. Today, the pull-apart cake is a staple of creative party planning, allowing for intricate shapes—from dinosaurs to bouquets—constructed entirely out of individual servings.
Why This Recipe Works
This recipe succeeds where many others fail due to the careful engineering of both the cake texture and the frosting consistency. First, let’s talk about the chocolate base. Many chocolate cupcakes are dry or lack depth. This recipe utilizes the ‘blooming’ technique, where boiling water or hot coffee is mixed with cocoa powder. This heat releases the flavor compounds in the cocoa, resulting in a more robust chocolate taste. Furthermore, we use a combination of oil and buttermilk. Butter tastes great, but oil is superior for retaining moisture in cakes that are kept at room temperature. The acidity in the buttermilk tenderizes the gluten, ensuring the pull-apart action is soft and yielding, not tough.
The frosting is equally critical. For a pull-apart cake, the frosting acts as the structural glue. It needs to be stiff enough to bridge the gaps between the curved cupcakes without collapsing, yet soft enough to spread smoothly without tearing the cake tops. We use a high ratio of creamy peanut butter to butter, which adds stability. The addition of a splash of heavy cream creates a fluffy, aerated texture that prevents the peanut butter from feeling heavy or sticky on the palate. The salt content in the peanut butter cuts through the richness of the chocolate and the sweetness of the powdered sugar, creating a perfectly balanced bite that keeps you coming back for ‘just one more.’
Why You’ll Love This Recipe
- ✓No knife required—guests simply pull a serving.
- ✓Deep, fudgy chocolate flavor enhanced by hot coffee.
- ✓Salty-sweet creamy peanut butter frosting.
- ✓Highly customizable shape (numbers, letters, or geometric).
- ✓Perfect for parties and large crowds.
- ✓Kid-friendly assembly and decoration.
Equipment You’ll Need
- ✓2 Standard 12-cup Muffin Tins
- ✓Cupcake Liners
- ✓Stand Mixer or Hand Mixer
- ✓Large Mixing Bowls
- ✓Whisk
- ✓Large Rectangular Cake Board or Serving Platter
- ✓Offset Spatula
- ✓Piping Bags
- ✓Large Star Piping Tip (optional)
Ingredients
- ✓2 cups granulated sugar
- ✓1 3/4 cups all-purpose flour
- ✓3/4 cup unsweetened cocoa powder
- ✓1 1/2 teaspoons baking powder
- ✓1 1/2 teaspoons baking soda
- ✓1 teaspoon salt
- ✓2 large eggs, room temperature
- ✓1 cup whole milk or buttermilk
- ✓1/2 cup vegetable oil
- ✓2 teaspoons vanilla extract
- ✓1 cup boiling water (or hot coffee for deeper flavor)
- ✓1 cup unsalted butter, softened (for frosting)
- ✓1 cup creamy peanut butter (commercial brand like Jif or Skippy, not natural style)
- ✓3-4 cups powdered sugar
- ✓1/4 cup heavy cream
- ✓1 teaspoon vanilla extract (for frosting)
- ✓Garnish: Mini chocolate chips, peanut butter cups, or chocolate drizzle
Instructions
- 1. Preheat your oven to 350°F (175°C). Line two 12-cup muffin tins with paper liners.
- 2. In a large bowl, whisk together the sugar, flour, cocoa, baking powder, baking soda, and salt until well combined and no lumps remain.
- 3. Add the eggs, milk (or buttermilk), oil, and vanilla extract. Beat on medium speed with a mixer for about 2 minutes. The batter should be smooth.
- 4. Stir in the boiling water (or hot coffee) by hand. The batter will be very thin and liquidy; this is normal and ensures moisture.
- 5. Pour the batter evenly into the prepared liners, filling them about 2/3 full. Do not overfill.
- 6. Bake for 18-22 minutes, or until a wooden toothpick inserted into the center comes out clean. Cool in the pans for 10 minutes, then remove to a wire rack to cool completely.
- 7. While cupcakes cool, make the frosting. In a large bowl, beat the softened butter and peanut butter together until smooth and creamy.
- 8. Gradually add the powdered sugar, one cup at a time, beating slowly. Add the vanilla and heavy cream.
- 9. Increase mixer speed to high and whip for 3 minutes until the frosting is fluffy and light. Add more cream if it’s too stiff, or more sugar if it’s too runny.
- 10. To assemble, arrange the cooled cupcakes on your large cake board in your desired shape (rectangle, circle, or number). Place them close enough so the liners touch.
- 11. Put a small dab of frosting on the bottom of each cupcake liner to ‘glue’ it to the board so they don’t slide while frosting.
- 12. Pipe or spread the frosting over the top of the cupcakes. Start by filling the gaps between the cupcakes to create a bridge, then spread over the tops to create a flat, unified surface resembling a sheet cake.
- 13. Decorate immediately with chocolate drizzle, mini peanut butter cups, or sprinkles.
- 14. Allow the frosting to set slightly before serving. To serve, simply pull a cupcake away from the group!
Expert Cooking Tips
- ✓Use room temperature ingredients (eggs, milk, butter) to ensure the batter and frosting emulsify properly.
- ✓Do not use natural peanut butter (the kind that separates) for the frosting; it will be too oily and won’t hold its shape.
- ✓For the darkest chocolate flavor, use Dutch-processed cocoa powder and hot coffee instead of water.
- ✓When arranging the cupcakes, pack them as tightly as possible to minimize the gaps you have to bridge with frosting.
- ✓If you want a very flat ‘cake’ look, you can trim the domes off the cupcakes before frosting, but leaving them domed gives a fun, bubbly appearance.
- ✓Chill the assembled cake for 20 minutes after frosting to set the shape, especially if your kitchen is warm.
Substitutions and Variations
This recipe is quite resilient and allows for several dietary adjustments. For a Gluten-Free version, substitute the all-purpose flour with a high-quality 1:1 gluten-free baking flour blend (look for one containing xanthan gum). The texture remains surprisingly similar. If you need a Dairy-Free cake, swap the buttermilk for almond milk mixed with a teaspoon of vinegar (to create vegan buttermilk) and use a neutral oil. For the frosting, use vegan butter sticks and full-fat coconut cream instead of heavy cream. Note that peanut allergies are a major concern; if you are baking for a school or crowd, you can substitute the peanut butter with cookie butter (Biscoff) or sunflower seed butter. The flavor profile will change, but the structure will remain intact. You can also swap the boiling water for boiling stout beer for a ‘Black and Tan’ flavor profile.
Common Mistakes to Avoid
The most common mistake with pull-apart cakes is spacing the cupcakes too far apart. If there are large gaps, the frosting will fall through, and the illusion of a single cake will be broken. Ensure the paper liners are touching. Another error is frosting the cupcakes while they are still slightly warm. This will melt the butter in the frosting, causing it to slide off and become greasy. Always wait until they are completely cool. In terms of the batter, do not be alarmed by how thin it is; adding more flour to ‘thicken’ it will result in dry, dense cupcakes. Trust the recipe! Finally, avoid over-whipping the frosting once it’s fluffy, as this can introduce too many air bubbles, making it hard to get a smooth finish on top.
Serving Suggestions
This pull-apart cake is best served at room temperature to keep the frosting creamy and the cake soft. It pairs beautifully with a cold glass of milk to cut through the richness or a hot cup of dark roast coffee. For a birthday party, present the cake on a large wooden board or a flat baking sheet covered in decorative foil. Since it’s a ‘pull-apart’ cake, you don’t need plates or forks if the setting is casual—napkins will suffice! If you want to elevate the dessert, serve each pulled cupcake with a scoop of vanilla bean ice cream and a drizzle of warm caramel sauce.
Storage and Reheating Tips
Because this cake contains dairy in the frosting (cream and butter), it should ideally be stored in a cool place. If your home is cool (below 70°F), it can stay out on the counter for up to 2 days, covered loosely with plastic wrap or inside a cake box. For longer storage, keep it in the refrigerator for up to 5 days. However, the cold fridge will harden the buttercream and the chocolate chips, so be sure to take the cake out 30-60 minutes before serving to let it return to room temperature. Freezing is possible but best done with unfrosted cupcakes. If you must freeze the finished product, flash freeze it uncovered for an hour to harden the frosting, then wrap tightly in plastic wrap and foil. Thaw in the fridge overnight.
Nutrition Facts (Estimated)
| Serving Size | 1 Cupcake |
| Calories | 380 |
| Fat | 18g |
| Saturated Fat | 7g |
| Unsaturated Fat | 9g |
| Trans Fat | 0g |
| Cholesterol | 45mg |
| Sodium | 210mg |
| Carbohydrates | 42g |
| Fiber | 2g |
| Sugar | 28g |
| Protein | 6g |
Frequently Asked Questions
Can I make this recipe ahead of time?
Yes! You can bake the cupcakes 1-2 days in advance and store them in an airtight container. Make the frosting and assemble the cake on the day of the event for the freshest taste.
How do I transport a pull-apart cake?
Transporting is easier if you build the cake on a sturdy board that fits inside a large bakery box. If you don’t have a box, place the board in the trunk of your car on a non-slip mat to prevent sliding.
Why is my frosting grainy?
Grainy frosting usually happens if the powdered sugar wasn’t sifted or if there wasn’t enough liquid to dissolve the sugar. Add a teaspoon more cream and whip longer.
Can I use store-bought frosting?
Technically yes, but store-bought frosting is often thinner and softer. It might not bridge the gaps between cupcakes as well as homemade buttercream. If you use it, whip it with a little extra powdered sugar to stiffen it.
How many cupcakes does this batter make?
This recipe reliably yields 24 standard-sized cupcakes. If you make jumbo or mini cupcakes, the baking time and yield will vary.
Can I arrange these into a number shape?
Absolutely. This is the most popular way to use this recipe. Just layout the unfrosted cupcakes on your board to form the number, then glue them down and frost.
My cupcakes have high domes, is that okay?
High domes are great for a bubbly look! If you want a perfectly flat surface to pipe a picture onto, simply use a serrated knife to level the tops before frosting.
What if I don’t have buttermilk?
You can make a quick substitute by adding 1 tablespoon of white vinegar or lemon juice to a cup of regular milk and letting it sit for 5 minutes until it curdles slightly.
Conclusion
The Chocolate Peanut Butter Pull-Apart Cupcake Cake is more than just a dessert; it’s a conversation starter and a centerpiece that brings people together. It combines the deep, sophisticated flavors of dark chocolate and espresso with the comforting, creamy nostalgia of peanut butter. Whether you arrange it in a rectangle, a heart, or the age of the birthday guest, the result is always the same: smiles, sticky fingers, and empty plates. Ditch the knife and the stress at your next gathering and embrace the fun, delicious simplicity of the pull-apart cake. Happy baking!