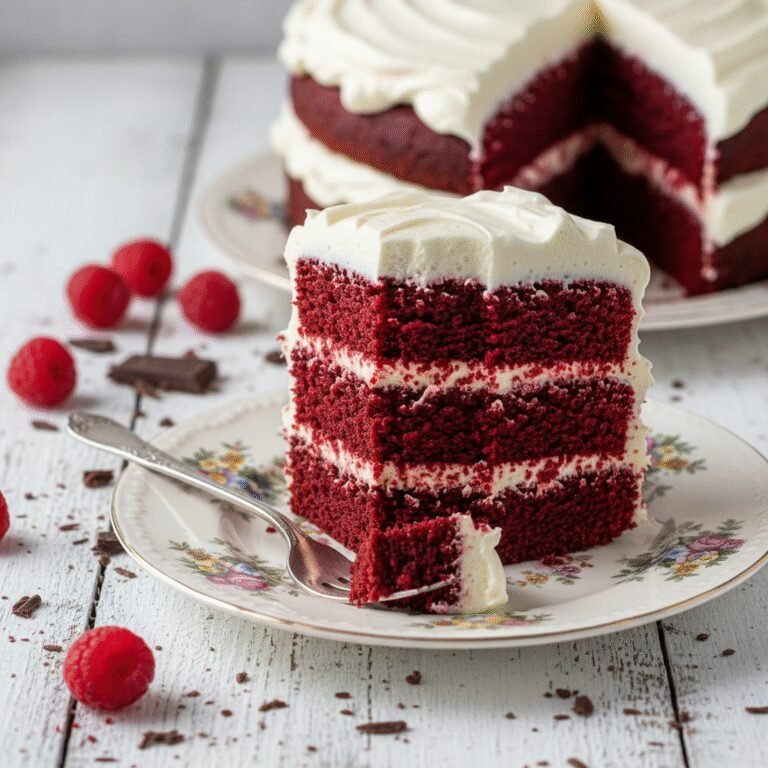
The Ultimate Moist Vegan Red Velvet Cake With Whipped Coconut Cream Frosting
Moist Vegan Red Velvet Cake With Coconut Cream Frosting Recipe
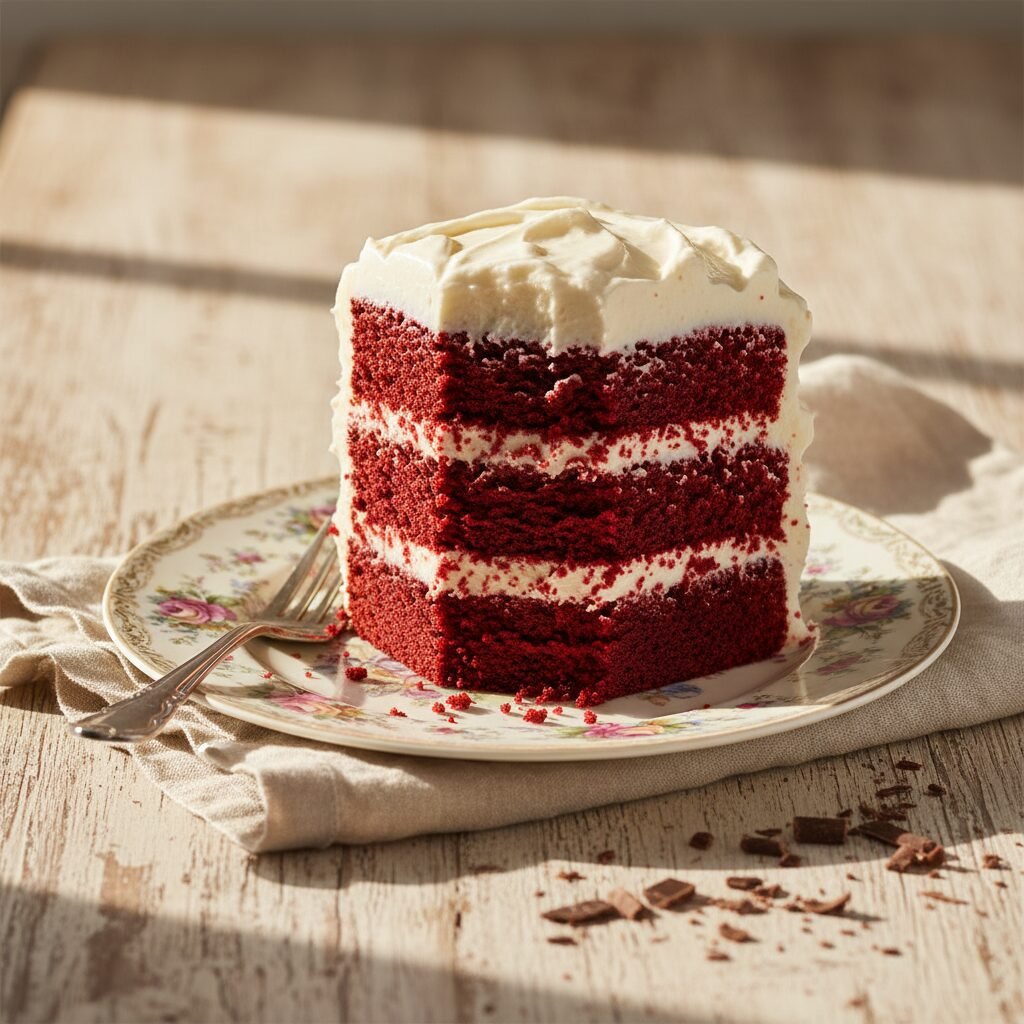
Discover the secret to the most tender, velvety crumb you have ever tasted—completely plant-based. This stunning Vegan Red Velvet Cake is paired with a luscious, dairy-free whipped coconut cream frosting that is light as air and perfectly sweet.
30 minutes
30 minutes
1 hour 30 minutes (includes cooling)
12 servings (2-layer 8-inch cake)
Dessert
Baking
American
Vegan
When it comes to iconic American desserts, few can compete with the dramatic allure of a Red Velvet Cake. For years, there has been a lingering misconception in the baking world that vegan desserts somehow lack the moisture or richness of their dairy-laden counterparts. I am here to shatter that myth once and for all with this recipe. This Moist Vegan Red Velvet Cake is a triumph of texture and flavor. Imagine a crumb so tender it practically melts on your tongue, boasting that signature subtle cocoa flavor that defines a true red velvet, all wrapped up in a vibrant, eye-catching crimson hue. But the cake is only half the story. We are ditching the heavy, often overly sweet buttercream for a cloud-like Whipped Coconut Cream Frosting. This frosting provides a refreshing, tropical undertone that perfectly cuts through the richness of the chocolate-vanilla sponge. Whether you are a lifelong vegan, hosting a plant-based friend, or simply looking to reduce your dairy intake without sacrificing decadence, this cake is a showstopper. It captures the essence of Southern hospitality and comfort baking, translated into a modern, compassionate recipe. The magic lies in the reaction between the plant-based buttermilk and the baking soda, creating a lift and fluffiness that rivals any bakery cake. Prepare to impress your guests, your family, and most importantly, your own taste buds with a dessert that proves you really can have it all.
History & Origins
The history of Red Velvet Cake is as rich and layered as the cake itself, often shrouded in culinary mystery and debate. Its origins can be traced back to the Victorian era, where the term ‘velvet’ was used to describe cakes with a particularly soft and fine crumb, distinct from the coarser sponge cakes of the time. The reddish hue, however, wasn’t always the result of food coloring. In the early 20th century, unprocessed cocoa powder contained higher levels of anthocyanins. When this raw cocoa mixed with acidic ingredients like buttermilk and vinegar, a chemical reaction occurred that turned the batter a dark, reddish-brown mahogany color. This natural reaction is the grandfather of the modern red velvet we know today. The cake gained massive popularity in the United States during the Great Depression and World War II. During rationing, bakers used boiled beet juices to enhance the color of their cakes and keep them moist, cementing the association between the color red and this specific style of cake. A popular urban legend attributes the recipe to the Waldorf Astoria Hotel in New York, claiming a woman was charged a fortune for the recipe and distributed it out of spite, though this is likely folklore. In the mid-20th century, the Adams Extract company in Texas popularized the use of red food dye to create the vibrant, shocking red color we see today, moving away from the subtle mahogany of the past. This vegan adaptation honors that history by maintaining the crucial acid-base chemistry—using vinegar and plant milk—to replicate the traditional texture while adhering to modern plant-based ethics.
Why This Recipe Works
The success of this vegan red velvet cake hinges on a precise balance of chemistry that replicates the structural properties of eggs and dairy buttermilk. In traditional baking, eggs provide structure and lift, while buttermilk tenderizes the gluten. To achieve this without animal products, we utilize a ‘vegan buttermilk’ created by curdling soy milk with apple cider vinegar. This mixture introduces the necessary acidity to the batter. When this acidic liquid meets the baking soda (a base), it creates a vigorous bubbling reaction, releasing carbon dioxide gas. These bubbles get trapped in the batter, providing the lift and aeration required for a light, fluffy crumb, effectively replacing the leavening power of eggs. Furthermore, the use of oil instead of butter is a deliberate choice for moisture. Butter contains water which evaporates during baking, sometimes leading to a drier cake once cooled. Oil, being 100% fat, remains liquid at room temperature, ensuring the cake stays incredibly moist and soft for days. For the frosting, using chilled full-fat coconut milk allows us to whip the separated coconut fat just like heavy dairy cream. The natural stability of cold coconut fat holds air bubbles beautifully, resulting in a frosting that is stable enough to pipe yet melts delicately in the mouth.
Why You’ll Love This Recipe
- ✓100% Plant-Based and Dairy-Free
- ✓Incredibly moist crumb that stays soft for days
- ✓Natural cocoa flavor balanced with vanilla
- ✓Light and airy coconut whipped cream frosting
- ✓Perfect for birthdays, holidays, and special occasions
- ✓No obscure ingredients—simple pantry staples
Equipment You’ll Need
- ✓Two 8-inch round cake pans
- ✓Large mixing bowl
- ✓Medium mixing bowl
- ✓Whisk
- ✓Electric hand mixer or stand mixer
- ✓Rubber spatula
- ✓Measuring cups and spoons
- ✓Wire cooling rack
- ✓Offset spatula for frosting
Ingredients
- ✓2 1/2 cups all-purpose flour
- ✓1 1/2 cups granulated sugar
- ✓2 tablespoons unsweetened cocoa powder
- ✓1 teaspoon baking soda
- ✓1/2 teaspoon salt
- ✓1 1/2 cups unsweetened soy milk (or almond milk)
- ✓2 teaspoons apple cider vinegar
- ✓1/2 cup neutral oil (canola, vegetable, or melted coconut oil)
- ✓1 tablespoon vanilla extract
- ✓1-2 tablespoons vegan red food coloring (gel preferred)
- ✓2 cans (14 oz each) full-fat coconut milk, chilled overnight
- ✓1/2 cup powdered sugar, sifted
- ✓1 teaspoon vanilla bean paste or extract (for frosting)
Instructions
- 1. Preheat your oven to 350°F (175°C). Grease two 8-inch round cake pans with a little oil and line the bottoms with parchment paper to ensure easy release.
- 2. Prepare the vegan buttermilk: In a measuring cup, combine the soy milk and apple cider vinegar. Stir gently and let it sit for about 5-10 minutes until it curdles and thickens slightly.
- 3. In a large mixing bowl, sift together the flour, granulated sugar, cocoa powder, baking soda, and salt. Whisk well to ensure the cocoa and leavening agents are evenly distributed.
- 4. To the curdled milk mixture, add the oil, vanilla extract, and red food coloring. Whisk until the liquid is a vibrant, uniform red.
- 5. Pour the wet ingredients into the dry ingredients. Using a whisk or electric mixer on low speed, mix until just combined and no large lumps of flour remain. Be careful not to overmix.
- 6. Divide the batter evenly between the two prepared cake pans. Tap the pans gently on the counter to release any large air bubbles.
- 7. Bake for 28-32 minutes, or until a toothpick inserted into the center comes out clean or with just a few moist crumbs.
- 8. Remove from the oven and let the cakes cool in the pans for 10 minutes. Then, carefully turn them out onto a wire rack to cool completely before frosting.
- 9. While the cakes cool, make the frosting. Open the chilled cans of coconut milk without shaking them. Scoop out the hardened coconut cream from the top into a chilled mixing bowl, leaving the watery liquid behind (save this for smoothies).
- 10. Beat the coconut cream with an electric mixer on high speed until fluffy and smooth, about 2-3 minutes.
- 11. Gradually add the powdered sugar and vanilla bean paste, continuing to whip until the frosting holds stiff peaks.
- 12. Once the cakes are fully cooled, place one layer on a serving plate. Spread a generous layer of coconut cream frosting over the top. Place the second layer on top and frost the top and sides of the cake.
- 13. Garnish with cake crumbs or fresh berries if desired. Refrigerate the cake for at least 30 minutes before slicing to let the frosting set.
Expert Cooking Tips
- ✓Chill your mixing bowl and beaters before making the coconut whipped cream to keep the fat solid and aerated.
- ✓Do not skip the parchment paper; vegan cakes can be more delicate and prone to sticking.
- ✓Use room temperature ingredients for the cake batter to ensure an even emulsion.
- ✓If you prefer a natural color, you can use beet powder, though the red will be more muted and earthy.
- ✓Soy milk works best for the ‘buttermilk’ because of its higher protein content compared to almond or oat milk.
- ✓Level your cakes with a serrated knife if they dome significantly during baking for a professional look.
- ✓Add the food coloring to the wet ingredients to avoid streaks in the final batter.
Substitutions and Variations
Baking is a science, but there is room for flexibility with the right knowledge. For the flour, you can substitute a high-quality 1:1 Gluten-Free All-Purpose Baking Flour blend if you need a gluten-free option; just ensure it contains xanthan gum. If you do not have apple cider vinegar, white distilled vinegar or fresh lemon juice works equally well to activate the baking soda. For the oil, melted coconut oil adds a nice flavor that complements the frosting, but canola or grapeseed oil yields a more neutral taste. Regarding the sweetener, while granulated cane sugar provides the best structure, you can use coconut sugar for a caramel undertone, though it will darken the cake’s color. If you cannot find full-fat coconut milk for the frosting, store-bought vegan cream cheese or a vegan butter-based buttercream are excellent alternatives.
Common Mistakes to Avoid
The most frequent mistake in vegan baking is overmixing the batter. Once the wet and dry ingredients meet, the gluten begins to develop. If you mix too vigorously, the cake will become tough and rubbery instead of tender. Mix only until the flour streaks disappear. Another common pitfall is using ‘lite’ coconut milk for the frosting; it simply does not have enough fat to whip up and will result in a runny glaze rather than a fluffy frosting. Additionally, impatience is a cake killer—frosting a cake that is even slightly warm will cause the coconut cream to melt instantly, sliding off the sides and creating a mess. Ensure your cake layers are cool to the touch.
Serving Suggestions
This cake is a centerpiece dessert that deserves a beautiful presentation. Serve it on a white ceramic cake stand to let the red color pop. A slice pairs wonderfully with a glass of cold oat milk or a hot cup of dark roast coffee to balance the sweetness. For a festive touch, garnish the top with fresh raspberries, strawberries, or even pomegranate arils. If you are feeling artistic, save the crumbs from leveling the cakes and sprinkle them in a ring around the top edge of the frosting for that classic red velvet look.
Storage and Reheating Tips
Because of the coconut cream frosting, this cake must be stored in the refrigerator. It will keep well in an airtight cake carrier or container for up to 5 days. The cold temperature actually helps the cake firm up slightly, making it easier to slice. If you want to freeze it, you can freeze individual slices wrapped tightly in plastic wrap and then foil for up to 2 months. Thaw frozen slices in the refrigerator overnight before serving. If making ahead, you can bake the cake layers in advance, wrap them tightly, and freeze them unfrosted; simply thaw and frost on the day of serving.
Nutrition Facts (Estimated)
| Serving Size | 1 slice |
| Calories | 420 |
| Fat | 22g |
| Saturated Fat | 12g |
| Unsaturated Fat | 8g |
| Trans Fat | 0g |
| Cholesterol | 0mg |
| Sodium | 310mg |
| Carbohydrates | 54g |
| Fiber | 2g |
| Sugar | 28g |
| Protein | 5g |
Frequently Asked Questions
Can I make this cake gluten-free?
Yes, absolutely. Swap the all-purpose flour for a reputable 1:1 gluten-free baking flour blend. The texture may be slightly denser, but it will still be delicious.
Why did my coconut cream not whip up?
This usually happens if the coconut milk wasn’t chilled long enough or if the can didn’t have a high enough fat content. Ensure you use full-fat canned coconut milk and chill it for at least 24 hours.
Can I use liquid food coloring instead of gel?
You can, but you will need to use significantly more liquid dye to achieve a deep red color, which can throw off the liquid ratio of the recipe. Gel paste is much more concentrated and recommended.
Does this cake taste like coconut?
The cake itself does not taste like coconut if you use neutral oil. The frosting has a distinct coconut flavor, but it pairs beautifully with the chocolate. If you dislike coconut, use a vegan butter frosting instead.
Can I use beet juice for coloring?
Yes, roasted beet puree or beet powder can be used for a natural alternative. However, be aware that the color will be more of a rusty brown-red rather than the vibrant artificial red.
Why is there vinegar in a cake recipe?
Vinegar reacts with baking soda to create carbon dioxide bubbles, which leavens the cake. It also reacts with the soy milk to create a buttermilk-like tang and tenderness.
Can I make this as cupcakes?
Yes! This recipe will yield approximately 20-24 standard cupcakes. Bake them for 18-22 minutes at the same temperature.
My cake sank in the middle, what happened?
This is often due to opening the oven door too early, which causes a sudden temperature drop, or underbaking. It can also result from using too much leavening agent.
Conclusion
There you have it—a Moist Vegan Red Velvet Cake that defies expectations and delivers on every level of flavor and texture. It is a testament to how delicious plant-based baking can be when you understand the simple science behind the ingredients. Whether you are celebrating a milestone or just treating yourself on a weekend, this cake brings a sense of occasion to the table. I hope this recipe becomes a staple in your kitchen, just as it has in mine. Happy baking, and don’t forget to share your beautiful creations on social media!