The Ultimate Moist Vegan Red Velvet Cake With Creamy Vegan Buttercream
Moist Vegan Red Velvet Cake With Vegan Buttercream Recipe
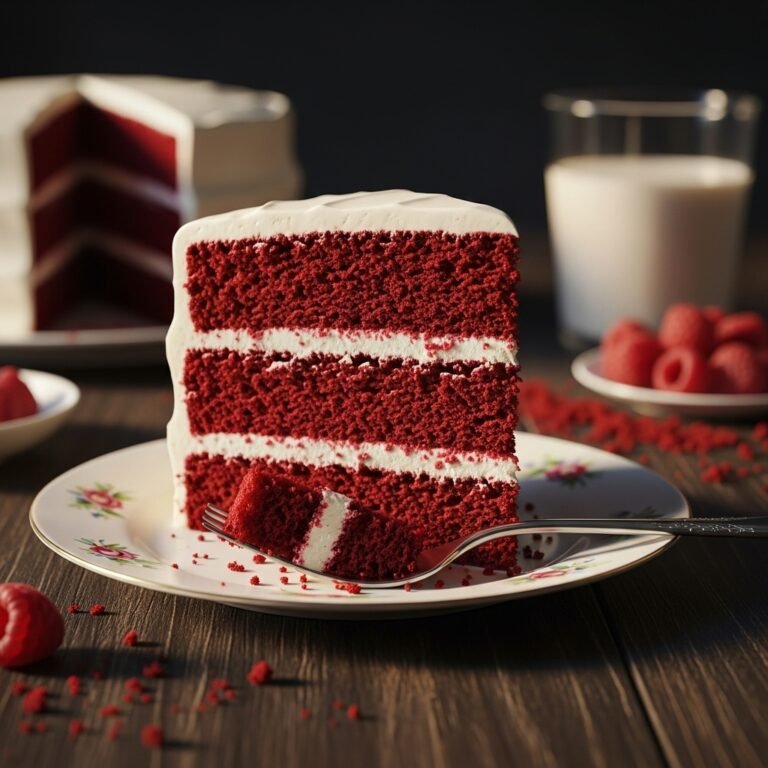
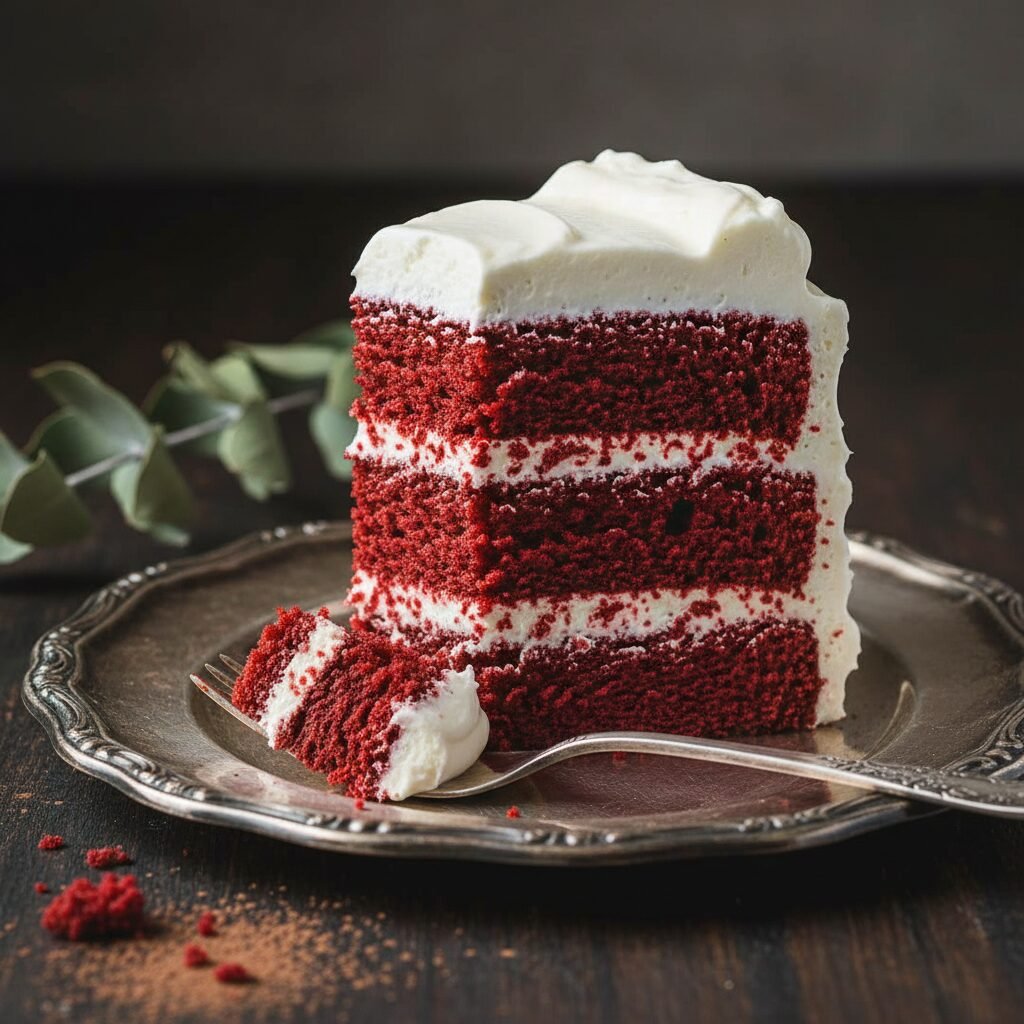
Discover the secret to a perfectly moist, tender, and vibrant Vegan Red Velvet Cake that rivals any traditional bakery version. Paired with a luscious, tangy vegan buttercream frosting, this recipe is an absolute showstopper for birthdays, holidays, or any time you crave a slice of velvety perfection.
30 minutes
35 minutes
1 hour 30 minutes
12-14 servings
Dessert
Baking
American
Vegan
There is something undeniably magnetic about Red Velvet Cake. Its striking crimson hue, its subtle chocolate undertones, and that signature tangy sweetness make it a dessert icon. For years, many home bakers have assumed that achieving that classic velvety texture without eggs or dairy was impossible. I am here to tell you that not only is it possible, but this Moist Vegan Red Velvet Cake might just be the best cake—vegan or otherwise—you will ever taste. The journey to creating this recipe was one of rigorous testing. We wanted to banish the stigma of dry, dense vegan baking forever. The result is a crumb so tender it practically melts in your mouth, supported by a structure that holds up perfectly to layers of frosting.
What makes this cake truly special is the balance of flavors. It is not just a vanilla cake dyed red, nor is it a full-blown chocolate cake. It sits in that delicious middle ground, offering a hint of cocoa that deepens the flavor profile without overpowering it. The vegan buttercream we have paired with it mimics the traditional cream cheese frosting, providing that essential tangy counterpoint to the sweet sponge. Whether you are a lifelong vegan, hosting a plant-based guest, or simply looking to reduce your dairy intake without sacrificing indulgence, this cake is your answer. It is a celebration of texture, flavor, and the magic of plant-based chemistry coming together to create something truly decadent.
History & Origins
The history of Red Velvet Cake is as rich and layered as the dessert itself, often shrouded in culinary myths and marketing legends. The concept of a ‘velvet’ cake dates back to the Victorian era in the late 1800s. During this time, bakers used the term ‘velvet’ to distinguish cakes with a soft, fine crumb from the coarser, denser cakes that were common. The redness of the original cakes was not the result of food coloring, but rather a chemical reaction. Traditional recipes called for natural, non-alkalized cocoa powder. When this acidic cocoa mixed with buttermilk and baking soda, the anthocyanins in the cocoa revealed a reddish-brown mahogany hue. It was a subtle, natural elegance that defined the early versions of this dessert.
The vibrant, bright red color we recognize today emerged later, largely influenced by the Great Depression and World War II. During times of rationing, bakers would use boiled beet juices to enhance the moisture and color of their cakes, as sugar and butter were scarce. However, the modern incarnation of Red Velvet Cake is widely attributed to the Adams Extract company in Texas during the mid-20th century. To boost sales during the Depression, John A. Adams marketed a recipe that used his red food dye and butter extract, forever cementing the link between ‘Red Velvet’ and a shocking bright red aesthetic. Another famous claim to fame comes from the Waldorf Astoria Hotel in New York City, which served a signature Red Velvet cake that became legendary, though the hotel’s version was originally much different from the Southern classic. Today, the vegan version represents the latest evolution in this history, proving that culinary traditions can adapt to modern ethical and dietary standards while preserving the nostalgia of the past.
Why This Recipe Works
This recipe succeeds where many vegan cakes fail because it relies on the fundamental science of baking rather than expensive egg replacers. The primary challenge in vegan baking is achieving lift and moisture without eggs. To solve this, we utilize a homemade ‘vegan buttermilk’ created by curdling high-protein soy milk with apple cider vinegar. This mixture does two things: it breaks down the gluten strands in the flour to ensure a tender crumb, and the acidity reacts vigorously with the baking soda to provide a powerful lift, compensating for the lack of egg structure.
Furthermore, we choose oil over vegan butter for the cake batter itself. While butter adds flavor, it contains water which evaporates during baking, sometimes leading to a drier texture in eggless cakes. Oil, being 100% fat, coats the flour proteins more effectively and remains liquid at room temperature, guaranteeing that the cake stays moist for days. The addition of a small amount of cornstarch to the dry ingredients mimics the protein content of cake flour, adding to that ‘velvet’ texture. Finally, for the frosting, we use a specific ratio of vegan butter to vegetable shortening. This combination ensures the frosting is stable enough to pipe but melts beautifully on the palate, avoiding the waxy mouthfeel that some plant-based frostings suffer from.
Why You’ll Love This Recipe
- ✓Incredibly moist and tender crumb that stays fresh for days.
- ✓Rich, tangy vegan buttercream that perfectly mimics cream cheese frosting.
- ✓No obscure ingredients; uses pantry staples like vinegar and soy milk.
- ✓Vibrant natural red color options or classic food dye instructions.
- ✓Sturdy enough for layer cakes but soft enough for cupcakes.
- ✓100% dairy-free and egg-free without sacrificing flavor.
Equipment You’ll Need
- ✓Two 8-inch or 9-inch round cake pans
- ✓Electric stand mixer or hand mixer
- ✓Large mixing bowls
- ✓Whisk
- ✓Rubber spatula
- ✓Measuring cups and spoons
- ✓Wire cooling rack
- ✓Parchment paper
- ✓Offset spatula for frosting
Ingredients
- ✓2 1/2 cups All-purpose flour (or cake flour for extra lightness)
- ✓1 1/2 cups Granulated sugar
- ✓1 tsp Baking soda
- ✓1 tsp Baking powder
- ✓1/2 tsp Salt
- ✓2 tbsp Unsweetened cocoa powder (natural, not Dutch-processed)
- ✓1 1/2 cups Unsweetened soy milk (or almond milk)
- ✓2 tsp Apple cider vinegar (or white vinegar)
- ✓1/2 cup Vegetable oil (or canola/grapeseed oil)
- ✓1 tbsp Vanilla extract
- ✓1-2 tbsp Red food coloring (vegan-friendly gel or liquid)
- ✓1 cup Vegan butter sticks, slightly softened (for frosting)
- ✓3-4 cups Powdered sugar, sifted (for frosting)
- ✓1 tsp Apple cider vinegar or lemon juice (for frosting tang)
- ✓2 tbsp Unsweetened plant milk (for frosting consistency)
Instructions
- Preheat your oven to 350°F (175°C). Grease two 8-inch round cake pans with oil and line the bottoms with parchment paper to ensure easy removal.
- Prepare the vegan buttermilk: In a small bowl or measuring cup, combine the 1 1/2 cups of soy milk with 2 teaspoons of apple cider vinegar. Stir gently and let it sit for about 5-10 minutes until it curdles and thickens slightly.
- In a large mixing bowl, sift together the flour, granulated sugar, baking soda, baking powder, salt, and cocoa powder. Whisk heavily to ensure the cocoa is evenly distributed and there are no lumps.
- In a separate medium bowl, whisk together the prepared vegan buttermilk, vegetable oil, vanilla extract, and red food coloring. Add enough coloring to reach your desired shade of deep red.
- Pour the wet ingredients into the dry ingredients. Using a whisk or electric mixer on low speed, mix until just combined. Do not overmix; stop as soon as the streaks of flour disappear to prevent a tough cake.
- Divide the batter evenly between the two prepared cake pans. Tap the pans gently on the counter 2-3 times to release any large air bubbles.
- Bake in the center of the preheated oven for 30-35 minutes, or until a toothpick inserted into the center comes out clean or with just a few moist crumbs attached.
- Remove the cakes from the oven and let them cool in the pans for 10 minutes. Then, carefully invert them onto a wire rack to cool completely before frosting. They must be room temperature or colder to prevent the frosting from melting.
- Make the frosting: In a large bowl or stand mixer, beat the softened vegan butter until creamy and pale (about 3-4 minutes).
- Gradually add the powdered sugar, one cup at a time, beating on low speed until incorporated. Add the vanilla, a splash of lemon juice or vinegar (for that cream cheese tang), and 1 tablespoon of plant milk.
- Increase the speed to high and whip for another 2-3 minutes until the frosting is fluffy and smooth. Add more milk if it’s too stiff, or more sugar if it’s too runny.
- Assemble the cake: Place one cake layer on your serving plate. Spread a generous layer of frosting over the top. Place the second cake layer on top. Cover the top and sides with the remaining frosting. Decorate with cake crumbs or sprinkles if desired.
Expert Cooking Tips
- ✓Use room temperature ingredients, especially the soy milk, to ensure the emulsion forms correctly.
- ✓Do not overmix the batter once the wet and dry ingredients are combined; this activates gluten and makes the cake dense.
- ✓Weigh your flour using a kitchen scale for the most accurate results; scooping with a cup often packs too much flour.
- ✓Use ‘natural’ cocoa powder rather than Dutch-processed for the best reaction with the baking soda.
- ✓Let the cakes cool completely before frosting; even a slightly warm cake will cause the vegan butter to slide off.
- ✓If using gel food coloring, you will need less than liquid dye as it is more concentrated.
Substitutions and Variations
If you need to make this gluten-free, swap the all-purpose flour for a high-quality 1:1 Gluten-Free Baking Flour blend that contains xanthan gum. For the oil, melted coconut oil can work, but it may impart a slight coconut flavor; avocado oil is a great neutral alternative. If you want to avoid artificial red dye, you can use beet powder or concentrated beet juice, though be aware this may slightly alter the flavor profile to be earthier and the color will be a more muted, rusty red. For the vegan buttermilk, soy milk works best due to its high protein content, but almond milk or oat milk can be used in a pinch, though the curdling effect will be less pronounced. In the frosting, vegetable shortening can replace half of the vegan butter for a frosting that holds up better in hot weather.
Common Mistakes to Avoid
The most common mistake is opening the oven door too early. Red velvet is sensitive to temperature changes during the rise; opening the door before the structure is set can cause the center to sink. Another issue is using old baking soda. Since this recipe relies heavily on the reaction between vinegar and baking soda for lift, ensure your leavening agents are fresh. Lastly, failing to line the pans with parchment paper often results in the bottom of the cake sticking, which can lead to the cake breaking when you try to remove it. Always use parchment rounds.
Serving Suggestions
Serve this cake in generous slices on white dessert plates to make the red color pop. It pairs beautifully with a glass of cold almond milk or a hot cup of coffee to balance the sweetness. For a decorative touch, save the crumbs from leveling the cakes and sprinkle them in a ring around the top edge of the frosting. Fresh berries, such as raspberries or strawberries, also make for a fresh and tart garnish that complements the rich buttercream.
Storage and Reheating Tips
This cake stores excellently due to its oil-based moisture. Keep the frosted cake in an airtight container or cake dome at room temperature for up to 2 days. If your kitchen is warm, or for longer storage, place it in the refrigerator for up to 5 days. Allow refrigerated slices to come to room temperature for 15-20 minutes before eating for the best texture and flavor. You can also freeze the unfrosted cake layers wrapped tightly in plastic wrap for up to 3 months. Thaw them in the fridge overnight before frosting.
Nutrition Facts (Estimated)
| Serving Size | 1 slice |
| Calories | 450 |
| Fat | 22g |
| Saturated Fat | 6g |
| Unsaturated Fat | 14g |
| Trans Fat | 0g |
| Cholesterol | 0mg |
| Sodium | 310mg |
| Carbohydrates | 62g |
| Fiber | 2g |
| Sugar | 32g |
| Protein | 4g |
Frequently Asked Questions
Can I make this cake into cupcakes?
Absolutely! This recipe yields about 24 standard cupcakes. Bake them at 350°F for 18-22 minutes. Check for doneness with a toothpick.
Why did my cake turn out brown instead of red?
This usually happens if you use too much cocoa powder or Dutch-processed cocoa, which is darker. It can also happen if not enough food coloring was used to overcome the brown of the cocoa.
Can I use liquid sweetener instead of sugar?
It is not recommended to substitute liquid sweeteners like maple syrup for the granulated sugar in this specific recipe, as it alters the wet-to-dry ratio and affects the structural integrity of the crumb.
Is this recipe soy-free?
It can be! Simply swap the soy milk for a high-protein pea milk or oat milk, and ensure your vegan butter and chocolate ingredients are soy-free.
How do I get the frosting to taste like cream cheese?
The secret is adding a small amount of acid. Lemon juice or a tiny splash of apple cider vinegar added to the vegan buttercream mimics the tanginess of cultured cream cheese.
Can I use coconut oil instead of vegetable oil?
Yes, but ensure it is melted and cooled. Also, note that coconut oil solidifies when cold, so the cake might feel denser if eaten straight from the fridge.
Do I really need the vinegar in the cake batter?
Yes, it is crucial. The vinegar reacts with the baking soda to create carbon dioxide bubbles, which makes the cake rise. Without it, the cake will be flat and dense.
Can I freeze the frosted cake?
Yes, you can freeze slices of the frosted cake. Place them on a baking sheet to freeze the frosting solid first, then wrap them tightly in plastic wrap and foil.
Conclusion
Mastering this Moist Vegan Red Velvet Cake is a game-changer for any plant-based baker. It proves that you do not need dairy or eggs to create a dessert that is luxurious, flavorful, and structurally perfect. Whether you are celebrating a special occasion or just treating yourself on a weekend, this cake delivers on every promise of the classic Red Velvet experience. I hope this recipe brings a splash of color and joy to your kitchen. Happy baking!