The Ultimate Fun Chocolate Peanut Butter Birthday Cake: Perfect 8-Inch Recipe
Fun Chocolate Peanut Butter Birthday Cake For 8 Inch Round Pans Recipe
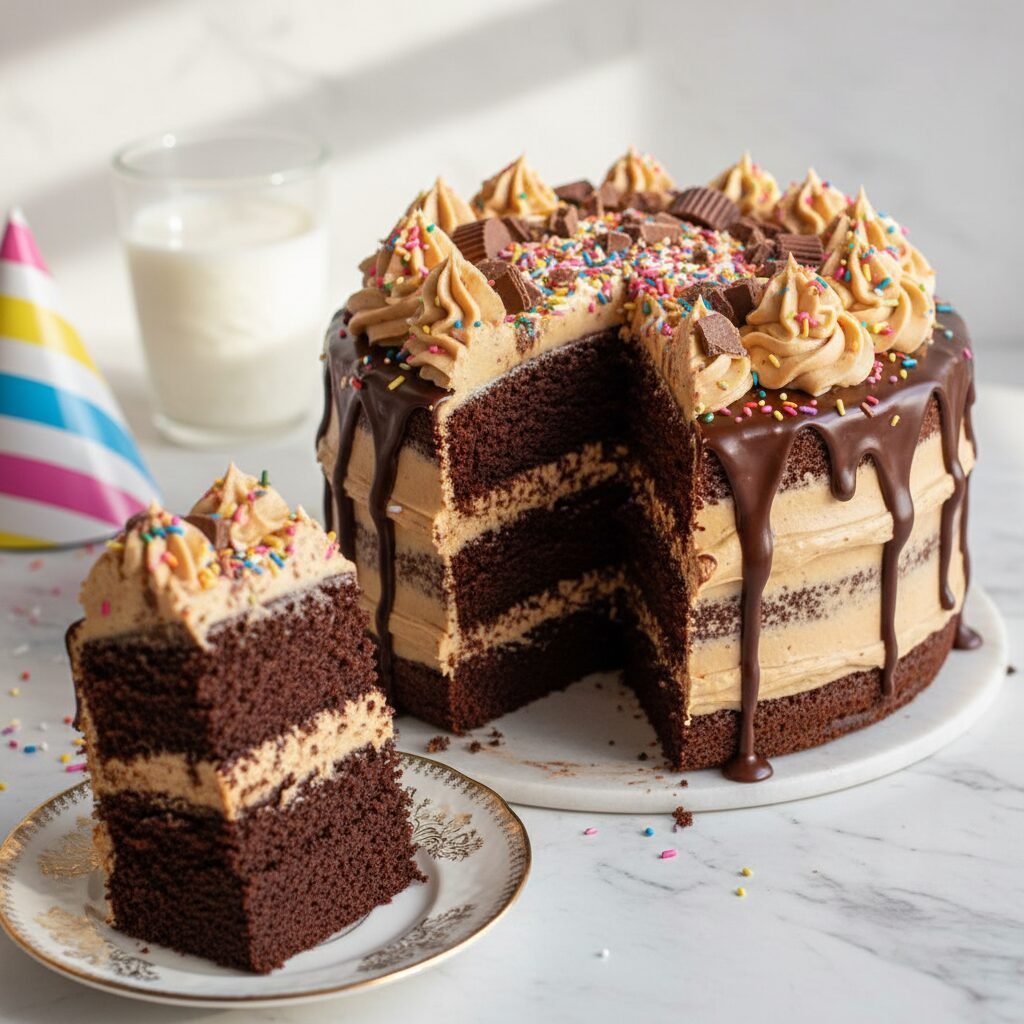
Celebrate in style with this decadent Chocolate Peanut Butter Birthday Cake, specifically designed for 8-inch round pans. Featuring ultra-moist chocolate layers and a creamy, salty-sweet peanut butter frosting, this showstopper is topped with a chocolate ganache drip and festive sprinkles for the ultimate party treat.
45 minutes
35 minutes
1 hour 20 minutes
12-14 servings
Dessert
Baking
American
Vegetarian
There are few flavor combinations in the culinary world as iconic, beloved, and downright irresistible as chocolate and peanut butter. It is a marriage of rich, deep cocoa notes and salty, nutty creaminess that triggers a sense of nostalgia and pure indulgence. This Fun Chocolate Peanut Butter Birthday Cake for 8-inch round pans is not just another dessert; it is a celebration on a plate, meticulously crafted to deliver bakery-quality results right in your home kitchen.
When planning a birthday party or a special gathering, the cake is always the centerpiece. However, many home bakers struggle with recipes that are calibrated for 9-inch pans, resulting in flat, dry layers when baked in smaller tins, or overflowing batter that creates a mess. This recipe is specifically engineered for 8-inch pans, ensuring you get that impressive height and perfect structure that defines a professional-looking cake. The chocolate sponge is incredibly moist—thanks to the inclusion of both buttermilk and oil—and possesses a profound chocolate flavor achieved by blooming the cocoa powder in hot coffee.
But let’s be honest, the real star here might just be the frosting. We are talking about a fluffy, cloud-like peanut butter buttercream that isn’t too sweet, perfectly balancing the density of the cake. To make it ‘fun’ and birthday-ready, we don’t stop there. A glossy chocolate ganache drip adds a touch of elegance, while a crown of chopped peanut butter cups and colorful sprinkles brings the joy. Whether you are baking for a child’s birthday, a partner’s milestone, or simply because you survived the work week, this cake promises to deliver a slice of happiness. It is a labor of love that pays off with every forkful, creating memories that last long after the last crumb is gone.
History & Origins
To understand the gravity of this dessert, we must look back at the history of its two main components. Chocolate cake, as we know it, is a relatively modern invention. While chocolate has been consumed as a beverage for millennia, dating back to the Aztecs and Mayans, it wasn’t until the mid-19th century, with the extraction of cocoa butter and the creation of cocoa powder, that baking with chocolate became accessible. The first ‘chocolate cakes’ were actually yellow cakes with chocolate frosting. It wasn’t until the early 20th century that the dark, Devil’s Food style cakes became popular in American households, largely due to the affordability of cocoa powder.
Peanut butter, on the other hand, has its roots in the work of Marcellus Gilmore Edson, John Harvey Kellogg, and Ambrose Straub, who all patented peanut paste processes in the late 1800s. However, it was originally marketed as a protein source for the elderly and infirm at sanitariums. It wasn’t until the 1920s, with the invention of hydrogenation to prevent oil separation, that peanut butter became a shelf-stable staple in American pantries.
The cultural explosion of combining these two flavors can be largely attributed to H.B. Reese. In 1928, Reese, a former dairy farmer and shipping foreman for Milton Hershey, created the Peanut Butter Cup. This invention solidified the chocolate and peanut butter pairing as an American classic. Since then, the duo has found its way into ice creams, cookies, bars, and, of course, cakes. In the context of birthday celebrations, the shift from simple vanilla cakes to elaborate, flavor-forward creations mirrors the rise of food media and the desire for personalized, gourmet experiences at home. This recipe honors that rich history, blending the classic American Devil’s Food texture with the nostalgic comfort of peanut butter, creating a modern classic that pays homage to a century of culinary evolution.
Why This Recipe Works
This recipe succeeds where others fail because it relies on the chemistry of baking to ensure moisture and stability. First, we use a mix of granulated sugar and brown sugar. While white sugar provides structure and crisp edges, the molasses in the brown sugar adds moisture and a depth of flavor that complements the chocolate.
Secondly, the chocolate flavor is intensified through ‘blooming.’ By mixing the cocoa powder with hot coffee (or hot water) before adding it to the batter, we dissolve the cocoa solids and release flavor compounds that are otherwise trapped. This results in a chocolate taste that is robust rather than dusty. Don’t worry, the cake won’t taste like coffee; the coffee simply enhances the cocoa notes.
Thirdly, we use oil instead of butter for the cake batter. While butter tastes great, it contains water which evaporates, and milk solids which can dry out. Oil is 100% fat and remains liquid at room temperature, guaranteeing that the cake stays moist for days. For the frosting, we use a high ratio of peanut butter to butter. This ensures the flavor is unmistakably nutty, but we whip it with a splash of heavy cream to incorporate air, preventing the frosting from becoming a dense, sticky paste. Finally, the specific measurements for 8-inch pans mean the batter fills the pans perfectly to create tall, flat-topped layers that stack beautifully without needing excessive trimming.
Why You’ll Love This Recipe
- ✓Perfectly sized for 8-inch pans for tall, bakery-style layers.
- ✓Intense chocolate flavor achieved by blooming cocoa powder.
- ✓Stays moist for days thanks to the use of oil and buttermilk.
- ✓Creamy, fluffy peanut butter frosting that isn’t overly sweet.
- ✓Festive presentation with ganache drip and sprinkles.
Equipment You’ll Need
- ✓Two 8-inch round cake pans
- ✓Stand mixer or electric hand mixer
- ✓Large mixing bowls
- ✓Wire cooling rack
- ✓Parchment paper
- ✓Offset spatula
- ✓Measuring cups and spoons
- ✓Whisk
- ✓Saucepan (small, for ganache)
Ingredients
- ✓2 cups granulated sugar
- ✓1 3/4 cups all-purpose flour
- ✓3/4 cup unsweetened cocoa powder (Dutch-processed preferred)
- ✓1 1/2 teaspoons baking powder
- ✓1 1/2 teaspoons baking soda
- ✓1 teaspoon salt
- ✓2 large eggs, room temperature
- ✓1 cup whole milk or buttermilk, room temperature
- ✓1/2 cup vegetable oil or canola oil
- ✓2 teaspoons pure vanilla extract
- ✓1 cup boiling water (or hot coffee for deeper flavor)
- ✓1 cup unsalted butter, softened (for frosting)
- ✓1 cup creamy peanut butter (commercial brand like Jif or Skippy, not natural)
- ✓3-4 cups powdered sugar
- ✓1/4 cup heavy cream
- ✓1/2 cup semi-sweet chocolate chips (for ganache)
- ✓1/3 cup heavy cream (for ganache)
- ✓Sprinkles and chopped peanut butter cups for garnish
Instructions
- Preheat your oven to 350°F (175°C). Grease two 8-inch round cake pans with butter or cooking spray and line the bottoms with parchment paper circles. Dust the sides with cocoa powder or flour.
- In the bowl of a stand mixer or a large bowl, whisk together the sugar, flour, cocoa, baking powder, baking soda, and salt until well combined and no lumps remain.
- Add the eggs, buttermilk, oil, and vanilla extract. Beat on medium speed for about 2 minutes. The batter should be smooth and glossy.
- Reduce the mixer speed to the lowest setting and carefully pour in the boiling water (or hot coffee). Mix until just combined. The batter will be very thin and liquid; this is normal.
- Divide the batter evenly between the two prepared pans. Tap the pans gently on the counter to release any large air bubbles.
- Bake for 30-35 minutes, or until a wooden toothpick inserted into the center comes out clean or with just a few moist crumbs.
- Remove from the oven and let the cakes cool in the pans for 10 minutes. Then, run a knife around the edges and invert them onto a wire rack to cool completely before frosting.
- While the cakes cool, make the frosting. In a large bowl, beat the softened butter and peanut butter together until smooth and creamy (about 2-3 minutes).
- Gradually add the powdered sugar, one cup at a time, mixing on low speed. Once incorporated, increase to high speed and beat for 1 minute.
- Add the vanilla and 1/4 cup heavy cream. Beat on medium-high speed for another 2-3 minutes until the frosting is light and fluffy. If it’s too stiff, add more cream; if too soft, add more sugar.
- To assemble, level the tops of the cooled cakes with a serrated knife if they are domed. Place one layer on a serving plate or cake stand.
- Spread a generous layer of peanut butter frosting over the top of the first layer. Place the second cake layer on top, bottom side up for a flat top.
- Frost the top and sides of the cake with the remaining frosting. Smooth the sides with an offset spatula or create rustic swirls.
- Prepare the ganache: Place chocolate chips in a heatproof bowl. Heat 1/3 cup heavy cream until it just begins to simmer, then pour over the chips. Let sit for 5 minutes, then whisk until smooth.
- Let the ganache cool slightly until it thickens but is still pourable. Using a spoon or squeeze bottle, drip the ganache over the edges of the cake and fill in the center top.
- Immediately decorate with sprinkles and chopped peanut butter cups before the ganache sets. Chill for 20 minutes to set the drip, then serve.
Expert Cooking Tips
- ✓Use room temperature ingredients (eggs, buttermilk) to ensure the batter emulsifies properly.
- ✓Do not overmix the batter once the flour is added, as this can develop gluten and make the cake tough, though the liquid nature of this batter makes it forgiving.
- ✓For the peanut butter frosting, avoid ‘natural’ peanut butters that separate; the oil can break your buttercream. Use standard creamy peanut butter.
- ✓If your cakes dome significantly, use a serrated bread knife to slice off the top hump for a stable, flat layer cake.
- ✓Chill the cake for 15-20 minutes after the ‘crumb coat’ (a thin layer of frosting) before applying the final thick layer of frosting for a professional finish.
- ✓To get clean slices, run your knife under hot water and wipe it dry between each cut.
Substitutions and Variations
This recipe is versatile enough to handle several substitutions if you are in a pinch or have dietary restrictions. For the buttermilk, you can make a sour milk substitute by adding one tablespoon of white vinegar or lemon juice to a cup of regular milk and letting it sit for 5 minutes. If you need a gluten-free version, a high-quality 1:1 gluten-free all-purpose baking flour blend (preferably one with xanthan gum) works surprisingly well, though the texture may be slightly denser. For the oil, melted coconut oil or melted butter can be used, though vegetable or canola oil provides the moistest crumb. In the frosting, if you have a peanut allergy, you can substitute with almond butter, cashew butter, or even a sunflower seed butter for a nut-free school-safe option. If you prefer a less sweet frosting, you can swap the American buttercream for a Swiss Meringue Buttercream base and fold in the peanut butter at the end.
Common Mistakes to Avoid
The most common mistake with this specific recipe is panicking about the thin batter. Unlike a pound cake batter, this mixture is very liquid—almost like chocolate milk—when it goes into the oven. Do not add more flour to thicken it; the liquid evaporates during baking to create a tender crumb. Another frequent error is frosting the cake before it is 100% cool. Even a slightly warm cake will melt the butter in the frosting, causing the layers to slide off one another and the frosting to become a greasy puddle. Patience is key! Lastly, be careful with the ganache temperature. If the ganache is too hot when you pour it, it will melt the peanut butter frosting underneath and run all the way down to the plate rather than creating nice drips. Let it cool until it is the consistency of thick corn syrup.
Serving Suggestions
This Fun Chocolate Peanut Butter Birthday Cake is rich, so thin slices go a long way. It pairs beautifully with a cold glass of milk to cut through the richness of the peanut butter and chocolate. For an adult gathering, serve it alongside a hot cup of dark roast coffee or a stout beer, which complements the cocoa notes. If you want to go over the top, serve each slice with a scoop of vanilla bean ice cream or a dollop of unsweetened whipped cream. To make it extra festive for a birthday, use tall gold candles or a custom cake topper. The cake looks best when displayed on a pedestal cake stand to show off the drip and decorations.
Storage and Reheating Tips
Because of the dairy in the frosting and ganache, this cake is best stored in the refrigerator, especially in warm climates. However, buttercream tastes best at room temperature. We recommend storing the cake in an airtight cake keeper in the fridge for up to 5 days. Remove slices or the whole cake from the fridge about 1-2 hours before serving to allow the frosting and cake to soften. If you have leftover slices, you can press a piece of plastic wrap directly against the cut sides to keep them from drying out. For long-term storage, you can freeze individual slices wrapped tightly in plastic wrap and then foil for up to 3 months. Thaw frozen slices in the fridge overnight or on the counter for a few hours.
Nutrition Facts (Estimated)
| Serving Size | 1 slice |
| Calories | 680 |
| Fat | 38g |
| Saturated Fat | 14g |
| Unsaturated Fat | 20g |
| Trans Fat | 0g |
| Cholesterol | 65mg |
| Sodium | 340mg |
| Carbohydrates | 78g |
| Fiber | 4g |
| Sugar | 55g |
| Protein | 10g |
Frequently Asked Questions
Can I bake this recipe in 9-inch pans instead?
Yes, you can, but the layers will be thinner and the baking time will need to be reduced by about 5-8 minutes. Watch closely to ensure they don’t dry out.
Can I make this cake ahead of time?
Absolutely. You can bake the cake layers up to 2 days in advance, wrap them tightly in plastic wrap, and store them at room temperature or in the fridge. You can also freeze the unfrosted layers for up to a month.
Why do I need to use boiling water?
Boiling water (or hot coffee) ‘blooms’ the cocoa powder, dissolving it completely to release the full flavor profile and ensuring the cake is dark and moist.
My frosting is too soft, what do I do?
If your kitchen is warm or the butter was too soft, the frosting might be runny. Pop the bowl in the fridge for 10-15 minutes, then re-whip it. You can also add a bit more powdered sugar.
Can I use natural peanut butter?
It is not recommended for the frosting. Natural peanut butter separates and can cause the buttercream to break or become oily. Stick to commercial brands like Jif or Skippy for the best texture.
How do I get the perfect drip?
The key is temperature. The cake should be chilled so the frosting is firm, and the ganache should be cool enough to be thick but still pourable. Test a drip on the back of the cake first.
Can I make this into cupcakes?
Yes! This recipe yields about 24 standard cupcakes. Bake them at 350°F for 18-22 minutes.
Is the coffee flavor strong?
No, you will not taste the coffee. It simply enhances the chocolate flavor, making it taste more ‘chocolatey’. If you dislike coffee entirely, boiling water works fine.
Conclusion
There is something undeniably magical about a homemade birthday cake, and this Fun Chocolate Peanut Butter Birthday Cake for 8-inch round pans is sure to be the highlight of any celebration. It strikes the perfect balance between sophisticated flavor and whimsical fun, proving that you don’t need to be a professional pastry chef to create a masterpiece. From the moist, deep-dark chocolate crumb to the salty-sweet embrace of the peanut butter frosting, every element works in harmony. So, preheat your oven, grab your favorite sprinkles, and get ready to bake a cake that will be requested year after year. Happy baking!