The Ultimate Fun Chocolate Peanut Butter Birthday Cake For 9×13 Pan
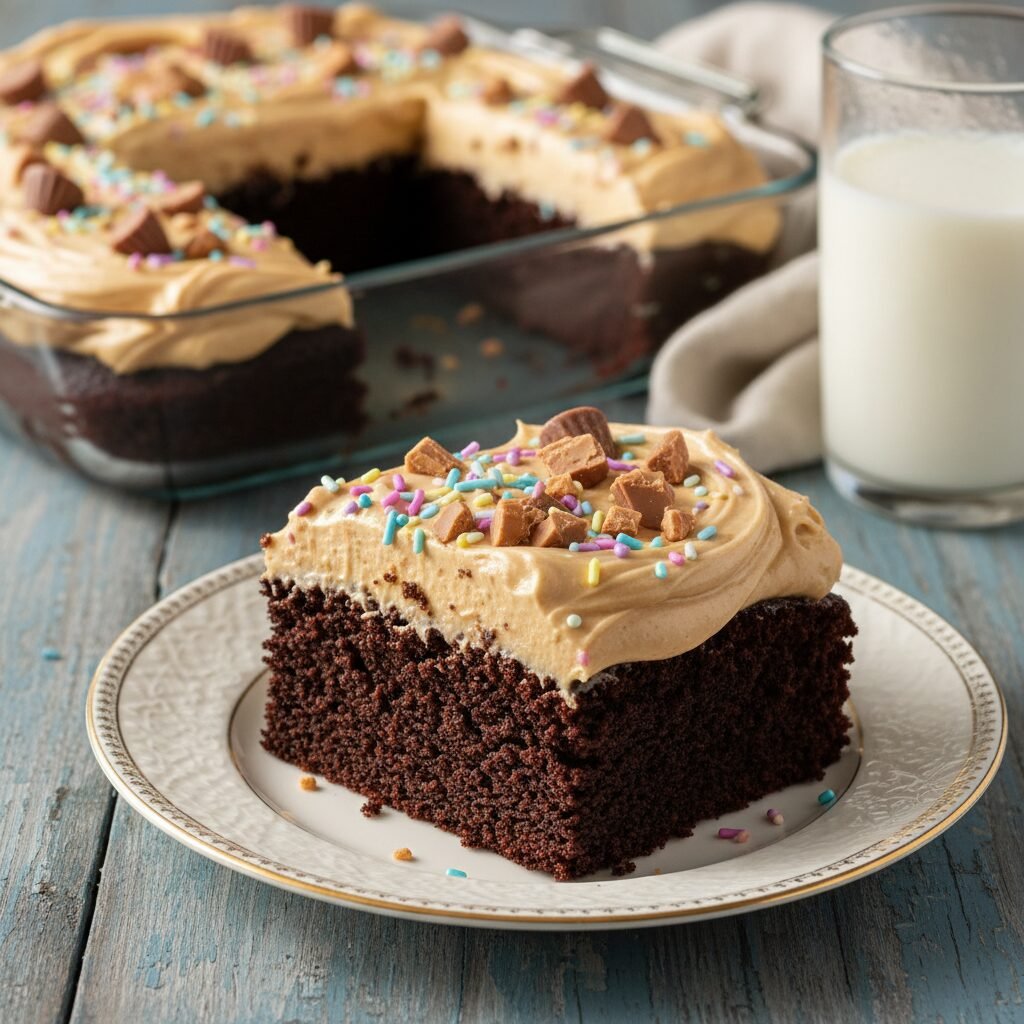
Fun Chocolate Peanut Butter Birthday Cake For 9×13 Pan Recipe
This decadent Chocolate Peanut Butter Birthday Cake is the ultimate crowd-pleaser, featuring a moist, fudgy chocolate base topped with fluffy, creamy peanut butter frosting. Baked in a convenient 9×13 pan, it’s the perfect hassle-free dessert for parties, potlucks, and celebrations that demands seconds.
20 minutes
35 minutes
1 hour 15 minutes
15 servings
Dessert
Baking
American
Vegetarian
There is something undeniably nostalgic and comforting about a classic 9×13 sheet cake. While towering layer cakes have their place in the world of pastry arts, the humble rectangular cake remains the unsung hero of American birthday parties. This recipe for a Fun Chocolate Peanut Butter Birthday Cake is a love letter to that simplicity, elevating the format with a flavor combination that is nothing short of legendary. We are talking about a crumb so moist and tender that it practically melts on your tongue, paired with a peanut butter frosting that strikes the perfect balance between salty and sweet.
For many home bakers, the stress of leveling cake layers, crumb coating, and piping intricate designs can suck the joy out of baking. That is why this recipe is a game-changer. It delivers bakery-quality flavor without the architectural engineering required for a tiered cake. The chocolate base is robust and deep, enhanced by a splash of hot coffee that blooms the cocoa powder, while the frosting is whipped to an ethereal cloud-like consistency. It is the kind of cake that invites you to drag your finger through the frosting when no one is looking. Whether you are celebrating a milestone birthday, a casual Friday night, or just the fact that you made it through the week, this cake promises to be the highlight of the occasion. It is rich, it is indulgent, and it is unapologetically fun—sprinkles and all.
History & Origins
The concept of the sheet cake is deeply rooted in 20th-century American baking culture. As post-war suburban life expanded in the 1950s, so did the popularity of the 9×13 baking pan. It became the standard vessel for potlucks, church socials, and backyard barbecues, prized for its ability to feed a crowd and its ease of transport. This specific style of cake often draws inspiration from the famous ‘Texas Sheet Cake,’ a chocolate cake known for its thin profile and poured fudge icing. However, our version pivots towards a fluffier, taller crumb and swaps the poured icing for a whipped buttercream, a style that became prominent in community cookbooks during the 1970s and 80s.
The marriage of chocolate and peanut butter, however, has a distinct history of its own. While chocolate has been consumed for millennia, peanut butter is a relatively modern invention, popularized at the 1904 St. Louis World’s Fair. The combination of the two became an American icon largely thanks to H.B. Reese, a former dairy farmer who created the Peanut Butter Cup in 1928. Reese’s invention cemented the idea that the savory, nutty profile of peanuts was the perfect foil for the sweetness of milk and dark chocolate. Over the decades, this flavor profile migrated from candy bars to baked goods, eventually finding its way into the repertoire of home bakers who wanted to replicate that candy-aisle magic in a homemade birthday cake.
Why This Recipe Works
This recipe succeeds where others fail due to a few key chemical reactions and ingredient choices that prioritize moisture and flavor depth. First, we utilize the ‘blooming’ technique for the cocoa powder. By mixing unsweetened cocoa powder with hot coffee (or boiling water) before adding it to the batter, we dissolve the cocoa butter and release the full spectrum of chocolate flavor, preventing the cake from tasting dusty or dry. The addition of coffee emphasizes the chocolate notes without making the cake taste like a mocha latte.
Secondly, the fat content is carefully balanced. We use a combination of oil and buttermilk. Butter adds flavor, but oil is superior for texture in chocolate cakes because it remains liquid at room temperature, ensuring the cake stays soft for days. The acidity in the buttermilk reacts with the baking soda to create a tender crumb and a slight tang that cuts through the richness of the sugar. Finally, the frosting uses a high ratio of creamy peanut butter to butter. Many recipes skimp on the peanut butter, resulting in a generic buttercream. By using plenty of smooth peanut butter and whipping it with heavy cream, we create a frosting that is stable enough to hold its shape but light enough to not weigh down the tender cake beneath.
Why You’ll Love This Recipe
- ✓Baked in a single 9×13 pan for easy transport and cleanup.
- ✓Uses the ‘blooming’ technique for intense chocolate flavor.
- ✓Frosting is whipped for a light, mousse-like texture.
- ✓Perfect balance of salty and sweet flavors.
- ✓Stays moist for up to 4 days at room temperature.
- ✓Highly customizable with toppings like chopped cups or sprinkles.
Equipment You’ll Need
- ✓9×13 inch baking pan
- ✓Stand mixer or electric hand mixer
- ✓Large mixing bowl
- ✓Medium mixing bowl
- ✓Whisk
- ✓Rubber spatula
- ✓Offset spatula
- ✓Measuring cups and spoons
- ✓Wire cooling rack
Ingredients
- ✓2 cups all-purpose flour
- ✓2 cups granulated sugar
- ✓3/4 cup unsweetened cocoa powder
- ✓2 teaspoons baking soda
- ✓1 teaspoon baking powder
- ✓1 teaspoon salt
- ✓2 large eggs, room temperature
- ✓1 cup buttermilk, room temperature
- ✓1/2 cup vegetable oil (or canola oil)
- ✓2 teaspoons vanilla extract
- ✓1 cup hot brewed coffee (strong)
- ✓1 cup unsalted butter, softened (for frosting)
- ✓1 cup creamy peanut butter (commercial brand like Jif or Skippy)
- ✓3 cups powdered sugar, sifted
- ✓1/4 cup heavy cream
- ✓1 teaspoon vanilla extract (for frosting)
- ✓Pinch of salt (for frosting)
- ✓Sprinkles or chopped peanut butter cups for garnish
Instructions
- Preheat your oven to 350°F (175°C). Grease a 9×13 inch baking pan generously with butter or non-stick cooking spray and lightly dust with cocoa powder or flour.
- In a large mixing bowl, whisk together the flour, sugar, cocoa powder, baking soda, baking powder, and salt until fully combined and no lumps remain.
- In the bowl of a stand mixer (or a separate medium bowl using a hand mixer), beat the eggs, buttermilk, vegetable oil, and 2 teaspoons of vanilla extract until smooth.
- With the mixer on low speed, gradually add the dry ingredients to the wet ingredients. Mix only until just combined to avoid overworking the gluten.
- Keep the mixer on the lowest setting and carefully pour in the hot coffee in a slow, steady stream. The batter will be very thin and liquid; this is normal and ensures a moist cake.
- Pour the batter into the prepared 9×13 pan. Tap the pan gently on the counter once or twice to release any large air bubbles.
- Bake for 30-35 minutes, or until a toothpick inserted into the center comes out clean or with just a few moist crumbs attached. Do not overbake.
- Remove the cake from the oven and place the pan on a wire rack. Allow the cake to cool completely in the pan. This is crucial; if the cake is warm, the frosting will melt.
- While the cake cools, make the frosting. In a clean mixing bowl, beat the softened butter and creamy peanut butter together on medium-high speed for 2-3 minutes until smooth and creamy.
- Reduce speed to low and gradually add the powdered sugar, about one cup at a time, mixing until incorporated.
- Add the vanilla extract, a pinch of salt, and the heavy cream. Increase the speed to high and whip the frosting for 3-4 minutes until it is fluffy and lightened in color.
- Once the cake is fully cool, use an offset spatula to spread the peanut butter frosting evenly over the top.
- Garnish immediately with festive sprinkles, chopped peanut butter cups, or a drizzle of chocolate sauce.
- Slice into squares and serve directly from the pan.
Expert Cooking Tips
- ✓Ensure all refrigerated ingredients (eggs, buttermilk, butter) are at room temperature before starting to ensure a smooth emulsion.
- ✓Do not skip the hot coffee; it blooms the cocoa. If you dislike coffee, use boiling water, but the coffee flavor is undetectable in the final product.
- ✓Sift your powdered sugar before making the frosting to avoid gritty lumps.
- ✓Use a commercial creamy peanut butter (like Jif or Skippy) rather than natural peanut butter, which can separate and cause the frosting to be oily.
- ✓Be gentle when checking the cake for doneness; opening the oven door too early can cause the center to sink.
- ✓If the frosting feels too stiff, add more heavy cream one teaspoon at a time. If too soft, add more powdered sugar.
Substitutions and Variations
This recipe is quite resilient, allowing for several substitutions if you have dietary restrictions or missing ingredients. For the flour, a high-quality 1:1 Gluten-Free baking flour blend works wonderfully; just ensure it contains xanthan gum. If you do not have buttermilk, you can make a ‘sour milk’ substitute by adding one tablespoon of white vinegar or lemon juice to a cup of regular milk and letting it sit for 5 minutes. Vegetable oil can be swapped for melted coconut oil or melted butter, though oil yields the moistest crumb. For the coffee, boiling water is a perfectly fine substitute if you want to avoid caffeine entirely. In the frosting, if you are allergic to peanuts, you can substitute smooth almond butter, cashew butter, or even a sunflower seed butter (SunButter) for a nut-free school-safe version. For a dairy-free cake, use almond milk with vinegar instead of buttermilk, and use plant-based butter sticks and coconut cream in the frosting.
Common Mistakes to Avoid
The most common mistake with this cake is overbaking. Because the batter is dark, it is hard to see browning. Rely on the toothpick test and start checking at the 30-minute mark. Another frequent error is frosting the cake before it is 100% cool. Even a slightly warm center will cause the butter in the frosting to separate and slide off the cake. Regarding the batter, do not be alarmed by how liquid it is after adding the coffee; adding extra flour to ‘thicken’ it will result in a dry, tough brick of a cake. Finally, using natural peanut butter (the kind you have to stir) for the frosting is a mistake; the oil separation makes the buttercream unstable and greasy. Stick to the stabilized commercial brands for the best texture.
Serving Suggestions
This cake is rich, so it pairs beautifully with beverages that cut through the sweetness. An ice-cold glass of milk is the classic choice, but a hot cup of black coffee or an unsweetened espresso is equally delightful. If serving for a birthday party, offer a scoop of vanilla bean ice cream on the side. To dress it up for a more adult gathering, garnish with shaved dark chocolate and serve with a glass of port wine or a stout beer. For a festive touch, you can pipe the frosting using a star tip rather than just spreading it, though the rustic swirl of a spatula is part of the sheet cake’s charm.
Storage and Reheating Tips
Because the frosting contains dairy (heavy cream and butter), many assume it needs immediate refrigeration, but the high sugar content acts as a preservative. The cake can be stored safely at room temperature in an airtight container or covered tightly with plastic wrap for up to 3 days. In fact, room temperature is preferred as the cold fridge can dry out the sponge and harden the butter in the frosting. If you live in a very hot or humid climate, however, store it in the fridge and let it come to room temperature for 30 minutes before serving. To freeze, place individual slices on a baking sheet to freeze the frosting solid, then wrap them tightly in plastic wrap and foil. They will keep for up to 3 months.
Nutrition Facts (Estimated)
| Serving Size | 1 slice (1/15 of cake) |
| Calories | 480 |
| Fat | 26g |
| Saturated Fat | 10g |
| Unsaturated Fat | 14g |
| Trans Fat | 0g |
| Cholesterol | 45mg |
| Sodium | 310mg |
| Carbohydrates | 58g |
| Fiber | 3g |
| Sugar | 42g |
| Protein | 7g |
Frequently Asked Questions
Can I make this cake ahead of time?
Absolutely. In fact, this cake often tastes better the next day as the flavors have time to meld. You can bake the cake one day, cover it, and frost it the next, or make the entire dish a day in advance.
Why does the recipe call for hot coffee?
Hot liquid is used to ‘bloom’ the cocoa powder, dissolving the cocoa butter to release more intense chocolate flavor. Coffee specifically enhances chocolate’s depth without adding a distinct coffee taste.
Can I use natural peanut butter?
It is not recommended for the frosting. Natural peanut butter tends to separate and can make the buttercream greasy or grainy. Stabilized brands like Jif or Skippy provide the best fluffy texture.
My batter is very runny, did I do something wrong?
No, you did it perfectly! This specific type of chocolate cake batter is supposed to be very thin and liquid. This high moisture content is what creates the ultra-soft crumb.
Can I bake this in round pans instead?
Yes, this recipe yields enough batter for two 8-inch or 9-inch round cake pans. You will likely need to reduce the baking time to 25-30 minutes.
How do I prevent the cake from sticking to the pan?
Grease the pan thoroughly with butter or shortening, then dust it with cocoa powder instead of flour. This prevents white flour streaks on your dark cake.
Can I use Dutch-process cocoa powder?
Yes, you can. Dutch-process cocoa will give the cake a darker color and a slightly fudgier flavor, while natural cocoa provides a lighter, reddish crumb. Both work well here.
Is the heavy cream in the frosting necessary?
The heavy cream helps whip air into the frosting, making it fluffy. You can substitute milk, but use less of it, as it is thinner than cream.
Can I freeze the whole cake?
Yes, you can freeze the frosted cake in the pan if you have freezer space. Wrap the entire pan in two layers of plastic wrap and one layer of heavy-duty foil.
What kind of sprinkles work best?
For a birthday look, ‘jimmies’ (the rod-shaped sprinkles) or confetti quins work best as they don’t bleed color into the frosting as easily as nonpareils (the tiny balls).
Conclusion
There are few things in life as universally satisfying as a slice of homemade chocolate cake with peanut butter frosting. It is a combination that transcends trends, bringing out the inner child in everyone who takes a bite. This Fun Chocolate Peanut Butter Birthday Cake for 9×13 pan proves that you don’t need complicated techniques or fancy equipment to create a masterpiece. It is a testament to the power of good ingredients and the magic of a simple sheet cake. Whether you are baking for a crowd or just treating your family, this recipe is guaranteed to become a requested favorite for years to come. So grab your mixer, brew some coffee, and get ready to bake the best birthday cake you’ve ever had.