The Ultimate Fun Chocolate Dinosaur Birthday Cake: A Roar-some Party Centerpiece
Fun Chocolate Dinosaur Birthday Cake Recipe
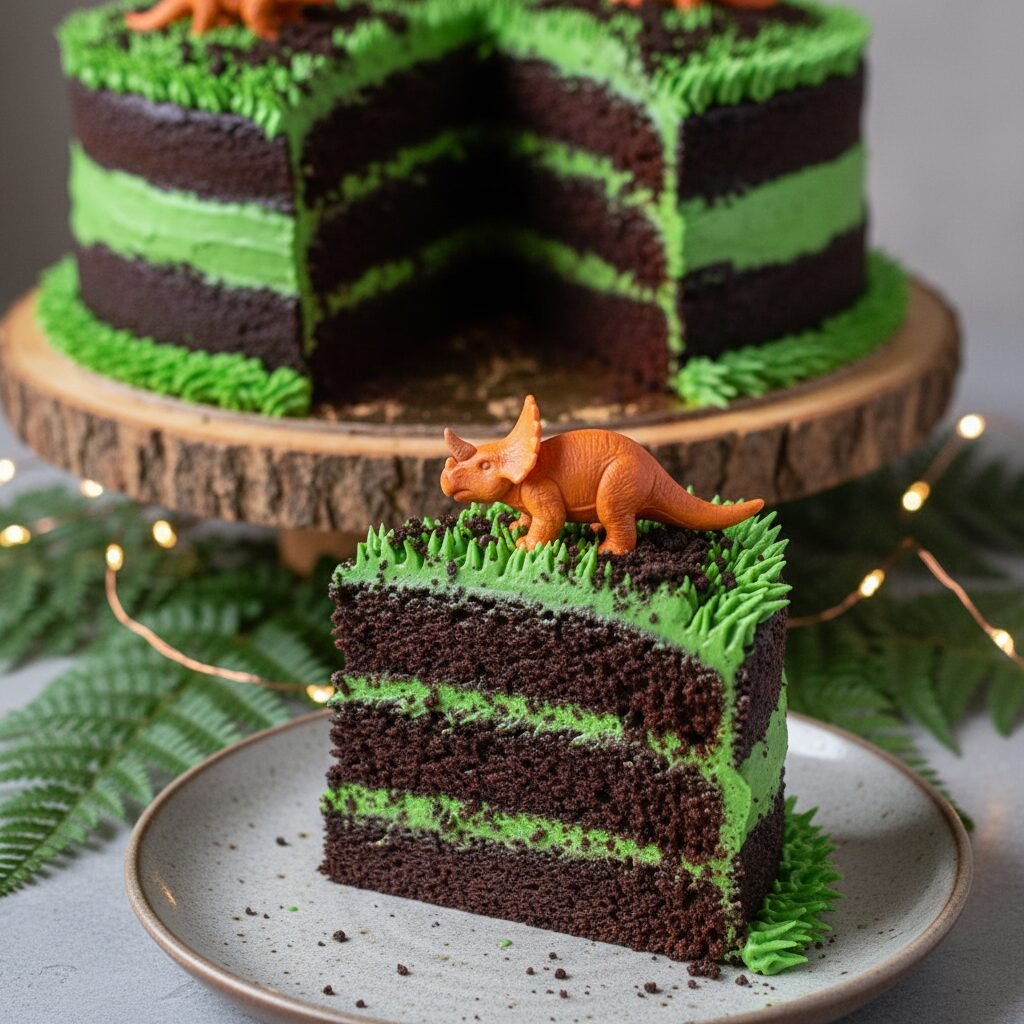
Make your little paleontologist’s dreams come true with this rich, fudge-like chocolate dinosaur birthday cake! Featuring a moist, tender crumb and a luscious buttercream frosting decorated to look like a prehistoric landscape, this showstopper is surprisingly easy to assemble and guaranteed to be the hit of the party.
45 minutes
35 minutes
1 hour 20 minutes (plus cooling)
12-16 servings
Dessert
Baking
American
Vegetarian
There is something undeniably magical about a child’s birthday party, specifically the moment the lights go down and the cake comes out. If you have a dinosaur-obsessed little one in your life, you know that a generic sheet cake just won’t cut it. Enter this Fun Chocolate Dinosaur Birthday Cake—a creation that is as delicious to eat as it is exciting to look at. We aren’t just talking about slapping a plastic T-Rex on a grocery store cake; we are talking about a homemade, deep-dark chocolate masterpiece that serves as the edible terrain for a prehistoric adventure. The base is my all-time favorite chocolate cake recipe, which uses hot coffee to bloom the cocoa powder, resulting in an intensely chocolatey flavor and a crumb that stays moist for days.
But the real fun begins with the decoration. This guide walks you through creating a ‘Jurassic’ landscape using crushed cookie ‘dirt’, green buttercream ‘grass’, and perhaps a flowing ganache ‘lava’ river. It is designed for home bakers who want Pinterest-worthy results without needing a degree in pastry arts. The texture of the cake is robust enough to handle stacking and decorating but tender enough to melt in your mouth. Whether you are celebrating a toddler who just learned to roar or an older child fascinated by fossils, this cake bridges the gap between gourmet flavor and whimsical fun. It is a labor of love that pays off in wide-eyed wonder and chocolate-covered smiles. So, preheat your ovens and get your piping bags ready—we are about to travel back in time for the ultimate birthday treat.
History & Origins
The tradition of the birthday cake dates back centuries, with roots often traced to the German ‘Kinderfest’ in the Middle Ages, where a sweet, brioche-like dough was served to celebrate a child’s birthday. However, the concept of the elaborately decorated, themed birthday cake is a much more modern phenomenon, largely accelerating in the mid-20th century with the availability of affordable baking molds, food coloring, and commercially available fondant. The dinosaur theme, specifically, saw a massive surge in popularity following the ‘Dino-Mania’ of the late 1980s and early 1990s, fueled by pop culture phenomena and blockbuster films that captured the world’s imagination.
Before this era, animal cakes were often generic—bears, bunnies, or circus animals. The shift toward specific, scientifically inspired (albeit often cartoonish) dinosaur cakes marked a change in how we celebrate children’s individual interests. Parents began moving away from standard floral piping to creating narrative scenes on cakes. The ‘excavation’ style cake, featuring crumbled cookie ‘dirt’ and fossilized bones made of white chocolate, became a staple in the early 2000s. Today, the dinosaur cake is a genre of its own, ranging from hyper-realistic sculpted fondant velociraptors to cute, friendly stegosauruses made with simple round pans cut into shapes. This specific recipe honors that history by combining the classic, nostalgic taste of a homemade American chocolate birthday cake with the modern, creative flair of a themed landscape, proving that some trends, like dinosaurs themselves, never truly go extinct.
Why This Recipe Works
This recipe succeeds where others fail because it prioritizes both structural integrity and moisture content—two factors that are often at odds in cake baking. Many decorative cakes are dry and dense to support the weight of frosting and toppers, but we circumvent this by using a reverse-creaming method or a liquid-fat based batter (oil instead of butter). Oil remains liquid at room temperature, ensuring the cake feels moist on the palate even after sitting out at a party. Furthermore, we utilize boiling water or hot coffee in the batter. This isn’t just for moisture; the heat ‘blooms’ the cocoa powder, releasing more flavor compounds and dissolving the cocoa butter, which deepens the chocolate intensity significantly.
For the frosting, we use an American Buttercream with a high ratio of heavy cream and a pinch of salt. This creates a frosting that crusts slightly on the outside—perfect for holding the shape of piped ‘grass’ or ‘scales’—while remaining creamy underneath. The density of the cake layers is perfectly balanced to hold the weight of plastic dinosaur figures or heavy fondant decorations without collapsing. We also employ a ‘crumb coat’ technique in the instructions, sealing in loose crumbs before the final design is applied, which is crucial for achieving that professional, clean look amidst the intentional ‘mess’ of the dinosaur dirt.
Why You’ll Love This Recipe
- ✓Deep, fudge-like chocolate flavor enhanced by blooming cocoa.
- ✓Sturdy crumb perfect for stacking and holding decorations.
- ✓Customizable decoration level—from simple sprinkles to elaborate landscapes.
- ✓Uses common pantry staples; no obscure ingredients required.
- ✓Frosting crusts perfectly for durable piping that withstands party temperatures.
- ✓Includes a ‘dirt’ topping technique that kids absolutely love.
Equipment You’ll Need
- ✓Two 8-inch or 9-inch round cake pans
- ✓Electric stand mixer or hand mixer
- ✓Large mixing bowls
- ✓Wire cooling rack
- ✓Offset spatula
- ✓Piping bags and grass tip (Wilton 233 or similar)
- ✓Clean, food-safe toy dinosaurs or fondant cutters
- ✓Serrated knife for leveling
Ingredients
- ✓2 cups granulated sugar
- ✓1 3/4 cups all-purpose flour
- ✓3/4 cup unsweetened cocoa powder (high quality)
- ✓1 1/2 teaspoons baking powder
- ✓1 1/2 teaspoons baking soda
- ✓1 teaspoon salt
- ✓2 large eggs, room temperature
- ✓1 cup whole milk, room temperature
- ✓1/2 cup vegetable oil or canola oil
- ✓2 teaspoons vanilla extract
- ✓1 cup boiling water (or hot coffee for deeper flavor)
- ✓1.5 cups unsalted butter, softened (for frosting)
- ✓5-6 cups powdered sugar (for frosting)
- ✓1/4 cup heavy cream (for frosting)
- ✓Green gel food coloring
- ✓1 pack chocolate sandwich cookies (like Oreos), crushed for ‘dirt’
- ✓Chocolate rocks or malt balls for decoration
Instructions
- Preheat oven to 350°F (175°C). Grease and flour two 8-inch or 9-inch round cake pans, or line the bottoms with parchment paper for easy release.
- In a large mixer bowl, whisk together the sugar, flour, cocoa, baking powder, baking soda, and salt until fully combined.
- Add the eggs, milk, oil, and vanilla extract. Beat on medium speed for about 2 minutes. The batter will be somewhat thick at this stage.
- Reduce mixer speed to the lowest setting and carefully pour in the boiling water (or hot coffee). Mix until just combined. The batter will be very thin and liquid; this is normal.
- Pour the batter evenly into the prepared pans. Tap the pans gently on the counter to release any large air bubbles.
- Bake for 30 to 35 minutes. Test for doneness by inserting a wooden toothpick into the center; it should come out clean or with just a few moist crumbs.
- Cool in the pans for 10 minutes, then remove from pans to wire racks to cool completely. Do not attempt to frost until cakes are fully cool.
- While cakes cool, prepare the frosting: Beat the softened butter until creamy. Gradually add powdered sugar and heavy cream alternately, beating on high until fluffy. Add vanilla and salt.
- Tint about 2/3 of the frosting with green gel food coloring. Keep the rest white or dye it blue for a ‘water’ feature, or chocolate brown for ‘mud’.
- Level the tops of the cooled cakes with a serrated knife if they have domed.
- Place one cake layer on your serving platter. Spread a layer of frosting on top. Place the second layer on top.
- Apply a thin ‘crumb coat’ of frosting all over the cake and refrigerate for 20 minutes to set.
- Apply the final layer of green frosting. Use a spatula to create texture or a piping bag with a grass tip to pipe tufts of grass all over the top.
- Sprinkle crushed cookies in patches to create ‘dirt’ paths. Place chocolate rocks around the base.
- Arrange the clean dinosaur toys or fondant toppers on the cake to create a scene. Serve and enjoy!
Expert Cooking Tips
- ✓Use room temperature ingredients (eggs and milk) to ensure the batter emulsifies properly for a uniform crumb.
- ✓Do not overmix the batter once the flour is added, as this can develop gluten and make the cake tough.
- ✓If using plastic dinosaur toys, run them through the dishwasher or wash thoroughly with hot soapy water first.
- ✓For the blackest ‘dirt’, use the dark cocoa variety of sandwich cookies and remove the cream filling before crushing.
- ✓If your frosting is too soft to pipe grass, chill it in the fridge for 10 minutes to firm up.
- ✓Weigh your flour if possible (approx. 120g per cup) to avoid a dry cake caused by packing too much flour into the measuring cup.
Substitutions and Variations
This recipe is quite versatile. If you need a gluten-free version, swap the all-purpose flour for a high-quality 1:1 gluten-free baking flour blend; the moisture in this recipe handles GF flours well. For a dairy-free cake, substitute the milk with almond or soy milk, and use a plant-based butter alternative for the frosting. If you don’t have vegetable oil, melted coconut oil or light olive oil works, though it may impart a slight flavor. For the boiling water, using hot coffee is highly recommended as it enhances the chocolate flavor without making the cake taste like coffee; however, plain water works fine if you prefer to avoid caffeine. You can also swap the buttercream for a chocolate ganache if you prefer a richer, less sugary coating.
Common Mistakes to Avoid
The most common mistake is frosting the cake before it is completely cool. Even a slightly warm cake will melt the butter in the frosting, causing the layers to slide and the decoration to droop. Another error is over-baking; check the cake 5 minutes before the timer goes off. Chocolate cake is hard to judge by color, so rely on the toothpick test. When decorating, avoiding a ‘crumb coat’ is a mistake; skipping this step often leads to chocolate crumbs getting mixed into your pristine green grass, ruining the effect. Finally, using liquid food coloring instead of gel can thin out your frosting too much; always stick to gel paste for vibrant colors without changing the consistency.
Serving Suggestions
Serve this cake on a large, rustic wooden board or a platter decorated with large tropical leaves (real or paper) to enhance the jungle theme. It pairs beautifully with a scoop of vanilla bean ice cream to cut through the richness of the chocolate. For a party, consider serving ‘dino egg’ punch (lemonade with frozen grapes) or green ‘swamp water’ alongside. If you are feeling extra festive, place sparklers on the cake instead of traditional candles for a volcanic effect during the birthday song.
Storage and Reheating Tips
This cake can be stored at room temperature in an airtight cake carrier for up to 3 days. The sugar and fat content act as preservatives. If you have used a perishable filling (like fresh fruit or whipped cream), it must be refrigerated. To freeze, you can freeze the baked, unfrosted layers wrapped tightly in plastic wrap for up to 3 months. Thaw them in the fridge overnight before decorating. Leftover frosted slices can also be frozen; place them on a baking sheet to freeze the frosting solid, then wrap individually in plastic wrap and foil.
Nutrition Facts (Estimated)
| Serving Size | 1 slice |
| Calories | 580 |
| Fat | 28g |
| Saturated Fat | 12g |
| Unsaturated Fat | 14g |
| Trans Fat | 0g |
| Cholesterol | 65mg |
| Sodium | 320mg |
| Carbohydrates | 78g |
| Fiber | 4g |
| Sugar | 45g |
| Protein | 6g |
Frequently Asked Questions
Can I make this cake in advance?
Yes, you can bake the cake layers 1-2 days in advance. Wrap them tightly in plastic wrap and store them at room temperature or in the fridge. Decorate the day of or the night before the party.
How do I make the grass look realistic?
Use a multi-opening piping tip (like Wilton 233). Hold the bag at a 90-degree angle, squeeze to form the base, pull up, and release pressure quickly to break the icing strands.
Can I use a 9×13 sheet pan instead?
Absolutely. The baking time may need to be adjusted slightly (usually 35-40 minutes). A sheet cake provides a larger surface area for a sprawling dinosaur landscape.
What if I don’t have buttermilk?
You can make a substitute by adding 1 tablespoon of lemon juice or white vinegar to a cup of regular milk and letting it sit for 5 minutes until it curdles.
Is the coffee flavor strong?
No, the hot coffee serves to intensify the cocoa flavor. The final cake will taste like rich chocolate, not a mocha latte.
How do I prevent the cake from sticking to the pan?
Grease the pan thoroughly with butter or spray, line the bottom with parchment paper, and flour the sides. This ‘belt and suspenders’ approach guarantees release.
Can I use natural food coloring?
Yes, you can use matcha powder or spirulina for green, though it may impart an earthy flavor. Commercial natural food dyes are also available but may result in more pastel tones.
How do I transport this cake?
A tall cake box is essential. If the dinosaurs are tall, you might need to add them once you arrive at the venue to avoid crushing them with the box lid.
Conclusion
Creating a Fun Chocolate Dinosaur Birthday Cake is more than just baking; it’s about crafting a memory. The joy on a child’s face when they see a prehistoric world made just for them is worth every minute of measuring and piping. This recipe provides a foolproof foundation with its ultra-moist chocolate base, allowing your creativity to run wild with the decorations. Whether you keep it simple with a few plastic toys or go all out with fondant volcanoes and piping-bag foliage, the result will be a delicious centerpiece that tastes as good as it looks. Happy baking, and may your celebration be a roaring success!