The Ultimate Classic British Victoria Sponge Cake: A Royal Tea Time Treat
Classic British Victoria Sponge Cake Recipe
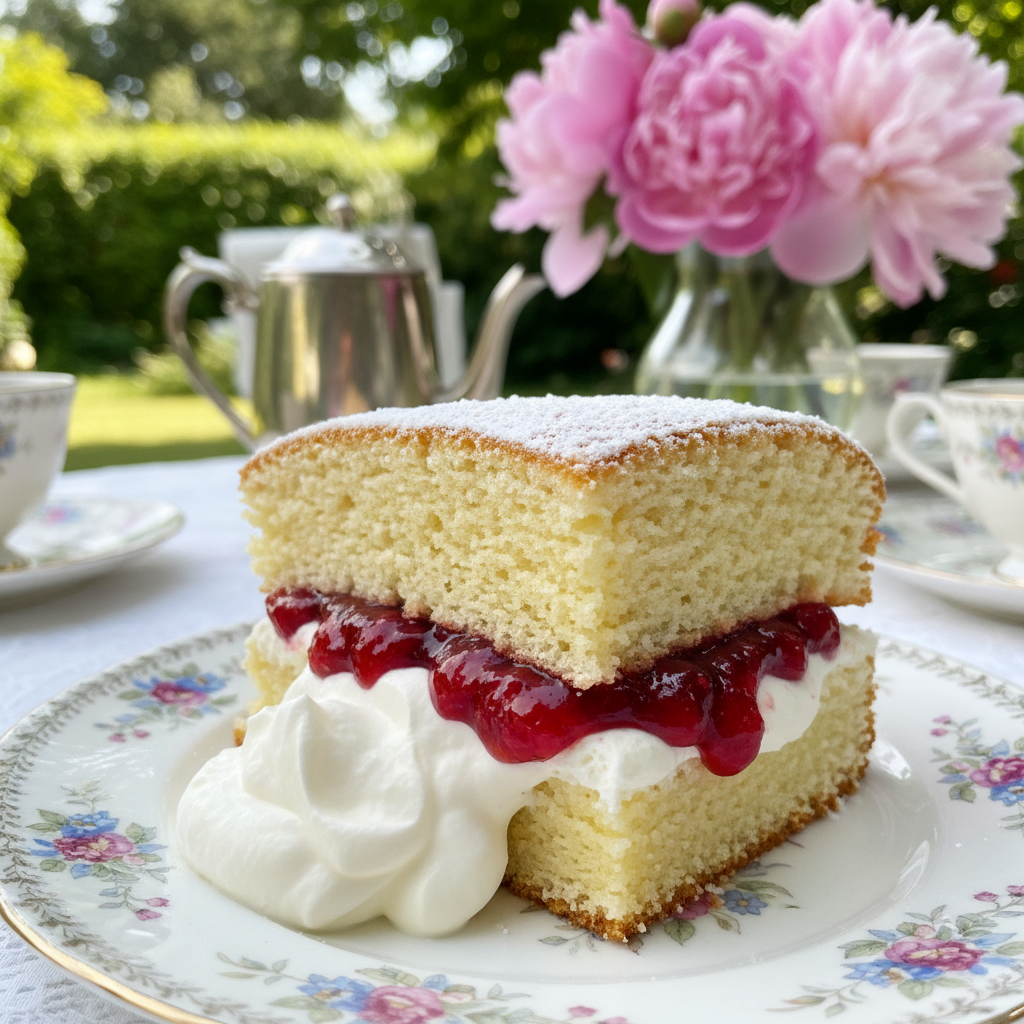
Experience the elegance of a true British classic with this foolproof Victoria Sponge Cake recipe. Featuring two airy, golden sponge layers sandwiched with sweet strawberry jam and luscious whipped cream, this cake is the crown jewel of any afternoon tea.
20 minutes
25 minutes
45 minutes
8-10 Slices
Dessert
Baking
British
Vegetarian
There is perhaps no cake more iconic in the realm of British baking than the Victoria Sponge. Often referred to simply as a ‘Victoria Sandwich,’ this cake is the epitome of understated elegance. It doesn’t rely on fancy piping, fondant decorations, or complex flavor combinations. Instead, it champions the beauty of simplicity: the perfect marriage of buttery, vanilla-scented sponge, sharp fruit jam, and rich cream. When done correctly, the texture is impossibly light and airy, melting in your mouth with every bite. It evokes images of sunny garden parties, vintage china, and the comforting ritual of afternoon tea.
However, achieving that quintessential ‘air-light’ texture requires precision. Unlike American butter cakes which can be denser, a true British sponge relies heavily on the aeration of butter and sugar, and the specific ratios of ingredients. In this comprehensive guide, we are moving beyond the basics to explore exactly how to achieve a bake that would make Mary Berry proud. We will discuss the importance of ingredient temperature, the ‘weighing the eggs’ method which guarantees a perfect rise every time, and the debate between buttercream versus fresh whipped cream. Whether you are hosting a bridal shower, a birthday party, or simply craving a slice of nostalgia with your midday Earl Grey, this Victoria Sponge recipe promises to be a staple in your baking repertoire.
History & Origins
The history of the Victoria Sponge is deeply intertwined with the history of the British High Tea. In the early 19th century, dinner was served quite late, often around 8:00 PM, leaving a long gap between lunch and the evening meal. Anna, the Duchess of Bedford and a lady-in-waiting to Queen Victoria, is credited with inventing ‘afternoon tea’ around 1840 to bridge this hunger gap. She would request a tray of tea, bread and butter, and cake to be brought to her room in the late afternoon. This private habit soon evolved into a fashionable social event among the aristocracy.
Queen Victoria herself adopted this new craze with enthusiasm. The sponge cake served at her tea parties was originally a nursery cake, simple and plain, but it evolved significantly with the invention of baking powder by Alfred Bird in 1843. Prior to this, cakes were leavened with yeast or by beating eggs for hours. The introduction of baking powder allowed for a ‘buttery sponge’ that could rise higher and lighter than the traditional pound cakes of the era. The cake, consisting of two layers of sponge sandwiched with jam (and later cream), was named after the Queen who loved it so dearly. Interestingly, the traditional filling was only raspberry jam; the addition of cream is a more modern, 20th-century luxury. Today, the Victoria Sponge remains a symbol of British culinary heritage, celebrated in village fetes and baking competitions across the UK.
Why This Recipe Works
This recipe works because it adheres to the golden rule of sponge baking: equal weights. While many recipes give you static cup measurements, the most reliable way to bake a Victoria Sponge is to weigh your eggs in their shells first. Once you have that weight, you measure out the exact same weight in butter, sugar, and self-raising flour. This 1:1:1:1 ratio ensures the chemical balance of fat, sugar, and structure is perfect, regardless of whether your eggs are slightly larger or smaller than average.
Furthermore, the method emphasizes the ‘creaming’ stage. By beating the butter and sugar until pale and almost white, you mechanically trap air into the mixture. This air expands in the oven, assisted by the baking powder, creating that distinctive lofty crumb. We also use caster sugar (superfine sugar) rather than granulated sugar, as its finer crystals dissolve more readily into the butter, preventing a gritty texture and aiding in creating a finer crumb structure. Finally, the decision to use room-temperature ingredients is non-negotiable; it prevents the batter from curdling, ensuring a smooth emulsion that bakes evenly without greasy pockets.
Why You’ll Love This Recipe
- ✓Uses the foolproof ‘weigh-the-eggs’ method for perfect ratios.
- ✓Produces an incredibly light, airy, and moist crumb.
- ✓Classic filling of high-quality strawberry jam and Chantilly cream.
- ✓Simple ingredients found in any pantry.
- ✓Ready in under an hour, perfect for last-minute hosting.
- ✓Elegant presentation suitable for birthdays or high tea.
Equipment You’ll Need
- ✓Kitchen scale (essential)
- ✓Stand mixer or electric hand whisk
- ✓Two 8-inch (20cm) round cake tins
- ✓Parchment paper
- ✓Sieve
- ✓Spatula
- ✓Wire cooling rack
- ✓Palette knife
Ingredients
- ✓4 large Eggs (weighed in shells, approx 225g – use this weight for other ingredients)
- ✓225g Unsalted Butter, very soft (match egg weight)
- ✓225g Caster Sugar (match egg weight)
- ✓225g Self-raising Flour (match egg weight)
- ✓2 tsp Baking Powder
- ✓1 tsp Vanilla Bean Paste or Extract
- ✓1-2 tbsp Whole Milk (if needed for consistency)
- ✓150g High-quality Strawberry or Raspberry Jam
- ✓300ml Double Cream (Heavy Cream)
- ✓1 tbsp Icing Sugar (Confectioners’ Sugar), plus extra for dusting
Instructions
- Preheat your oven to 180°C (350°F) or 160°C (320°F) for fan-assisted ovens. Grease two 8-inch round sandwich tins with butter and line the bases with parchment paper.
- Weigh your eggs in their shells. Note the weight (e.g., 225g). Weigh out your butter, caster sugar, and flour to match this exact weight.
- In a large mixing bowl or stand mixer, beat the softened butter and caster sugar together on medium-high speed. Beat for at least 5-7 minutes until the mixture is very pale, almost white, and fluffy. Scrape down the sides of the bowl occasionally.
- Break the eggs into a jug and beat lightly with a fork. With the mixer running on low, gradually add the beaten eggs to the butter mixture, a little at a time, beating well between each addition to prevent curdling. Add the vanilla extract.
- Sift the flour and baking powder together. Gently fold this into the batter using a large metal spoon or spatula. Use a ‘figure-of-eight’ motion to cut through the mixture. Do not overmix, or you will knock out the air bubbles.
- If the batter feels too stiff (it should be a ‘dropping consistency’—meaning it drops reluctantly from a spoon), gently fold in 1-2 tablespoons of milk.
- Divide the mixture evenly between the two prepared tins. Smooth the tops gently with a spatula, creating a slight dip in the center to ensure a flat top after baking.
- Bake in the center of the oven for 20-25 minutes. The cakes are done when they are golden brown, shrinking slightly from the sides, and spring back when lightly pressed with a finger.
- Remove from the oven and let them cool in the tins for 5 minutes. Then, carefully turn them out onto a wire rack, peel off the parchment paper, and allow to cool completely.
- While the cakes cool, whip the double cream with 1 tablespoon of icing sugar until it holds soft peaks. Do not over-whip or it will become buttery.
- To assemble, place one sponge layer upside down on a serving plate. Spread generously with the jam. Top the jam with the whipped cream.
- Place the second sponge layer on top (right side up). Dust heavily with icing sugar using a sieve. Serve immediately.
Expert Cooking Tips
- ✓Ensure your butter is extremely soft (room temperature) before starting; hard butter won’t aerate properly.
- ✓Weighing eggs is the secret weapon; even ‘large’ eggs vary in weight, which can throw off the ratio.
- ✓Do not open the oven door before the 20-minute mark, or the sudden drop in temperature may cause the cakes to sink.
- ✓If the batter curdles when adding eggs, add a tablespoon of the weighed flour to stabilize the mixture.
- ✓Use a metal spoon for folding in flour; it cuts through the batter cleaner than a wooden spoon, preserving air.
- ✓Wait until the cakes are completely cold before filling, otherwise the cream will melt and the jam will run.
Substitutions and Variations
If you cannot find caster sugar, you can make your own by pulsing regular granulated sugar in a food processor until fine. If self-raising flour is unavailable, use all-purpose flour and add 2 teaspoons of baking powder for every 150g (approx 1 cup) of flour, plus a pinch of salt. For the filling, traditionalists insist on raspberry jam, but strawberry is equally popular. You can also use lemon curd for a zesty twist. If you prefer a sturdier filling that lasts longer out of the fridge, swap the fresh whipped cream for a vanilla buttercream made from 100g butter and 200g icing sugar. For a dairy-free version, use a high-quality plant-based baking block and a coconut cream whip.
Common Mistakes to Avoid
The most common mistake is overmixing the batter once the flour is added. This develops the gluten and results in a tough, rubbery cake rather than a tender sponge. Another frequent error is using cold ingredients; if the eggs or butter are cold, the emulsion will break, leading to a heavy, greasy cake. Baking at the wrong temperature is also a culprit; if the oven is too hot, the cake will peak in the middle and crack while remaining raw inside. Finally, rushing the cooling process leads to a messy assembly—patience is key when waiting for the sponges to reach room temperature.
Serving Suggestions
This cake is best served on a vintage cake stand as the centerpiece of a table. It pairs beautifully with a pot of hot tea—English Breakfast, Earl Grey, or Darjeeling are classic choices. For a summer twist, serve slices with a side of fresh strawberries and a glass of Pimms or Prosecco. If serving for a birthday, you can top the cake with fresh berries and edible flowers for a festive look without needing heavy fondant icing.
Storage and Reheating Tips
Because this version uses fresh cream, the cake must be stored in the refrigerator if not eaten within 2 hours. It is best consumed on the day it is made but will keep in the fridge for up to 2 days. If you use buttercream instead of fresh cream, the cake can be stored in an airtight container at room temperature for up to 3 days. The unfilled sponge layers can be frozen effectively. Wrap each cooled sponge tightly in a double layer of cling film and freeze for up to 3 months. Defrost thoroughly at room temperature before filling.
Nutrition Facts (Estimated)
| Serving Size | 1 slice |
| Calories | 480 kcal |
| Fat | 28g |
| Saturated Fat | 16g |
| Unsaturated Fat | 10g |
| Trans Fat | 0.5g |
| Cholesterol | 125mg |
| Sodium | 210mg |
| Carbohydrates | 52g |
| Fiber | 1g |
| Sugar | 28g |
| Protein | 6g |
Frequently Asked Questions
Why did my sponge cake sink in the middle?
This usually happens if the oven door was opened too early during baking, causing the air bubbles to collapse. It can also be caused by underbaking or using too much baking powder.
Can I use salted butter?
Yes, you can. In fact, a little salt enhances the flavor. If you use salted butter, just omit any additional pinch of salt from the flour.
What is the difference between a Victoria Sponge and a Pound Cake?
A pound cake traditionally uses a 1:1:1:1 ratio but no raising agent, resulting in a dense cake. A Victoria Sponge uses the same ratio but includes baking powder (self-raising flour) and emphasizes creaming for a much lighter, aerated texture.
Can I make this recipe with the ‘all-in-one’ method?
Yes, you can put all ingredients in a bowl and mix together. However, the traditional creaming method described here generally produces a slightly taller and fluffier sponge.
How do I know when the cake is perfectly done?
The cake should be a golden brown color, pull away slightly from the sides of the tin, and the top should spring back immediately when pressed gently with a finger. A skewer inserted into the center should come out clean.
My batter looks curdled. Is it ruined?
Not at all! This happens if eggs are added too quickly or ingredients are cold. Quickly fold in a tablespoon of your weighed flour, and it should come back together. Even if it looks slightly curdled, it will usually bake fine.
Why is my cake top domed and cracked?
Your oven was likely too hot. The outside cooked and set before the inside finished rising, forcing the middle to burst through the crust. Use an oven thermometer to check accuracy.
Can I use margarine instead of butter?
Yes, baking margarine is often designed specifically for sponges and can make them very light. However, butter provides a superior, richer flavor. Many bakers use a 50/50 mix.
Conclusion
Mastering the Victoria Sponge is a rite of passage for any home baker. It teaches the fundamentals of baking science—temperature, aeration, and ratios—while rewarding you with a dessert that is universally loved. Whether you stick to the traditional raspberry jam or experiment with fresh strawberries and cream, the result is always a slice of pure comfort. So, put the kettle on, get your butter softened, and prepare to enjoy a truly royal treat in the comfort of your own kitchen. Happy baking!