Ultimate Tall Oreo Drip Cake: A Decadent Two-Layer Masterpiece
Tall Oreo Drip Cake Two Layer Cake Recipe
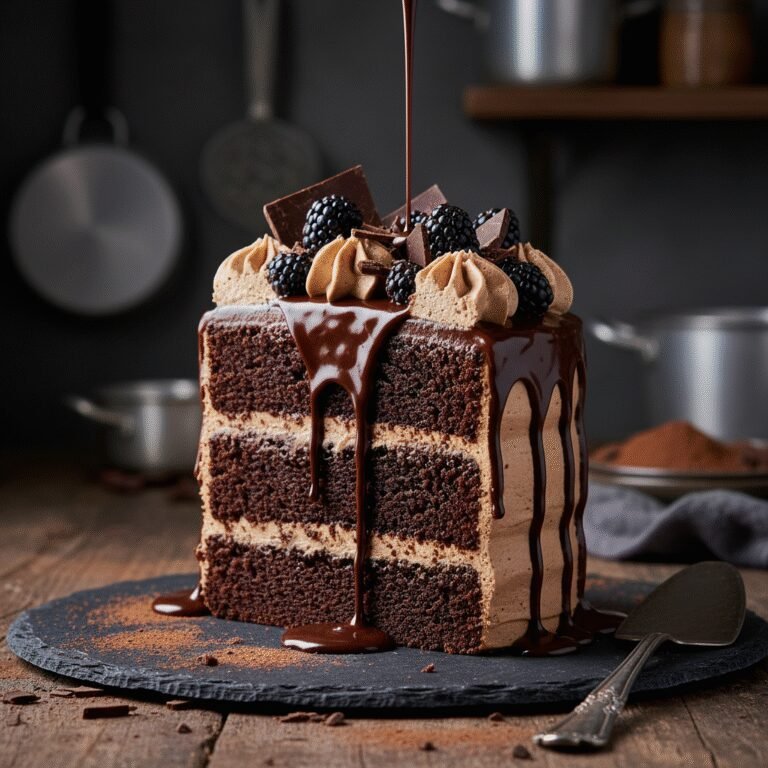
Get ready to impress with this stunning Tall Oreo Drip Cake! Featuring two ultra-thick, moist dark chocolate sponge layers packed with crushed cookies and enveloped in a velvety cookies-and-cream buttercream, this showstopper is finished with a glossy chocolate ganache drip for the ultimate celebration dessert.
45 minutes
35 minutes
2 hours 30 minutes (includes cooling)
12-14 Servings
Dessert
Baking
American
Vegetarian
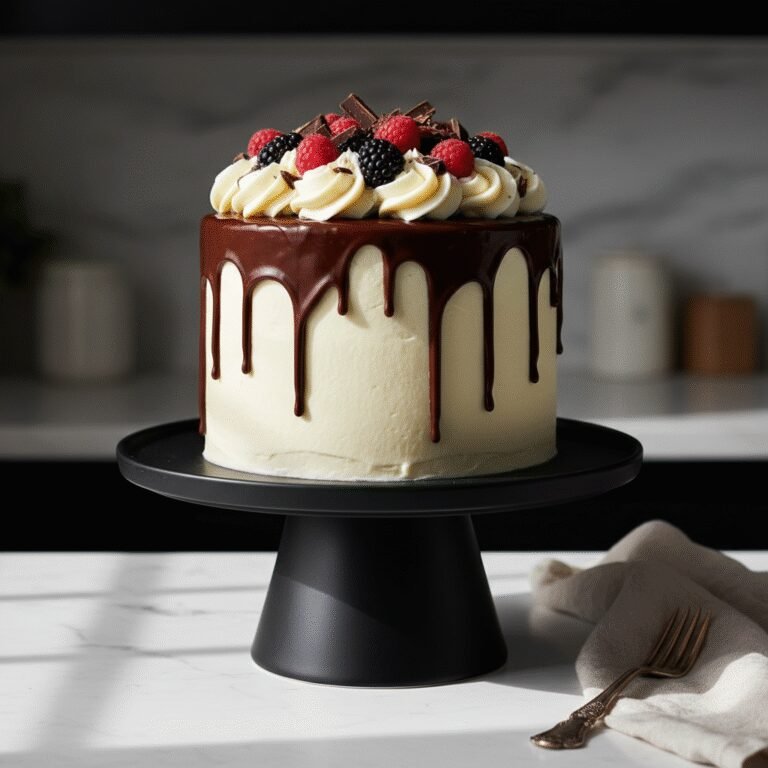
Welcome to the cake of your dreams—a towering, architectural beauty that tastes even better than it looks. If you have ever scrolled through Pinterest and marveled at those perfectly smooth, tall cakes with dramatic chocolate drips cascading down the sides, you might have thought they were strictly the domain of professional bakeries. I am here to tell you that you can absolutely achieve this at home. This Tall Oreo Drip Cake is designed specifically for the home baker who wants that professional ‘wow’ factor without needing a degree in pastry arts.
The magic starts with the sponge. We aren’t just making a standard chocolate cake; we are using black cocoa powder to mimic that authentic, slightly bitter, deep dark flavor of the Oreo wafer itself. The result is a jet-black sponge that contrasts beautifully with the snowy white vanilla buttercream speckled with chocolate crumbs. But we don’t stop there. This is a texture lover’s paradise. The crumb is tender and moist, thanks to the inclusion of buttermilk and oil, while the frosting offers a creamy, airy sweetness that cuts through the richness of the chocolate.
What makes this cake ‘tall’ despite being only two layers? It comes down to the volume of batter and the generous loft of the buttercream filling. By baking two thick, substantial layers and sandwiching them with a hefty amount of filling, we achieve a height that feels majestic and celebratory. The final touch—the glossy ganache drip—adds a touch of elegance and creates that mouth-watering anticipation. Whether it is for a birthday, an anniversary, or just a Tuesday where you need a serious chocolate fix, this cake promises to deliver joy in every slice.
History & Origins
To understand the soul of this cake, we have to look at two distinct culinary histories: the Oreo cookie and the modern drip cake phenomenon. The Oreo itself, America’s favorite cookie, was first introduced by the National Biscuit Company (Nabisco) on March 6, 1912, in New York City. Originally sold in a tin with a glass top, the design has evolved slightly, but the core concept—two dark chocolate wafers sandwiching a sweet crème filling—has remained an iconic staple of American snacking for over a century. It is a flavor profile that triggers deep nostalgia for millions.
Fast forward to the 21st century, specifically around 2015, when the cake decorating world saw a massive shift. Led by Australian bakers like Katherine Sabbath, the ‘drip cake’ trend exploded onto the scene. This style moved away from the stiff, perfect fondant-covered cakes of the 90s and 2000s, embracing a more playful, appetizing aesthetic involving buttercream finishes and a deliberate, artistic drip of ganache or caramel down the sides. It was a rebellion against the inedible-looking cakes of reality TV shows, favoring something that looked undeniably delicious.
Combining these two icons—the century-old cookie and the modern drip aesthetic—creates a dessert that feels both timeless and trendy. The ‘tall’ cake trend also emerged alongside the drip cake, as bakers realized that taller, narrower cakes photographed better for social media platforms like Instagram and Pinterest compared to the traditional wide, flat cakes. This recipe pays homage to that evolution, bringing the classic cookies-and-cream flavor into the modern era of vertical food styling.
Why This Recipe Works
This recipe is engineered for stability and flavor balance, two things that often fight against each other in tall cakes. First, let’s talk about the structure. A tall cake requires a sponge that is sturdy enough to hold weight without collapsing, yet moist enough to be enjoyable. We achieve this by using a ‘reverse creaming’ inspired method where we ensure the fat coats the flour particles, inhibiting gluten formation while maintaining structure. We also use a combination of butter for flavor and oil for lasting moisture, ensuring the cake doesn’t dry out even if it takes you a few days to eat it.
Secondly, the flavor profile is carefully calibrated. Oreo cakes can easily become cloyingly sweet. To combat this, we use Black Cocoa Powder in the batter. This specialty cocoa is heavily alkalized, giving it a charcoal color and a savory, less acidic flavor profile similar to an actual Oreo wafer. This bitterness creates a necessary counterpoint to the sweet American buttercream.
Finally, the drip technique included here uses a specific ratio of heavy cream to chocolate chips (1:1 by weight) which creates a ganache that is fluid enough to run but thick enough to stop midway down the cake. Many recipes result in a runny mess that pools at the bottom; this ratio, combined with our chilling instructions, ensures those picture-perfect drips that freeze in time.
Why You’ll Love This Recipe
- ✓Uses Black Cocoa for authentic Oreo flavor and color.
- ✓Stable buttercream recipe perfect for stacking tall layers.
- ✓Foolproof ganache ratio for the perfect drip effect.
- ✓Moist crumb texture that stays fresh for days.
- ✓Visual showstopper perfect for birthdays and parties.
Equipment You’ll Need
- ✓Two 8-inch round cake pans
- ✓Stand mixer or electric hand mixer
- ✓Wire cooling rack
- ✓Offset spatula
- ✓Bench scraper (for smoothing frosting)
- ✓Piping bag and tips
- ✓Squeeze bottle (for the drip)
- ✓Mixing bowls
- ✓Parchment paper
Ingredients
- ✓2 cups All-purpose flour
- ✓2 cups Granulated sugar
- ✓3/4 cup Black cocoa powder (or Dutch-process)
- ✓2 tsp Baking soda
- ✓1 tsp Baking powder
- ✓1 tsp Salt
- ✓1 cup Buttermilk, room temperature
- ✓1/2 cup Vegetable oil
- ✓2 large Eggs, room temperature
- ✓2 tsp Vanilla extract
- ✓1 cup Hot coffee (or hot water)
- ✓1.5 cups Unsalted butter, softened (for frosting)
- ✓5 cups Powdered sugar
- ✓1/4 cup Heavy cream (for frosting)
- ✓15 Oreos, finely crushed (for frosting)
- ✓1/2 cup Semi-sweet chocolate chips (for drip)
- ✓1/2 cup Heavy cream (for drip)
- ✓Whole Oreos and whipped cream for garnish
Instructions
- Preheat your oven to 350°F (175°C). Grease two 8-inch round cake pans and line the bottoms with parchment paper. Dust the sides with cocoa powder.
- In the bowl of a stand mixer, whisk together the flour, sugar, black cocoa, baking soda, baking powder, and salt.
- Add the buttermilk, vegetable oil, eggs, and vanilla extract to the dry ingredients. Mix on medium speed until well combined, about 2 minutes.
- Reduce the mixer speed to low and carefully pour in the hot coffee. Mix just until combined. The batter will be very thin; this is normal.
- Divide the batter evenly between the two prepared cake pans.
- Bake for 30-35 minutes, or until a toothpick inserted into the center comes out clean or with just a few moist crumbs.
- Remove from the oven and let the cakes cool in the pans for 10 minutes, then turn them out onto a wire rack to cool completely.
- While cakes cool, make the buttercream. Beat the softened butter on high speed for 5 minutes until pale and fluffy.
- Gradually add the powdered sugar, one cup at a time, mixing on low speed. Once incorporated, increase to high speed for 3 minutes.
- Add the 1/4 cup heavy cream and vanilla extract. Beat for another minute. Fold in the finely crushed Oreos by hand.
- To assemble, level the tops of the cooled cakes if they have domed. Place one layer on your serving plate.
- Spread a generous layer of Oreo buttercream over the first cake layer. Top with the second cake layer, upside down (flat side up) for a straight top edge.
- Apply a thin ‘crumb coat’ of frosting all over the cake to seal in crumbs. Chill in the fridge for 20 minutes.
- Apply the final thick layer of frosting and smooth the sides with a bench scraper. Chill the cake again for at least 30 minutes before the drip.
- Make the ganache: Place chocolate chips in a heat-proof bowl. Heat 1/2 cup heavy cream until it just begins to simmer, then pour over the chocolate. Let sit for 5 minutes, then whisk until smooth. Let it cool slightly until it creates a slow drip.
- Using a spoon or squeeze bottle, apply the drip around the edges of the chilled cake, letting it run down the sides. Fill in the top center with the remaining ganache.
- Pipe swirls of buttercream on top and garnish with whole Oreos before the ganache sets completely.
Expert Cooking Tips
- ✓Use room temperature ingredients (eggs, buttermilk, butter) to ensure the batter emulsifies properly.
- ✓Do not skip the hot coffee; it blooms the cocoa powder and intensifies the chocolate flavor without making the cake taste like coffee.
- ✓Chill the cake thoroughly before applying the warm ganache drip to ensure the drips stop midway down the cake.
- ✓If using a squeeze bottle for the drip, test one drip on the back of the cake first to check the consistency.
- ✓Sift your powdered sugar to avoid grainy buttercream.
- ✓For extra tall layers, you can use 6-inch pans instead of 8-inch pans, but increase baking time by 5-10 minutes.
Substitutions and Variations
Baking is a science, but there is some room for flexibility. If you cannot find Black Cocoa powder, standard Dutch-process cocoa works fine, though the cake will be brown rather than black. You can substitute the buttermilk with a mixture of regular milk and a tablespoon of white vinegar or lemon juice (let it sit for 5 minutes). If you need to make this egg-free, commercial egg replacers or flax eggs (1 tbsp flax meal + 3 tbsp water per egg) work reasonably well in this moist batter. For the frosting, if you find it too sweet, add a pinch of salt or replace half the butter with cream cheese for a tangier Cream Cheese Oreo frosting. The vegetable oil can be swapped for melted coconut oil or canola oil.
Common Mistakes to Avoid
The most common mistake with this recipe is rushing the cooling process. If you try to frost warm cakes, the butter in the frosting will melt, and the layers will slide off each other. Another issue is the ganache temperature; if it is too hot, it will melt your buttercream and run all the way to the plate. If it is too cold, it will look clumpy. Aim for a consistency similar to squeeze-bottle honey. Lastly, over-mixing the batter after adding the flour can lead to a dense, rubbery cake. Mix only until the flour streaks disappear.
Serving Suggestions
This cake is a centerpiece, so serve it with pride! It slices best when slightly chilled, but the flavor and texture are superior at room temperature. I recommend taking it out of the fridge 30 to 60 minutes before serving. Use a sharp, long knife run under hot water and wiped dry for clean, professional-looking slices. Serve with a tall glass of cold milk or a hot espresso to balance the sweetness. A side of fresh raspberries or strawberries also adds a nice tart contrast to the heavy chocolate and cream flavors.
Storage and Reheating Tips
Store any leftover cake in an airtight container at room temperature for up to 2 days. If you live in a very hot or humid climate, store it in the refrigerator for up to 5 days, but let it come to room temperature before eating. You can also freeze individual slices wrapped tightly in plastic wrap and foil for up to 3 months. To freeze the whole cake layers ahead of time, wrap the cooled, unfrosted layers in double plastic wrap and freeze for up to a month. Thaw in the fridge overnight before decorating.
Nutrition Facts (Estimated)
| Serving Size | 1 Slice |
| Calories | 680 |
| Fat | 38g |
| Saturated Fat | 18g |
| Unsaturated Fat | 18g |
| Trans Fat | 0.5g |
| Cholesterol | 85mg |
| Sodium | 340mg |
| Carbohydrates | 82g |
| Fiber | 4g |
| Sugar | 55g |
| Protein | 8g |
Frequently Asked Questions
Can I make this cake ahead of time?
Yes! You can bake the layers up to 2 days in advance. Wrap them tightly in plastic wrap and store them at room temperature or in the fridge. The flavor actually develops nicely over 24 hours.
Why is my ganache drip too runny?
The ganache was likely too hot or the cream-to-chocolate ratio was off. Ensure you measure by weight if possible, and let the ganache cool until it thickens to a honey-like consistency before pouring.
Can I use regular cocoa powder instead of black cocoa?
Absolutely. Regular unsweetened cocoa powder or Dutch-process cocoa works great. You just won’t get that signature jet-black color that mimics the Oreo cookie.
How do I get my frosting perfectly smooth?
Use a bench scraper and a turntable. Heat the metal scraper under hot water, dry it, and then glide it over the frosting. The slight heat melts the outer layer of fat just enough to smooth out air bubbles.
Can I turn this into cupcakes?
Yes, this batter makes excellent cupcakes. Fill liners 2/3 full and bake for 18-22 minutes at 350°F. The yield will be approximately 24 standard cupcakes.
My cake sank in the middle. Why?
This usually happens if the oven door was opened too early during baking or if the leavening agents (baking soda/powder) were expired. It can also happen if the batter was over-mixed.
Do I have to use coffee in the batter?
You don’t have to, but it is highly recommended. The coffee enhances the chocolate flavor. If you strictly avoid caffeine, use hot water or decaf coffee.
How do I keep the cake from sliding while frosting?
Put a dab of buttercream on the cake board before placing your first layer down; this acts as glue. Also, chilling the cake after the crumb coat is essential for stability.
Conclusion
There you have it—the ultimate guide to creating a Tall Oreo Drip Cake that looks like it came straight from a boutique bakery. While the steps might seem numerous, each one is simple and contributes to the magnificent final result. The combination of the deeply dark, tender sponge with the sweet, crunchy cookies-and-cream filling is a timeless classic that appeals to both kids and adults. Don’t be afraid to get messy with the drip or pile on the toppings; this cake is meant to be fun, indulgent, and a little bit dramatic. Happy baking!