Tall Chocolate Drip Cake: The Ultimate Two-Layer Celebration Cake
Tall Chocolate Drip Cake Two Layer Cake Recipe
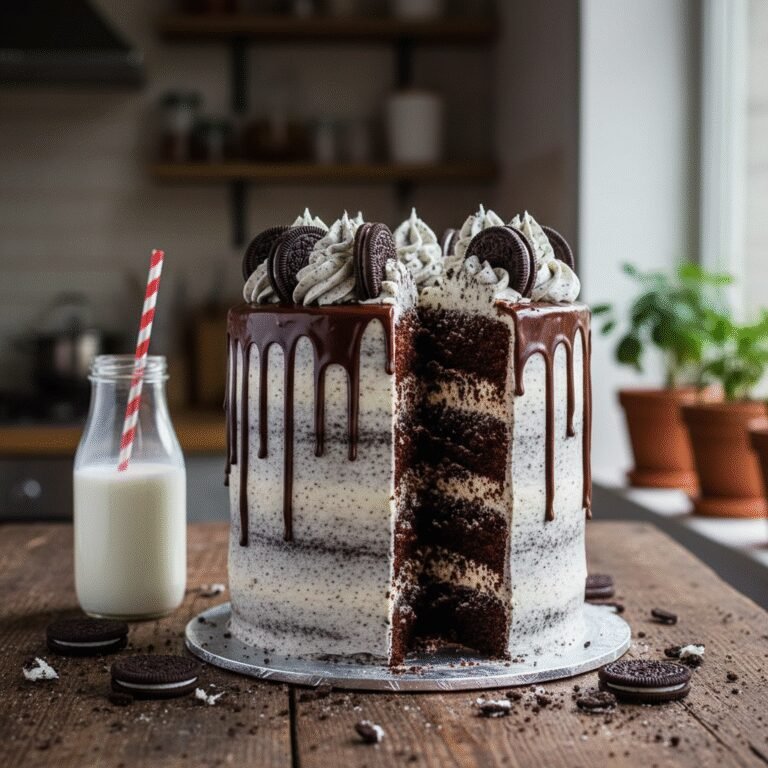
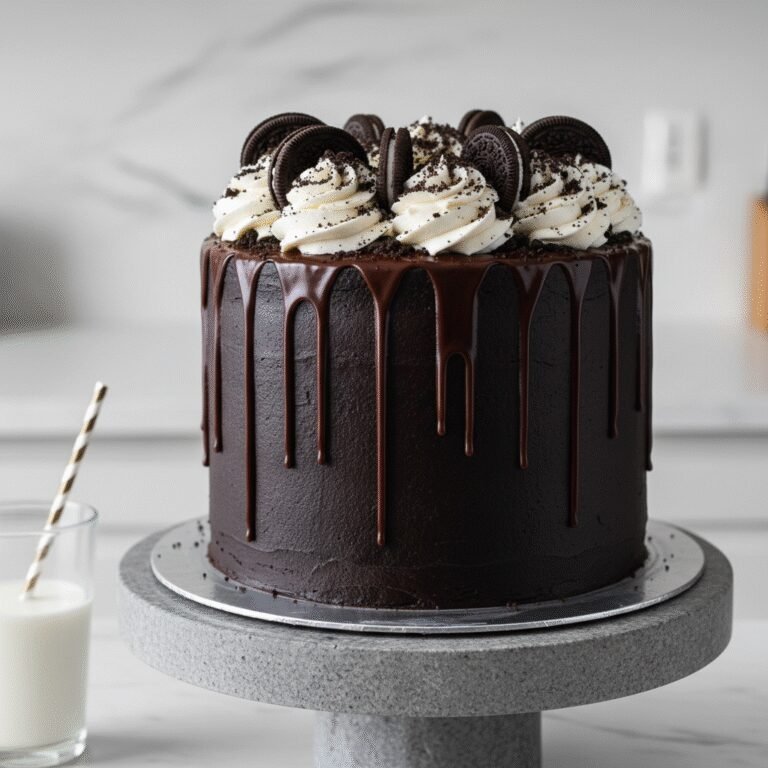
This show-stopping Tall Chocolate Drip Cake features two incredibly moist, fudge-like layers smothered in silky buttercream and crowned with a decadent chocolate ganache drip. It is the perfect centerpiece for birthdays and special occasions, offering a bakery-style aesthetic that is surprisingly achievable at home.
45 minutes
35 minutes
2 hours 30 minutes
12-14 servings
Dessert
Baking
American
Vegetarian
There is something undeniably magnetic about a tall, dark, and handsome chocolate cake. In the world of baking, few things scream ‘celebration’ quite like the dramatic elegance of a well-executed drip cake. This Tall Chocolate Drip Cake Two Layer Recipe is designed to be the ultimate crowd-pleaser, combining the nostalgic comfort of classic chocolate cake with the modern, chic aesthetic that has taken Pinterest and Instagram by storm. We aren’t just making a cake here; we are crafting an edible architectural marvel. The beauty of this recipe lies in its balance. The cake layers themselves are deeply chocolatey, owing their moisture to buttermilk and oil, while the structure is robust enough to stand tall without being dense.
But the real magic happens with the finish. A smooth, vanilla swiss meringue or American buttercream provides a stark, creamy canvas for the star of the show: the chocolate ganache drip. Achieving that perfect drip—one that cascades halfway down the side and freezes in time—is an art form, but one that we have decoded for you in this guide. Whether you are a seasoned baker looking for a reliable go-to or a novice ready to tackle your first ‘fancy’ cake, this recipe delivers on both flavor and visual impact. Prepare to fill your kitchen with the intoxicating aroma of cocoa and to serve a slice that looks just as good as it tastes.
History & Origins
The concept of the layer cake has a rich history that dates back to the mid-19th century, coinciding with the improvement of ovens and the availability of refined ingredients like baking powder. Before this, cakes were often yeast-leavened and more bread-like. The transition to the lighter, fluffier cakes we know today allowed bakers to begin stacking them with jams, jellies, and frostings. Chocolate cake specifically gained traction in the United States in the late 19th and early 20th centuries, particularly after the Duffy-Hye company introduced a new process for making cocoa powder more accessible.
The ‘Drip Cake’ phenomenon, however, is a much more recent culinary evolution. It exploded onto the baking scene around the mid-2010s, largely popularized by Australian bakers like Katherine Sabbath. Moving away from the rigid, fondant-covered cakes that dominated the early 2000s, the drip cake embraced a more playful, ‘perfectly imperfect’ aesthetic. It celebrated the appetizing nature of glazes and ganache, allowing them to run naturally down the sides of the cake. This style brought a sense of movement and indulgence to cake decorating that felt fresh and modern. This specific recipe marries the traditional American chocolate layer cake—rich, moist, and tender—with this contemporary decorating style, creating a dessert that honors baking history while firmly planting itself in modern trend culture.
Why This Recipe Works
This recipe succeeds where many others fail because it meticulously balances moisture with structural integrity. A common problem with ‘tall’ cakes is that the weight of the upper layers can compress the lower ones, leading to a dense, gummy texture. To combat this, we use a reverse creaming method or a carefully balanced wet-dry mix that limits gluten development while ensuring a sturdy crumb. The inclusion of hot coffee is a non-negotiable technique here; the heat blooms the cocoa powder, releasing its full flavor potential and dissolving the sugar completely for a uniform texture.
Furthermore, the ‘drip’ element is often the source of frustration for home bakers. If the ganache is too hot, it melts the buttercream; too cold, and it looks chunky. This recipe provides the precise ratio of heavy cream to chocolate and specific temperature cues to ensure your ganache flows like lava but sets firmly. We also utilize a high-fat buttercream which chills hard, providing the necessary cold surface to arrest the drip halfway down the cake, creating that professional, suspended-in-motion look. Every element, from the acidity of the buttermilk reacting with the baking soda for lift, to the chill time before the pour, is calculated for success.
Why You’ll Love This Recipe
- ✓Deep, intense chocolate flavor enhanced by hot coffee blooming.
- ✓Sturdy yet moist crumb structure perfect for stacking.
- ✓Foolproof ganache ratio for the perfect drip consistency.
- ✓Versatile base that pairs with vanilla, strawberry, or espresso buttercream.
- ✓Impressive height that serves as a stunning centerpiece.
Equipment You’ll Need
- ✓Two 8-inch round cake pans (or 6-inch for extra height)
- ✓Stand mixer or electric hand mixer
- ✓Wire cooling rack
- ✓Offset spatula
- ✓Bench scraper (cake smoother)
- ✓Squeeze bottle or spoon for dripping
- ✓Parchment paper
- ✓Turntable (optional but recommended)
Ingredients
- ✓2 cups all-purpose flour
- ✓2 cups granulated sugar
- ✓3/4 cup unsweetened cocoa powder (Dutch-processed preferred)
- ✓2 teaspoons baking powder
- ✓1 1/2 teaspoons baking soda
- ✓1 teaspoon salt
- ✓1 cup buttermilk, room temperature
- ✓1/2 cup vegetable oil
- ✓2 large eggs, room temperature
- ✓2 teaspoons vanilla extract
- ✓1 cup boiling hot coffee (or hot water)
- ✓1.5 cups unsalted butter, softened (for frosting)
- ✓5 cups powdered sugar (for frosting)
- ✓1/4 cup heavy cream (for frosting)
- ✓1/2 cup semi-sweet chocolate chips (for drip)
- ✓1/3 cup heavy cream (for drip)
Instructions
- Preheat your oven to 350°F (175°C). Grease two 8-inch round cake pans generously with butter or cooking spray and line the bottoms with parchment paper circles. Dust the sides with cocoa powder to prevent sticking.
- In the bowl of a stand mixer or a large mixing bowl, whisk together the flour, sugar, cocoa powder, baking powder, baking soda, and salt until fully combined.
- Add the buttermilk, vegetable oil, eggs, and vanilla extract to the dry ingredients. Mix on medium speed until well combined. Scrape down the sides of the bowl to ensure no dry pockets remain.
- Reduce the mixer speed to low and carefully pour in the boiling hot coffee. Mix until just combined. The batter will be very thin and liquidy; this is normal and essential for a moist cake.
- Divide the batter evenly between the two prepared cake pans. Tap the pans gently on the counter to release any large air bubbles.
- Bake for 30-35 minutes, or until a wooden toothpick inserted into the center comes out clean or with just a few moist crumbs. Do not overbake.
- Remove the cakes from the oven and let them cool in the pans for about 10 minutes. Then, run a knife around the edges and invert them onto a wire rack to cool completely before frosting.
- While the cakes cool, prepare the buttercream. Beat the softened butter until pale and creamy (about 5 minutes). Gradually add powdered sugar, one cup at a time, mixing well after each addition. Add the vanilla and heavy cream, and whip on high speed for 3-4 minutes until fluffy.
- Once cakes are cool, level the tops with a serrated knife if they are domed. Place the first layer on your cake stand. Spread a generous layer of buttercream on top.
- Place the second cake layer upside down (flat side up) on top of the filling. Apply a thin ‘crumb coat’ of frosting all over the cake to seal in crumbs. Chill the cake in the fridge for 20 minutes.
- Apply the final layer of frosting, using a bench scraper to smooth the sides and top perfectly. Chill the cake again for at least 30 minutes. The cake needs to be cold for the drip to work.
- Prepare the ganache drip. Place chocolate chips in a heat-proof bowl. Heat the 1/3 cup heavy cream until it begins to simmer (do not boil over). Pour the hot cream over the chocolate and let it sit for 5 minutes.
- Gently whisk the ganache from the center outwards until smooth and glossy. Let it cool until it is slightly thickened but still pourable (around 90°F or 32°C). Test a drip on the side of a bowl.
- Using a spoon or squeeze bottle, apply the drip to the cold cake. Squeeze a small amount at the edge and let it run down. Continue around the perimeter, then fill in the center top of the cake with the remaining ganache.
- Garnish with sprinkles, chocolate shards, or piped buttercream swirls while the ganache is still wet. Let it set before serving.
Expert Cooking Tips
- ✓Ensure all refrigerated ingredients (eggs, buttermilk) are at room temperature before mixing to prevent the batter from breaking.
- ✓Do not skip the parchment paper; it guarantees your cakes will release from the pans without tearing.
- ✓If your ganache is too thick, add a teaspoon of warm cream. If it’s too thin, let it cool longer or add a few more chocolate chips.
- ✓Chilling the cake before applying the drip is crucial; the cold buttercream helps the ganache set midway down the cake.
- ✓Weigh your flour using a kitchen scale for the most accurate results; too much flour leads to a dry cake.
- ✓Tap the mixing bowl on the counter before baking to bring air bubbles to the surface.
Substitutions and Variations
Baking is a science, but there is room for flexibility. If you do not have buttermilk, you can make a quick substitute by adding one tablespoon of white vinegar or lemon juice to a cup of whole milk and letting it sit for 5 minutes. For the vegetable oil, melted coconut oil or canola oil works perfectly fine. If you want to avoid caffeine, you can use boiling water instead of coffee, though the chocolate flavor may be slightly less intense. For a gluten-free version, swap the all-purpose flour for a high-quality 1:1 gluten-free baking flour blend that includes xanthan gum. In the frosting, you can use salted butter if you prefer a sweet-salty profile, just omit the pinch of salt in the recipe. For the drip, dark chocolate can be used for a richer, less sweet finish, but you may need slightly more cream to maintain the flow consistency.
Common Mistakes to Avoid
The most common mistake with drip cakes is rushing the cooling process. Applying frosting to a warm cake will cause the butter to melt and the layers to slide. Similarly, applying the ganache drip to a room-temperature cake often results in the chocolate running all the way to the bottom plate rather than creating beautiful droplets. Another pitfall is over-mixing the batter after adding the flour; this develops gluten and leads to a tough, bread-like texture. Finally, be careful with the temperature of the ganache. If it is too hot, it will melt the buttercream and create a messy, muddy look. Always do a ‘test drip’ on the back of the cake or a glass to check the consistency before committing.
Serving Suggestions
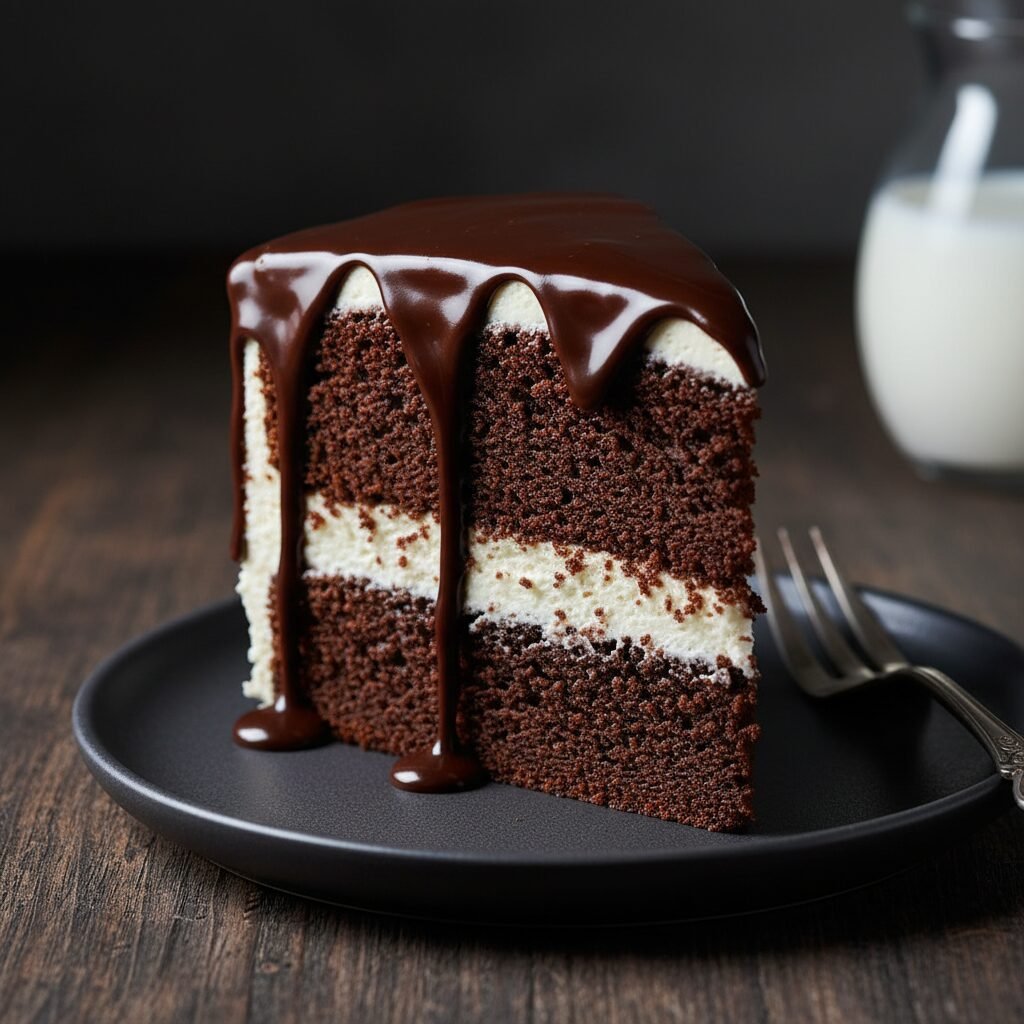
This Tall Chocolate Drip Cake is a centerpiece that deserves to be showcased. Serve it on a high pedestal cake stand to accentuate its height. Use a sharp chef’s knife dipped in hot water and wiped dry between cuts to get clean, professional-looking slices that show off the layers. It pairs beautifully with a scoop of vanilla bean ice cream or a dollop of unsweetened whipped cream to cut through the richness. Fresh berries, such as raspberries or strawberries, also make excellent garnishes that add a pop of color and acidity. For an adult twist, serve with a glass of bold red wine like a Cabernet Sauvignon or a dark stout beer.
Storage and Reheating Tips
Because of the buttercream and ganache, this cake is best stored in a cool environment. It can sit at cool room temperature for up to 2 days in a cake keeper. If your kitchen is warm, or for longer storage, keep it in the refrigerator for up to 5 days. However, always let the cake (or slices) come to room temperature before eating to ensure the buttercream is soft and the cake is moist; cold cake can taste dry and waxy. You can also freeze individual slices wrapped tightly in plastic wrap and foil for up to 2 months. Thaw in the fridge overnight before enjoying.
Nutrition Facts (Estimated)
| Serving Size | 1 slice |
| Calories | 650 |
| Fat | 34g |
| Saturated Fat | 18g |
| Unsaturated Fat | 14g |
| Trans Fat | 0g |
| Cholesterol | 85mg |
| Sodium | 320mg |
| Carbohydrates | 82g |
| Fiber | 4g |
| Sugar | 45g |
| Protein | 6g |
Frequently Asked Questions
Can I make the cake layers ahead of time?
Absolutely. In fact, chilled or frozen cake layers are easier to stack and frost. You can bake the layers, let them cool completely, wrap them tightly in plastic wrap, and freeze them for up to a month. Thaw slightly before frosting.
Why did my cake sink in the middle?
This usually happens if the oven door was opened too early during baking, causing a temperature drop, or if there was too much leavening (baking powder/soda). Ensure your oven temperature is accurate using an oven thermometer.
Can I use white chocolate for the drip?
Yes, but the ratio changes. White chocolate contains no cocoa solids, so you need less cream. Use a ratio of about 3 parts white chocolate to 1 part cream for a good drip consistency.
How do I get smooth sides on my buttercream?
The key is a bench scraper and hot water. Dip your metal scraper in hot water, wipe it dry, and then glide it around the cake. The heat slightly melts the outer layer of butter, creating a glass-like finish.
Do I have to use coffee?
No, you don’t have to, but it is highly recommended. The coffee enhances the chocolate flavor without making the cake taste like coffee. Boiling water is a suitable substitute.
Why is my ganache grainy?
Grainy ganache is usually the result of the chocolate seizing (coming into contact with water) or overheating. Make sure your bowl is dry and don’t boil the cream too vigorously.
Can I use 6-inch pans instead of 8-inch?
Yes! Using 6-inch pans will result in a taller cake with thicker layers, which is very trendy. You may need to increase the baking time slightly, by about 5-10 minutes, as the batter is deeper.
What if I don’t have a turntable?
While a turntable makes smoothing frosting much easier, you can improvise by placing your cake plate on a Lazy Susan or just manually turning the plate as you work.
Conclusion
Mastering the Tall Chocolate Drip Cake is a milestone for any home baker. It bridges the gap between simple comfort baking and professional-style decorating. While the steps might seem numerous, the process is logical and forgiving if you respect the temperatures and times. The result is more than just a dessert; it is a statement piece that brings joy and awe to any gathering. So, preheat that oven, brew some strong coffee, and get ready to create a chocolate masterpiece that will be the highlight of your next celebration. Happy baking!