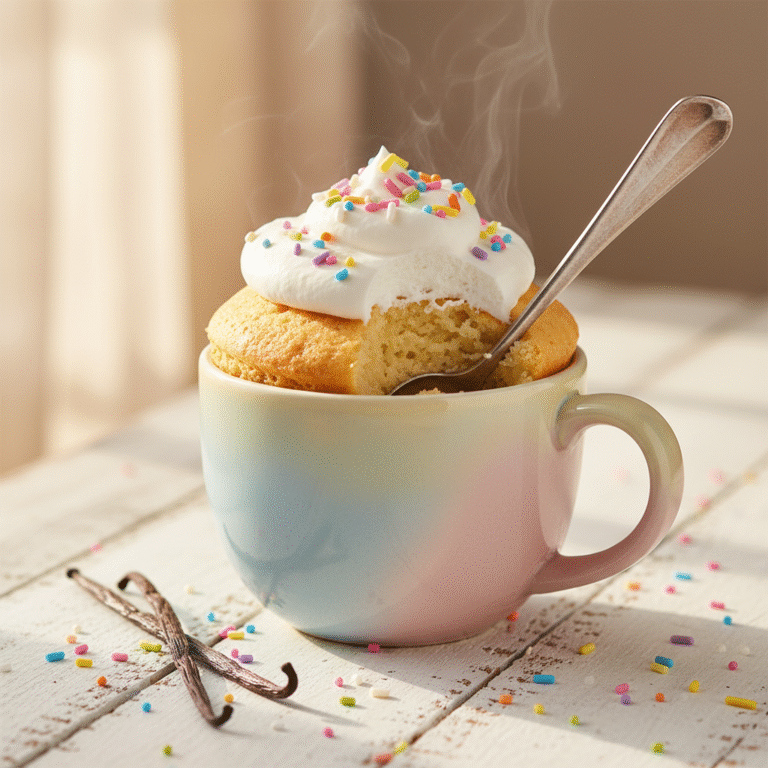
The Ultimate 5-Minute Fudgy Microwave Chocolate Mug Cake for One
Quick Microwave Chocolate Mug Cake For One Person Recipe
Satisfy your deepest chocolate cravings in less than five minutes with this ultra-fudgy, moist, and decadent chocolate mug cake. It is the perfect single-serving dessert that requires no eggs, minimal cleanup, and delivers a rich bakery-style taste right from your microwave.
3 minutes
1 minute
4 minutes
1 serving
Dessert
Microwave
American
Vegetarian
We have all been there: it is 9 PM on a Tuesday, the house is quiet, and suddenly, an undeniable craving for something sweet and chocolatey hits you like a freight train. You don’t want to drag out the stand mixer, preheat the oven, and wait an hour for a batch of brownies that will leave you with a sink full of dishes. Enter the absolute savior of late-night snacking: the Microwave Chocolate Mug Cake. This isn’t just any quick fix; this is a carefully tested recipe designed to banish the rubbery, dry texture often associated with microwave baking. Instead, we are talking about a warm, gooey, spoonable dessert that bridges the gap between a molten lava cake and a fluffy chocolate muffin.
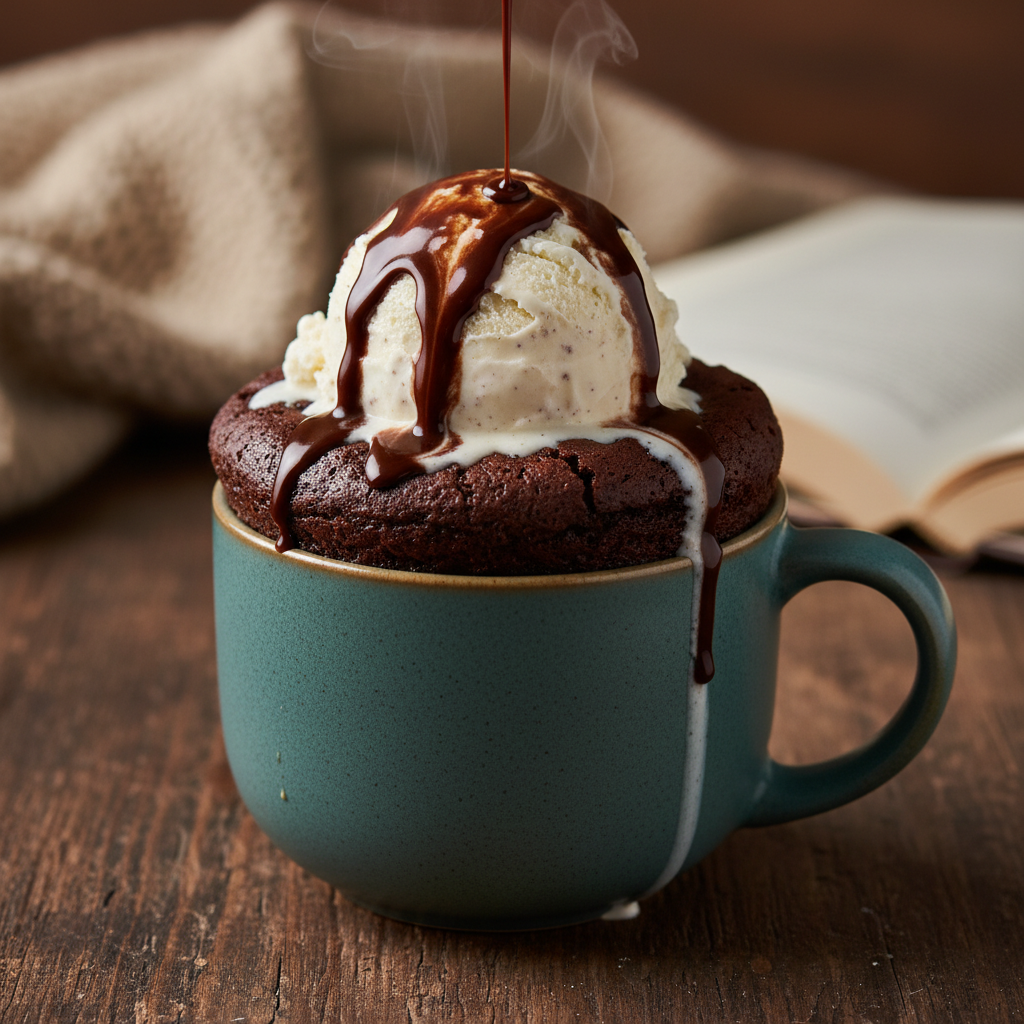
The beauty of this recipe lies in its simplicity and speed. With just a handful of pantry staples—flour, sugar, cocoa powder, and milk—you can transform a humble ceramic mug into a vessel of pure joy. It is the ideal solution for college students in dorms, busy parents needing a moment of solace, or anyone living alone who deserves a homemade treat without the commitment of a full cake. The texture is paramount here; by omitting the egg, which often makes microwave cakes tough and spongy, we achieve a velvety crumb that melts in your mouth. Topped with a scoop of vanilla bean ice cream or a dollop of whipped cream, the contrast of hot cake and cold topping creates a sensory experience that rivals high-end bistro desserts. This guide will walk you through every nuance of the process, ensuring that your mug cake comes out perfectly moist and deeply chocolatey every single time.
History & Origins
The concept of the ‘mug cake’ is a fascinating intersection of technological advancement and culinary convenience. While cakes have been baked in small cups or ramekins for centuries—dating back to the ‘cup cakes’ (literally cakes baked in pottery cups) of the 18th and 19th centuries—the microwave mug cake is a distinctly modern invention. The microwave oven itself, invented accidentally by Percy Spencer in 1945 and popularized in domestic kitchens throughout the 1970s and 80s, revolutionized how we approach cooking speed. However, for decades, the microwave was relegated to reheating leftovers or popping popcorn.
It wasn’t until the internet age, specifically the mid-to-late 2000s with the rise of food blogging and later, Pinterest, that the ‘mug cake’ trend exploded. Home cooks began experimenting with single-serving portions that could be ‘baked’ in under two minutes. Early iterations were often hit-or-miss, frequently resulting in dry, tasteless sponges due to the harsh way microwaves heat food compared to conventional ovens. The cultural shift towards instant gratification and the ‘treat yourself’ mentality of the 2010s fueled the refinement of these recipes. Viral videos and aesthetic Pinterest pins showcased gooey, decadent cakes that promised gourmet results with zero effort. Today, the mug cake has cemented its place in culinary history as a sub-genre of baking, representing the ultimate democratization of dessert: accessible to anyone with a mug, a spoon, and a microwave, regardless of their baking skill level.
Why This Recipe Works
Microwave baking operates on entirely different scientific principles than conventional oven baking, and understanding this is key to why this specific recipe is superior. Ovens cook from the outside in using convection or conduction, slowly setting the batter. Microwaves, however, penetrate the food and excite water molecules, generating heat internally and cooking the food incredibly fast. This rapid cooking process can easily toughen gluten proteins in flour and coagulate egg proteins, leading to that dreaded rubbery texture.
This recipe works because it eliminates the egg entirely. In a standard cake, eggs provide structure and lift, but in a small mug cake, an entire egg is too much binding power for such a small volume of flour, turning the cake into a sweet omelet. By relying on baking powder for lift and a higher ratio of fat (oil or melted butter) and liquid (milk), we ensure the crumb remains tender and moist. Furthermore, the inclusion of oil rather than just butter is crucial; oil remains liquid at room temperature, which translates to a sensation of moistness on the palate even as the cake cools. We also utilize a specific balance of sugar and cocoa powder to ensure the chocolate flavor is intense without being bitter. The short cooking time—roughly 60 seconds—is the final variable. By stopping the cooking process while the center still looks slightly glossy, we allow the residual heat to finish the job, resulting in a fudgy, pudding-like center rather than a dry brick.
Why You’ll Love This Recipe
- ✓Ready in under 5 minutes from start to finish
- ✓No eggs required, preventing a rubbery texture
- ✓Uses simple pantry staples you likely already have
- ✓Perfectly portioned for a single serving
- ✓Rich, fudgy texture similar to a brownie
- ✓Highly customizable with mix-ins like nuts or caramel
Equipment You’ll Need
- ✓Microwave-safe mug (12-16 oz capacity)
- ✓Tablespoon measure
- ✓Teaspoon measure
- ✓Small mixing spoon or fork
- ✓Microwave
Ingredients
- ✓4 tablespoons all-purpose flour
- ✓3 tablespoons granulated sugar
- ✓2 tablespoons unsweetened cocoa powder
- ✓1/2 teaspoon baking powder
- ✓Pinch of salt
- ✓3 tablespoons milk (dairy or non-dairy)
- ✓1 tablespoon vegetable oil or melted butter
- ✓1/4 teaspoon vanilla extract
- ✓1 tablespoon semi-sweet chocolate chips (optional but recommended)
Instructions
- Select a microwave-safe mug that holds at least 12 ounces of liquid to prevent overflowing.
- Add the dry ingredients directly into the mug: flour, sugar, cocoa powder, baking powder, and salt.
- Use a fork or small spoon to mix the dry ingredients thoroughly, ensuring there are no clumps of flour or cocoa at the bottom.
- Add the wet ingredients: milk, oil (or melted butter), and vanilla extract.
- Stir the batter briskly until it is smooth and uniform. Be sure to scrape the bottom corners of the mug to incorporate all the dry mix.
- Sprinkle the chocolate chips on top of the batter. You can gently push a few down into the center for a molten effect.
- Place the mug in the center of the microwave. Cook on high power for 60 to 90 seconds. Start with 60 seconds; the cake should rise and look set around the edges but may still look slightly wet in the very center.
- If the cake is still very liquid, microwave in additional 10-second bursts, checking after each one. Do not overcook.
- Remove the mug carefully from the microwave (the handle may be hot) and let it sit for 1-2 minutes to cool and finish setting.
- Top with whipped cream or ice cream if desired and enjoy immediately while warm.
Expert Cooking Tips
- ✓Use a wide mug rather than a tall, narrow one to ensure even cooking and prevent overflow.
- ✓Do not overmix the batter once the wet ingredients are added; stop as soon as it is smooth to keep it tender.
- ✓If you prefer a molten lava center, place a piece of chocolate or a truffle in the middle of the batter before cooking.
- ✓Microwave wattages vary greatly; if you have a high-powered microwave (1000W+), reduce power to 80% or check at 45 seconds.
- ✓Place a paper towel or small plate under the mug in the microwave just in case of spills.
- ✓Eat the cake while it is warm; mug cakes tend to dry out as they cool down completely.
Substitutions and Variations
This recipe is incredibly forgiving and versatile, allowing for numerous dietary adjustments and pantry swaps. For a gluten-free version, simply substitute the all-purpose flour with a high-quality 1:1 gluten-free baking flour blend; almond flour can also be used but may result in a denser, wetter texture. If you are vegan or dairy-free, use any plant-based milk such as almond, soy, or oat milk, and stick to vegetable oil or melted coconut oil instead of butter. Ensure your chocolate chips are dairy-free as well. Regarding sweeteners, you can swap granulated sugar for brown sugar for a deeper, caramel-like flavor, or use coconut sugar. Liquid sweeteners like maple syrup or honey can be used, but you may need to slightly increase the flour or reduce the milk to maintain the correct batter consistency. If you don’t have oil, applesauce or mashed banana can be used as a low-fat alternative, though this will change the flavor profile and texture, making it more bread-like than cake-like.
Common Mistakes to Avoid
The most common mistake when making a mug cake is overcooking it. Because microwaves cook unevenly and rapidly, a difference of 15 seconds can turn a moist cake into a hard, rubbery puck. Always err on the side of undercooking; the cake continues to cook from residual heat after you remove it. Another frequent error is using the wrong size mug. A standard coffee cup might be too small, causing the batter to bubble over and create a mess. Always use a mug with plenty of headspace. Failing to mix the batter thoroughly is another pitfall; often, pockets of dry flour get stuck in the bottom corners of the mug. Make sure to dig your spoon deep into the edges to incorporate everything. Lastly, using old or expired baking powder will result in a dense cake that doesn’t rise, so always check the freshness of your leavening agents.
Serving Suggestions
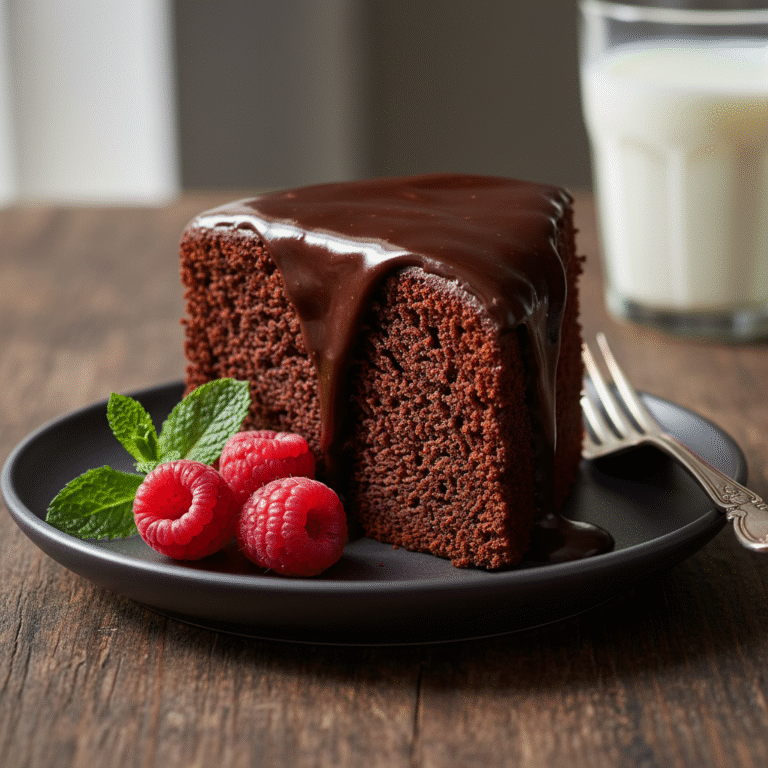
While delicious on its own, this chocolate mug cake is a blank canvas for decadent toppings. The classic pairing is a scoop of vanilla bean ice cream, which melts into the warm cake creating a creamy sauce. Fresh berries, particularly raspberries or strawberries, add a tart brightness that cuts through the richness of the chocolate. A dollop of homemade whipped cream and a dusting of powdered sugar can make it look elegant. For texture lovers, chopped toasted nuts like walnuts or pecans add a wonderful crunch. You can also drizzle caramel sauce, peanut butter, or hot fudge over the top for an extra layer of indulgence. For a sophisticated twist, try a pinch of flaky sea salt or a dash of espresso powder in the batter to enhance the chocolate flavor.
Storage and Reheating Tips
Mug cakes are best enjoyed immediately after cooking. The texture is optimal within the first 10 to 15 minutes. However, if you simply cannot finish it, you can cover the mug tightly with plastic wrap and store it in the refrigerator for up to 24 hours. To reheat, remove the plastic wrap and microwave for 10-15 seconds. Be aware that reheating may dry the cake out slightly. It is not recommended to freeze the cooked mug cake, as the texture will deteriorate significantly upon thawing. If you want to meal prep, you can mix the dry ingredients in small jars or ziplock bags in advance. When the craving strikes, just dump a bag into a mug, add the wet ingredients, and microwave.
Nutrition Facts (Estimated)
| Serving Size | 1 mug cake |
| Calories | 380 |
| Fat | 18g |
| Saturated Fat | 4g |
| Unsaturated Fat | 14g |
| Trans Fat | 0g |
| Cholesterol | 10mg |
| Sodium | 180mg |
| Carbohydrates | 48g |
| Fiber | 3g |
| Sugar | 28g |
| Protein | 5g |
Frequently Asked Questions
Why is my mug cake rubbery?
A rubbery texture is usually caused by two things: overmixing the batter or overcooking the cake. Overmixing develops the gluten in the flour too much, while overcooking evaporates all the moisture. Try mixing just until combined and reducing the cooking time.
Can I make this without a microwave?
Yes, you can bake this in an oven-safe ramekin at 350°F (175°C) for about 12-15 minutes. However, the texture might be slightly different, and it loses the speed advantage of the microwave method.
Can I double the recipe?
You can double the ingredients, but do not cook them in the same mug unless it is a very large soup mug or bowl. It is better to make two separate mug cakes in two separate mugs to ensure even cooking.
Why did my mug cake overflow?
This happens if the mug is too small for the amount of batter and the rise that occurs during cooking. Always use a mug that is at least 12-16 ounces, and fill it no more than halfway.
Can I use water instead of milk?
Technically yes, but the cake will be less rich and flavorful. Milk adds fat and sugar which contributes to a tender crumb and better taste. If using water, consider adding a bit more oil or chocolate chips.
Do I have to use baking powder?
Yes, baking powder is the leavening agent that makes the cake rise. Without it, you will end up with a dense, heavy brownie-like puck rather than a fluffy cake.
Can I add an egg for more protein?
Adding a whole egg to this small amount of batter will likely make the texture spongy and rubbery. If you must add egg, try using just the yolk, but the eggless version is generally superior for texture in single-serving microwave recipes.
Is it safe to eat if it looks wet in the middle?
Since this recipe contains no eggs, there is no risk of salmonella from undercooked eggs. However, raw flour can technically carry bacteria. For food safety, the flour should reach a temperature of 160°F, but generally, a slightly gooey center is the desired texture for this type of dessert.
Conclusion
There you have it—the secret to instant chocolate gratification. This Quick Microwave Chocolate Mug Cake proves that you don’t need hours of time or a kitchen full of equipment to create a dessert that feels special and indulgent. It is the ultimate hack for the modern sweet tooth, combining efficiency with genuine deliciousness. Whether you are curling up with a book on a rainy afternoon or needing a quick pick-me-up after a long day at work, this recipe is your faithful companion. Keep these pantry staples stocked, and you will never be more than five minutes away from a warm, chocolatey hug in a mug. Happy baking!