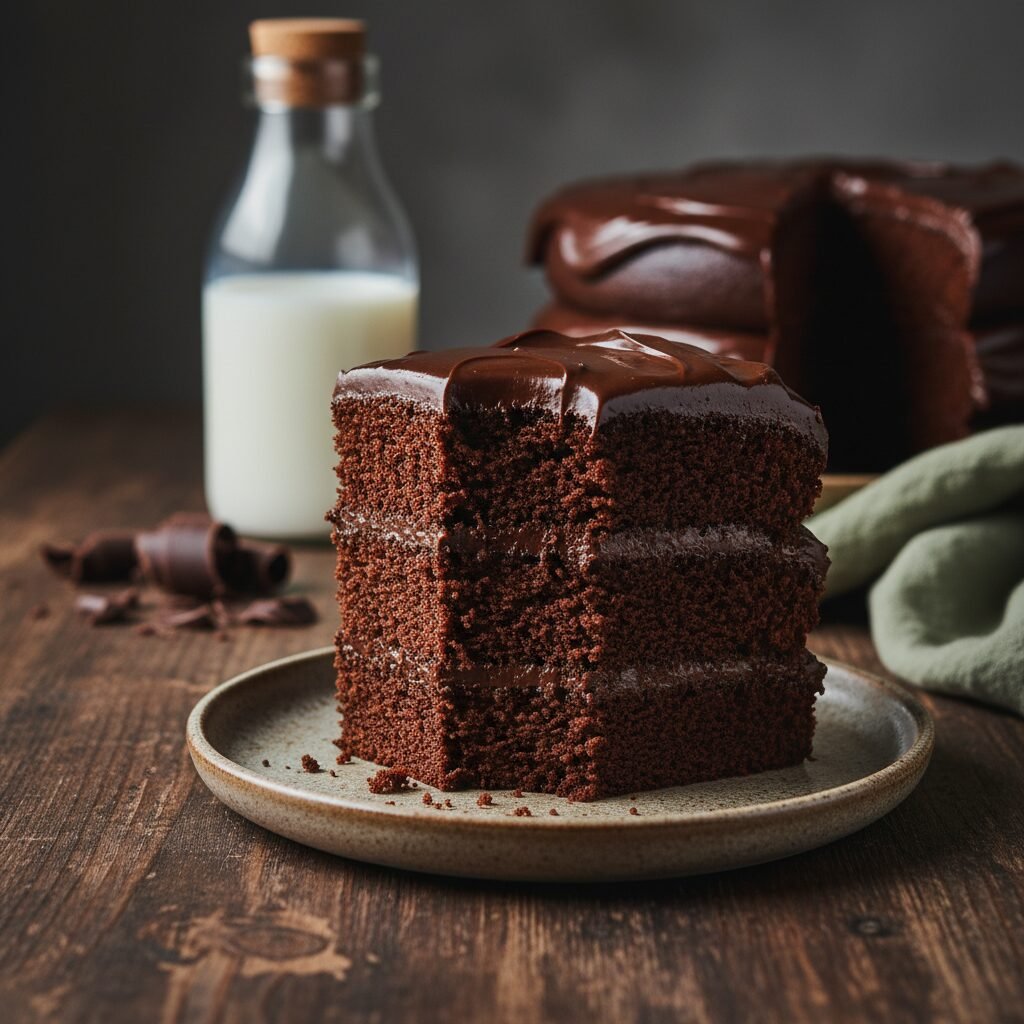
The Ultimate Moist Vegan Chocolate Cake: Rich, Fudgy, and Dairy-Free
Moist Vegan Chocolate Cake Recipe
Discover the secret to the most decadent, velvety chocolate cake that happens to be 100% plant-based. This one-bowl wonder delivers a rich fudge flavor and an impossibly moist crumb without any eggs or dairy, making it the perfect crowd-pleaser for every occasion.
20 minutes
35 minutes
55 minutes
12 servings (Two 8-inch round cakes)
Dessert
Baking
American
Vegan
There is a pervasive myth in the world of baking that in order to achieve a cake with a tender crumb and a rich, moist texture, one requires an abundance of eggs, butter, and heavy cream. This recipe is the definitive proof that this couldn’t be further from the truth. Welcome to the ultimate guide for making a Moist Vegan Chocolate Cake that rivals—and arguably surpasses—its dairy-laden counterparts. This isn’t just ‘good for a vegan cake’; it is simply an extraordinary chocolate cake, period.
The texture is the star of the show here. We are talking about a crumb that is velvety and soft, yet sturdy enough to hold up to a generous layer of vegan buttercream or a silky ganache. The flavor profile is deeply chocolatey, avoiding the cloying sweetness that often plagues store-bought desserts. By utilizing specific pantry staples and understanding the chemistry of vegan baking, we unlock a depth of flavor that is sophisticated yet nostalgic.
Whether you are a lifelong vegan, baking for someone with an egg or dairy allergy, or simply realized you are out of eggs at 9 PM on a Tuesday, this recipe is your savior. It comes together in a single bowl, requires no fancy mixers, and produces consistent, bakery-quality results every single time. Prepare to have your expectations shattered as you take that first bite of dark, fudgy perfection.
History & Origins
The origins of vegan chocolate cake are deeply rooted in American history, specifically tying back to the era of the Great Depression and World War II. During these times, ingredients that we consider staples today—such as butter, milk, and eggs—were either prohibitively expensive or strictly rationed. Home bakers, displaying incredible ingenuity and resilience, had to find ways to bring joy to their tables without these luxury items. This necessity gave birth to what was affectionately known as ‘Wacky Cake,’ ‘Depression Cake,’ or ‘War Cake.’
Instead of relying on eggs for structure and butter for richness, these early recipes utilized a brilliant chemical reaction between vinegar (or sometimes lemon juice) and baking soda to provide the necessary leavening lift. Oil was substituted for butter to provide fat and moisture. While the original recipes were born out of scarcity, they gained a cult following that persisted long after rationing ended. Families passed down these recipe cards not because they had to, but because the cake was genuinely delicious.
In recent decades, as the plant-based movement has surged, this humble ‘Wacky Cake’ has been rediscovered and refined. Modern food science has allowed us to tweak the ratios, incorporating ingredients like Dutch-processed cocoa and coffee to elevate the flavor profile from a simple depression-era treat to a gourmet dessert. This recipe honors that historical ingenuity while applying modern culinary standards to create a masterpiece of texture and taste.
Why This Recipe Works
This recipe succeeds where many others fail due to a few key scientific principles that govern vegan baking. First and foremost is the leavening system. Without the protein structure of eggs to trap air, we rely on the vigorous reaction between white vinegar and baking soda. When these two mix within the batter, they create carbon dioxide bubbles immediately, providing the lift needed for a light, airy sponge rather than a dense brick.
Secondly, the choice of fat is crucial. Butter contains water and milk solids and is solid at room temperature. While delicious, butter-based cakes can actually become firm and slightly dry when cool. Oil, however, remains liquid at room temperature. By using a neutral oil, we ensure that the cake remains incredibly moist and tender on the palate, even days after baking.
Finally, the ‘secret weapon’ in this recipe is the addition of boiling water (or hot coffee) at the very end of the mixing process. This technique, known as ‘blooming’ the cocoa, dissolves the cocoa powder effectively, releasing its full flavor potential and breaking down any lumps. The hot liquid also creates a very thin batter, which allows the flour to hydrate fully without over-developing the gluten, resulting in that melt-in-your-mouth tenderness that defines a high-quality chocolate cake.
Why You’ll Love This Recipe
- ✓Requires only one bowl for easy cleanup
- ✓Completely egg-free and dairy-free
- ✓Uses simple pantry staples you likely already have
- ✓Incredibly moist texture that stays fresh for days
- ✓Deep, rich chocolate flavor enhanced by coffee
- ✓Perfect for birthdays, holidays, or casual baking
Equipment You’ll Need
- ✓Two 8-inch round cake pans
- ✓Large mixing bowl
- ✓Whisk
- ✓Sifter or fine-mesh sieve
- ✓Measuring cups and spoons
- ✓Parchment paper
- ✓Wire cooling rack
- ✓Offset spatula (for frosting)
Ingredients
- ✓2 cups all-purpose flour
- ✓1 3/4 cups granulated sugar
- ✓3/4 cup unsweetened cocoa powder (preferably Dutch-processed)
- ✓2 teaspoons baking soda
- ✓1 teaspoon baking powder
- ✓1 teaspoon salt
- ✓1 cup unsweetened almond milk (or soy milk)
- ✓1 tablespoon white vinegar or apple cider vinegar
- ✓1/2 cup vegetable oil (or melted coconut oil)
- ✓2 teaspoons pure vanilla extract
- ✓1 cup boiling water (or hot brewed coffee for deeper flavor)
Instructions
- Preheat your oven to 350°F (175°C). Grease two 8-inch round cake pans with a little oil and line the bottoms with parchment paper to ensure a clean release.
- In a measuring cup, combine the almond milk and vinegar. Let it sit for about 5-10 minutes to curdle slightly, creating a vegan ‘buttermilk’.
- In a large mixing bowl, sift together the flour, sugar, cocoa powder, baking soda, baking powder, and salt. Whisk well to ensure all dry ingredients are evenly distributed.
- Add the vegan buttermilk mixture, vegetable oil, and vanilla extract to the dry ingredients. Mix with a whisk or electric mixer on low speed until just combined. Do not overmix.
- Carefully pour in the boiling water (or hot coffee). Whisk gently by hand until the batter is smooth and combined. The batter will be very thin and liquidy; this is normal and crucial for the moist texture.
- Divide the batter evenly between the two prepared cake pans.
- Bake in the preheated oven for 30 to 35 minutes. Test for doneness by inserting a wooden toothpick into the center of the cake; it should come out clean or with just a few moist crumbs attached.
- Remove the cakes from the oven and let them cool in the pans for about 10-15 minutes. This allows them to set up slightly before moving.
- Invert the cakes onto a wire cooling rack to cool completely before frosting. If you try to frost them while warm, the frosting will melt and slide off.
Expert Cooking Tips
- ✓Weigh your flour using a kitchen scale (approx. 120-125g per cup) for the most accurate results; scooping can lead to dense cakes.
- ✓Use hot coffee instead of boiling water to intensify the chocolate flavor without making the cake taste like coffee.
- ✓Do not skip the parchment paper; vegan cakes can be more fragile than egg-based cakes, and sticking is a risk.
- ✓Ensure your baking soda is fresh; since this recipe relies heavily on the soda-acid reaction, expired leavening agents will result in a flat cake.
- ✓Let the cake cool completely, or even chill it in the fridge for an hour, before frosting to make assembly easier.
- ✓If using coconut oil, ensure all other ingredients are at room temperature so the oil doesn’t solidify instantly upon contact.
- ✓Tap the pans on the counter a few times before baking to release large air bubbles.
Substitutions and Variations
This recipe is quite forgiving, allowing for several dietary adjustments. For a **Gluten-Free** version, substitute the all-purpose flour with a high-quality 1:1 Gluten-Free Baking Flour blend that contains xanthan gum. The texture may be slightly more fragile, so handle with care.
Regarding **sugar**, you can use coconut sugar for a lower glycemic index, though it will change the flavor profile to be more caramel-like. If you want to avoid **oil**, some bakers substitute unsweetened applesauce for half or all of the oil, though this will result in a denser, more bread-like texture rather than a fluffy cake.
For the **milk**, soy milk is the best alternative to almond milk due to its high protein content, which reacts better with the vinegar to create a thick buttermilk, but oat milk or rice milk will also work in a pinch. Finally, natural cocoa powder can be used instead of **Dutch-processed**, but the cake will be lighter in color and have a slightly more acidic flavor profile.
Common Mistakes to Avoid
The most common mistake with this recipe is **overmixing the batter** once the flour is added. Overmixing develops gluten, which leads to a tough, rubbery cake rather than a tender one. Mix until just combined. Another pitfall is **opening the oven door too early**. This cake relies on steam and chemical lift; opening the door releases heat and can cause the center to sink. Wait until at least 25 minutes have passed before peeking.
Using **cold ingredients** (other than the boiling water) can also be problematic, as room temperature ingredients emulsify better. Lastly, **overbaking** is the enemy of moist cake. Because the cake is dark, it’s hard to see browning, so rely on the toothpick test. If the toothpick comes out bone dry, it might be slightly overdone; a few moist crumbs are ideal.
Serving Suggestions
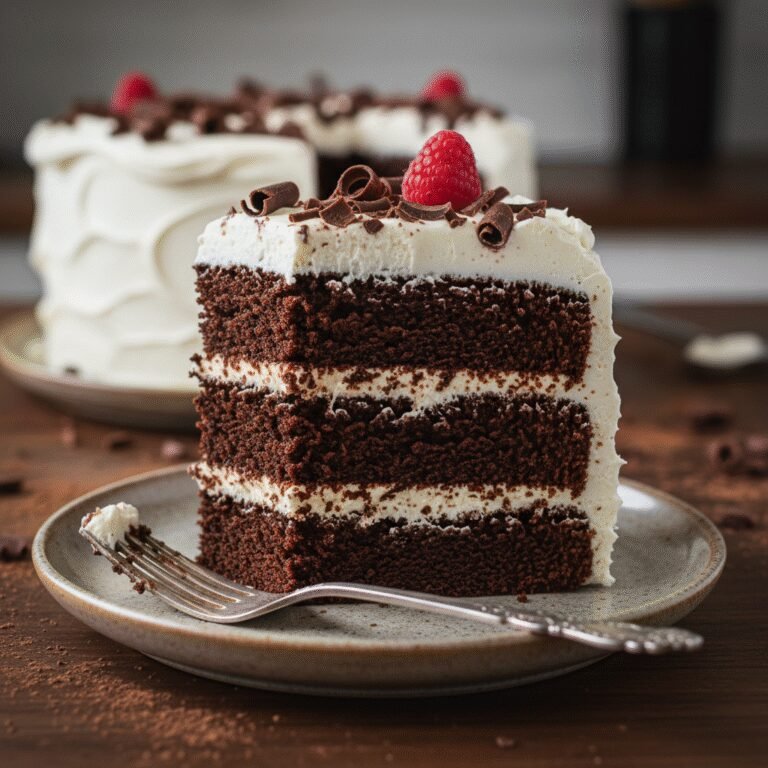
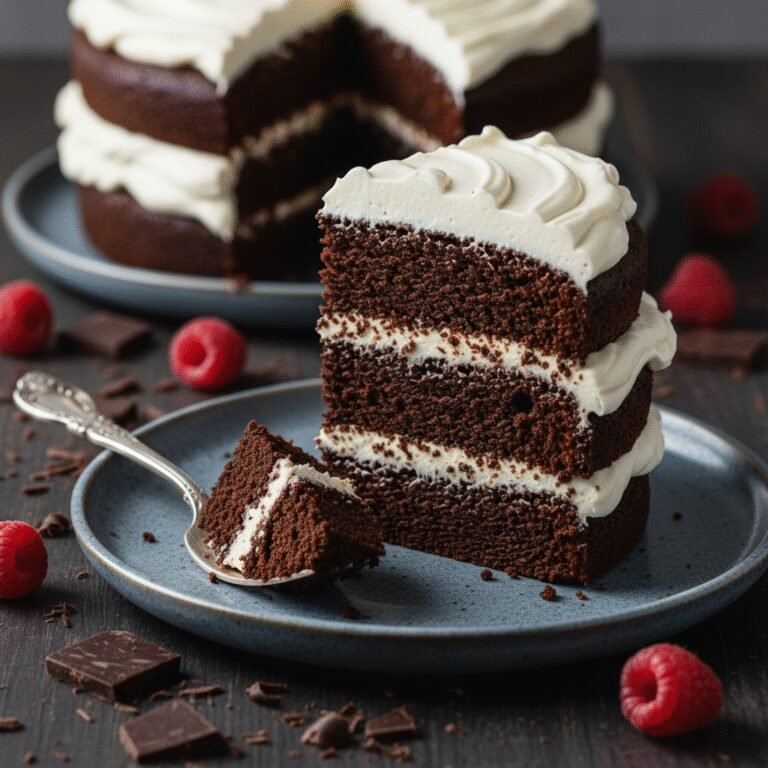
This rich chocolate cake serves as a magnificent canvas for various toppings. A classic **Vegan Chocolate Buttercream** or a **Coconut Cream Ganache** are the most popular choices for a decadent finish. For a lighter option, serve warm slices with a dollop of coconut whipped cream and a handful of fresh raspberries or strawberries to cut through the richness. It also pairs beautifully with a scoop of dairy-free vanilla bean ice cream. If you want to keep it simple, a dusting of powdered sugar and some shaved dark chocolate make for an elegant, rustic presentation suitable for a dinner party.
Storage and Reheating Tips
Because this cake is oil-based, it stays moist longer than butter-based cakes. It can be stored at **room temperature** in an airtight container for up to 3 days. If you live in a hot or humid climate, or if you’ve used a perishable filling, store it in the **refrigerator** for up to 5-7 days. Allow the cake to come to room temperature before eating for the best texture and flavor release.
This cake also **freezes beautifully**. Wrap unfrosted cake layers tightly in plastic wrap, then foil, and freeze for up to 3 months. Thaw in the refrigerator overnight before frosting. You can also freeze individual frosted slices in airtight containers for a quick treat later.
Nutrition Facts (Estimated)
| Serving Size | 1 slice |
| Calories | 340 |
| Fat | 16g |
| Saturated Fat | 2.5g |
| Unsaturated Fat | 13g |
| Trans Fat | 0g |
| Cholesterol | 0mg |
| Sodium | 310mg |
| Carbohydrates | 48g |
| Fiber | 3g |
| Sugar | 28g |
| Protein | 4g |
Frequently Asked Questions
Can I make this recipe into cupcakes?
Yes, absolutely! This batter works perfectly for cupcakes. Fill cupcake liners about 2/3 full and bake at 350°F for 18-22 minutes. This recipe yields approximately 24 cupcakes.
Why do I need to use vinegar?
Vinegar is an acid that reacts with the baking soda (a base). This chemical reaction creates carbon dioxide bubbles, which causes the cake to rise. Since there are no eggs to provide structure and lift, this reaction is essential.
Can I reduce the sugar in this recipe?
You can reduce the sugar by about 1/4 cup without significantly affecting the texture. However, sugar provides moisture as well as sweetness, so reducing it too much may result in a drier, denser cake.
My cake sank in the middle. What went wrong?
Sinking usually happens if the oven door was opened too early, the oven wasn’t hot enough, or there was too much leavening (baking soda/powder). It can also happen if the batter sat out too long before going into the oven.
Can I use a different type of flour?
Cake flour can be used for an even softer crumb, but you may need slightly more of it (add an extra 2 tablespoons). Whole wheat pastry flour works well too, but avoid 100% regular whole wheat flour as it will be too dense.
Does the cake taste like vinegar?
Not at all. The vinegar is chemically neutralized during the baking process as it reacts with the baking soda. You will not taste any sourness in the final product.
Can I bake this in a 9×13 inch pan?
Yes, this recipe fits a standard 9×13 inch rectangular pan perfectly. You will likely need to increase the baking time to 35-40 minutes.
What is Dutch-processed cocoa powder?
Dutch-processed cocoa has been treated with an alkalizing agent to reduce acidity. It is darker in color and has a smoother, more mellow chocolate flavor compared to natural cocoa powder.
Conclusion
There you have it—the only chocolate cake recipe you will ever need, vegan or otherwise. By stripping away the dairy and eggs and focusing on the science of moisture and flavor, we’ve created a dessert that is accessible, affordable, and undeniably delicious. Whether you are celebrating a milestone or just need a chocolate fix on a Friday night, this Moist Vegan Chocolate Cake delivers comfort and luxury in every bite. Don’t be surprised if your friends and family ask for the recipe, only to be shocked when you tell them it’s plant-based. Happy baking!