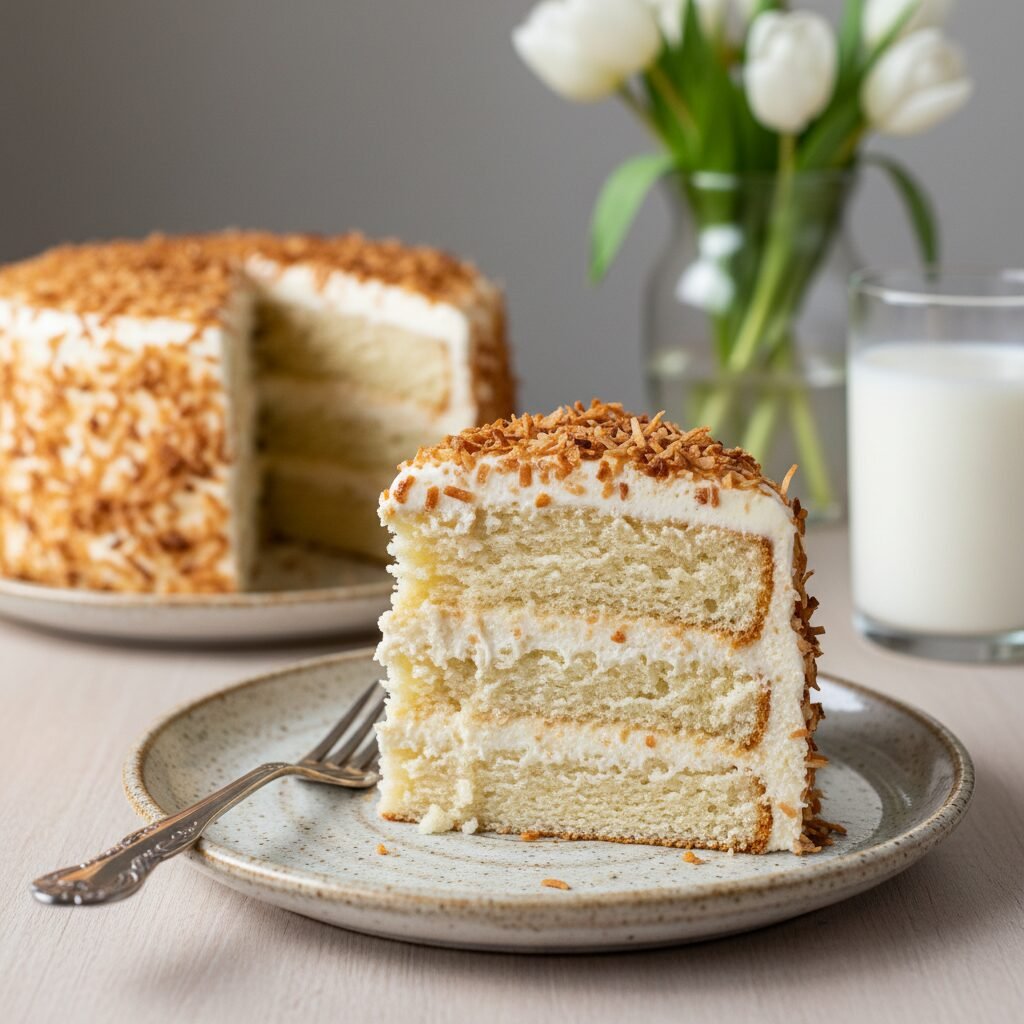
The Ultimate Moist Gluten-Free Coconut Cake with Cream Cheese Frosting
Moist Gluten Free Coconut Cake Recipe
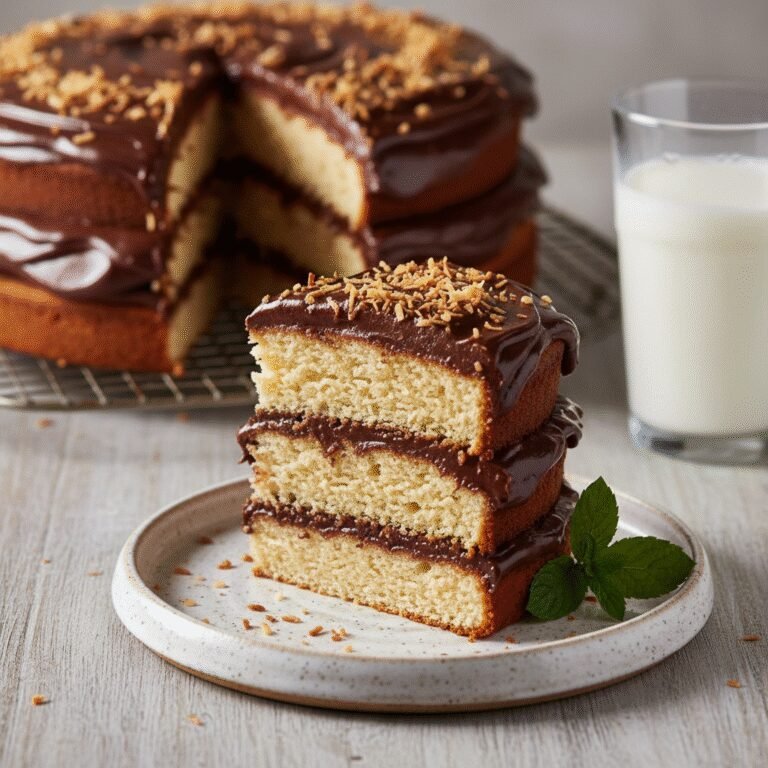
Forget everything you know about dry gluten-free baking; this ultra-moist coconut cake is tender, fluffy, and bursting with tropical flavor. Topped with a lush cream cheese coconut frosting and toasted flakes, it is the perfect showstopper for any celebration.
25 minutes
35 minutes
1 hour 30 minutes
12 servings
Dessert
Baking
American
Gluten-Free
There is a pervasive myth in the culinary world that gluten-free desserts are destined to be dry, crumbly, or possessed of a strange, gritty texture. For years, those with celiac disease or gluten sensitivities have had to settle for subpar sweets that crumble at the sight of a fork. This recipe is here to shatter that misconception completely. We are talking about a cake so incredibly moist, tender, and velvety that even your gluten-loving friends will be asking for the recipe, completely unaware that it is wheat-free.
The allure of a classic coconut cake lies in its ability to transport you. One bite, and the sweet, nutty aroma of coconut combined with the rich vanilla undertones evokes feelings of warm, tropical breezes and Southern hospitality. However, achieving that perfect ‘crumb’ without gluten—the protein that gives traditional cakes their structure—requires a careful balance of science and art. This cake utilizes a specific blend of high-quality gluten-free flour, almond flour for added richness, and full-fat sour cream to ensure a texture that mimics the finest bakery-style sponge.
But the cake layers are only half the story. The crowning glory is a tangy, sweet, and incredibly creamy coconut cream cheese frosting. Unlike a traditional buttercream which can sometimes be too heavy, the tang of the cream cheese cuts through the sweetness of the coconut, creating a perfectly balanced bite. Finished with a generous coating of golden, toasted coconut flakes for a satisfying crunch, this dessert is a symphony of textures. Whether you are baking for Easter, a birthday, or simply a Tuesday night craving, this Moist Gluten-Free Coconut Cake is destined to become a permanent fixture in your recipe box.
History & Origins
The coconut cake is a storied icon of American Southern hospitality, with roots that dig deep into the 19th century. While coconuts are not native to the continental United States, the expansion of the shipping trade in the 1800s brought these tropical treasures from the Caribbean to Southern ports like Charleston and New Orleans. In those early days, fresh coconut was a rare and expensive luxury, making a coconut cake a status symbol reserved for the most special occasions and high-society gatherings. Traditionally, these cakes were laborious labors of love, requiring the cracking and hand-grating of fresh coconuts.
As the 20th century progressed and desiccated, shredded coconut became commercially available, the cake’s popularity exploded, becoming a staple at church potlucks, weddings, and holiday tables across the South. The classic version typically features a white or yellow cake slathered in a ‘seven-minute frosting’—a marshmallow-like meringue. However, as culinary tastes evolved, richer frostings like cream cheese or buttercream became popular variations.
The history of gluten-free baking is a much more modern narrative. For decades, gluten-free baking was strictly a medical necessity for those with Celiac disease, often resulting in dense, brick-like loaves due to a lack of understanding of food chemistry. It wasn’t until the wellness movements of the early 2000s and the refinement of xanthan gum and rice flour blends that gluten-free baking began to rival its wheat-based counterparts. This recipe represents the convergence of these two histories: the timeless, indulgent tradition of the Southern coconut cake and the modern culinary innovation of high-quality gluten-free patisserie.
Why This Recipe Works
The primary challenge in gluten-free baking is replacing the elasticity and structure that gluten provides. Without it, cakes often fall apart or turn out dense. This recipe succeeds where others fail due to three critical factors: hydration, fat content, and flour blending.
First, the ‘Moist’ in the title is not just a buzzword; it is engineered. We use a combination of full-fat sour cream and canned coconut milk. The acidity in the sour cream tenderizes the protein strands in the eggs and flour, resulting in a softer crumb, while the thick coconut milk adds distinct flavor and fat without thinning the batter too much.
Second, we don’t rely solely on a generic gluten-free flour blend. By incorporating a small amount of superfine almond flour, we introduce natural nut oils that keep the cake soft for days. Almond flour also adds a slight texture that mimics the bite of traditional wheat flour, preventing that gummy texture often found in rice-flour-only recipes.
Finally, the reverse-creaming method (or a modified version thereof) ensures that the fats coat the flour particles before the liquid is fully absorbed, inhibiting the development of toughness. The addition of boiling water (or hot milk) at the very end of mixing blooms the cocoa (in chocolate cakes) or, in this case, helps the starches in the gluten-free flour absorb liquid instantly, leading to a batter that bakes up high and light.
Why You’ll Love This Recipe
- ✓Incredibly moist texture that stays soft for days
- ✓Rich, authentic coconut flavor using milk, extract, and shreds
- ✓Tangy cream cheese frosting balances the sweetness
- ✓Simple preparation with standard gluten-free pantry staples
- ✓Perfect for celebrations, birthdays, and holidays
- ✓Freeze-friendly layers for make-ahead convenience
Equipment You’ll Need
- ✓Two 8-inch or 9-inch round cake pans
- ✓Stand mixer or electric hand mixer
- ✓Large mixing bowls
- ✓Rubber spatula
- ✓Wire cooling rack
- ✓Parchment paper
- ✓Measuring cups and spoons
- ✓Offset spatula for frosting
Ingredients
- ✓2 1/2 cups Gluten-Free All-Purpose Flour Blend (with xanthan gum)
- ✓1/2 cup Superfine Almond Flour
- ✓1 tablespoon Baking Powder
- ✓1/2 teaspoon Baking Soda
- ✓3/4 teaspoon Sea Salt
- ✓1 3/4 cups Granulated Sugar
- ✓3/4 cup Unsalted Butter, softened to room temperature
- ✓3 Large Eggs, room temperature
- ✓2 teaspoons Pure Vanilla Extract
- ✓1 teaspoon Coconut Extract
- ✓1 cup Full-Fat Canned Coconut Milk (shaken well)
- ✓1/2 cup Full-Fat Sour Cream, room temperature
- ✓1 cup Sweetened Shredded Coconut (for batter)
- ✓FOR THE FROSTING:
- ✓8 oz Cream Cheese, softened
- ✓1/2 cup Unsalted Butter, softened
- ✓4 cups Powdered Sugar, sifted
- ✓1 teaspoon Coconut Extract
- ✓1-2 tablespoons Coconut Milk (if needed for consistency)
- ✓1 1/2 cups Sweetened Shredded Coconut (toasted, for garnish)
Instructions
- 1. PREHEAT & PREP: Preheat your oven to 350°F (175°C). Grease two 8-inch or 9-inch round cake pans generously with butter or cooking spray. Line the bottoms with parchment paper rounds to ensure the cakes release perfectly.
- 2. WHISK DRY INGREDIENTS: In a medium bowl, whisk together the gluten-free flour blend, almond flour, baking powder, baking soda, and salt. Ensure there are no lumps of almond flour. Set aside.
- 3. CREAM BUTTER & SUGAR: In the bowl of a stand mixer fitted with the paddle attachment (or using a large bowl and electric hand mixer), beat the softened butter and granulated sugar on medium-high speed for about 3-4 minutes. The mixture should look pale, fluffy, and aerated.
- 4. ADD EGGS & EXTRACTS: Lower the speed to medium. Add the eggs one at a time, beating well after each addition and scraping down the sides of the bowl. Stir in the vanilla extract and coconut extract.
- 5. COMBINE WETS: In a small measuring cup or bowl, whisk together the canned coconut milk and sour cream until smooth.
- 6. ALTERNATE DRY & WET: With the mixer on low speed, add the flour mixture in three parts, alternating with the coconut milk/sour cream mixture in two parts. Begin and end with the dry ingredients. Mix only until just combined—do not overmix.
- 7. FOLD IN COCONUT: Gently fold in the 1 cup of shredded coconut using a rubber spatula.
- 8. BAKE: Divide the batter evenly between the prepared cake pans. Smooth the tops with a spatula. Bake for 30-35 minutes, or until a toothpick inserted into the center comes out clean or with just a few moist crumbs. The tops should be a light golden brown.
- 9. COOL: Remove cakes from the oven and let them cool in the pans for 15 minutes. Then, carefully invert them onto a wire rack to cool completely before frosting. Do not frost warm cakes!
- 10. MAKE FROSTING: While cakes cool, beat the cream cheese and butter together until smooth and creamy (about 3 minutes). Gradually add the powdered sugar, one cup at a time, mixing on low speed. Add the coconut extract. Whip on high speed for 2 minutes until fluffy. If too stiff, add a teaspoon of coconut milk.
- 11. TOAST COCONUT (OPTIONAL): Spread the garnish coconut on a baking sheet and bake at 350°F for 5-7 minutes, watching closely until golden brown. Let cool.
- 12. ASSEMBLE: Place one cake layer on a serving plate. Spread a thick layer of frosting over the top. Place the second cake layer on top. Frost the top and sides of the entire cake. Press the toasted coconut into the sides and top of the cake.
- 13. SERVE: Slice and enjoy immediately, or refrigerate for 30 minutes to set the frosting.
Expert Cooking Tips
- ✓Room Temperature Ingredients: Ensure your butter, eggs, sour cream, and milk are at room temperature. This creates an emulsion that traps air, resulting in a fluffier cake.
- ✓Measure Flour Correctly: If you don’t have a scale, use the ‘spoon and level’ method. Spoon flour into the cup and level it off; never scoop directly from the bag, which packs the flour and leads to a dry cake.
- ✓Check Your GF Blend: Make sure your flour blend contains xanthan gum. If it doesn’t, add 1 teaspoon of xanthan gum to the dry ingredients.
- ✓Canned Coconut Milk: Use the thick, canned variety (often found in the Asian food aisle), not the carton coconut milk found in the dairy aisle. The fat content in the canned version is vital for moisture.
- ✓Don’t Overbake: Gluten-free goods can dry out quickly. Check the cake at the 30-minute mark. It is better to be slightly under-baked than over-baked.
- ✓Toasting Coconut: Watch the coconut like a hawk when toasting; it goes from white to burnt in seconds.
- ✓Cool Completely: Gluten-free cakes are more fragile when warm. Let them cool completely to room temperature to firm up before trying to remove them from the pans or frost them.
Substitutions and Variations
This recipe is versatile enough to accommodate several dietary tweaks. **Dairy-Free:** To make this cake dairy-free, substitute the butter with a high-quality vegan butter stick (not tub margarine). Replace the sour cream with a dairy-free plain yogurt (coconut based is best) or additional thick coconut cream mixed with a teaspoon of lemon juice. For the frosting, use vegan cream cheese and vegan butter. **Nut-Free:** If you cannot use almond flour, replace the 1/2 cup of almond flour with an additional 1/2 cup of your gluten-free all-purpose flour blend, but add an extra tablespoon of oil or melted butter to the batter to compensate for the lost fat. **Sugar:** You can use cane sugar or a granulated erythritol blend for a lower sugar option, though the texture may be slightly less fluffy. **Egg-Free:** While eggs provide structure, you can try using a commercial gluten-free egg replacer (like Bob’s Red Mill) or ‘flax eggs’ (1 tbsp ground flaxseed + 3 tbsp water per egg), though the cake will be denser and less airy.
Common Mistakes to Avoid
The most common mistake with this recipe is using the wrong type of coconut milk. Using ‘light’ coconut milk or the beverage type found in cartons will result in a batter that is too thin and a cake that lacks richness. Always choose full-fat canned coconut milk. Another error is cutting into the cake too soon. Gluten-free starches need time to set and gelatinize during the cooling process; cutting a warm cake will result in a gummy, sticky texture. Additionally, failing to grease and line the pans properly can lead to heartbreak. Gluten-free cakes are stickier than wheat cakes, so parchment paper is non-negotiable. Finally, relying on volume measurements for flour rather than weight (or the spoon-and-level method) often results in adding too much flour, which is the number one cause of dry, hard cakes.
Serving Suggestions
This cake is a stunning centerpiece on its own, but it pairs beautifully with fresh fruit. Serve slices with a side of fresh mango coulis, sliced strawberries, or grilled pineapple to accentuate the tropical vibes. For beverages, a hot cup of dark roast coffee contrasts perfectly with the sweet coconut frosting. If serving at a summer gathering, an iced hibiscus tea or a sparkling moscato makes for a refreshing accompaniment. For an extra indulgent touch, drizzle the plate with a little salted caramel sauce before placing the cake slice down.
Storage and Reheating Tips
Because of the cream cheese frosting, this cake should be stored in the refrigerator. Place it in an airtight cake carrier or cover the cut sections with plastic wrap to prevent drying out. It will keep fresh in the fridge for up to 5 days. The cake is actually best served at room temperature, so remove slices from the fridge about 30-60 minutes before eating to allow the frosting to soften and the cake crumb to relax. **Freezing:** This cake freezes exceptionally well. You can freeze individual slices wrapped tightly in plastic wrap and then foil for up to 3 months. Thaw in the fridge overnight or on the counter for an hour.
Nutrition Facts (Estimated)
| Serving Size | 1 slice |
| Calories | 580 kcal |
| Fat | 34g |
| Saturated Fat | 21g |
| Unsaturated Fat | 11g |
| Trans Fat | 0g |
| Cholesterol | 85mg |
| Sodium | 310mg |
| Carbohydrates | 68g |
| Fiber | 3g |
| Sugar | 42g |
| Protein | 6g |
Frequently Asked Questions
Can I make this cake in a 9×13 pan?
Yes! Grease a 9×13 inch pan and bake for approximately 35-45 minutes. Keep an eye on it and test with a toothpick starting at 35 minutes.
Why did my cake sink in the middle?
Sinking usually happens if the oven door was opened too early, causing a temperature drop, or if the cake was under-baked. It can also happen if there was too much leavening (baking powder/soda) or liquid in the batter.
Can I use coconut oil instead of butter?
Yes, you can substitute melted coconut oil for the butter. However, butter adds a specific flavor and aids in creaming with sugar for aeration. If using oil, the texture might be slightly denser but still delicious.
My gluten-free flour doesn’t have xanthan gum. How much should I add?
A general rule of thumb is to add 1/4 teaspoon of xanthan gum per cup of gluten-free flour. For this recipe, add about 3/4 to 1 teaspoon to the dry ingredients.
Can I make cupcakes with this recipe?
Absolutely. This batter makes wonderful cupcakes. Line a muffin tin with papers and fill 2/3 full. Bake at 350°F for 18-22 minutes. It should yield about 20-24 cupcakes.
Is coconut extract necessary?
It amplifies the flavor significantly. Without it, the cake tastes like a vanilla cake with coconut shreds. If you can’t find it, you can omit it, but the coconut punch will be milder.
Can I use unsweetened coconut?
Yes, you can use unsweetened shredded coconut. The cake batter has enough sugar to compensate, but the result will be slightly less sweet and have a nuttier flavor profile.
Why is my frosting runny?
Cream cheese frosting can get runny if the butter or cream cheese was too warm (melted) or if it was over-mixed. If it’s too soft, refrigerate the bowl for 20 minutes and whip again, or add more powdered sugar.
Conclusion
This Moist Gluten-Free Coconut Cake is more than just a dietary alternative; it is a triumph of flavor and texture that stands tall against any wheat-based competitor. By balancing the richness of coconut milk with the structure of almond flour, you achieve a dessert that is pure, fluffy perfection. Whether you are an experienced gluten-free baker or a novice just starting your journey, this recipe delivers consistent, bakery-quality results. So, preheat your oven, toast those coconut flakes, and get ready to enjoy a slice of tropical paradise right in your own kitchen. Don’t forget to share your creation on social media and tag us—we love seeing your beautiful bakes!