The Ultimate Moist Gluten Free Chocolate Cake Recipe (Better Than Bakery!)
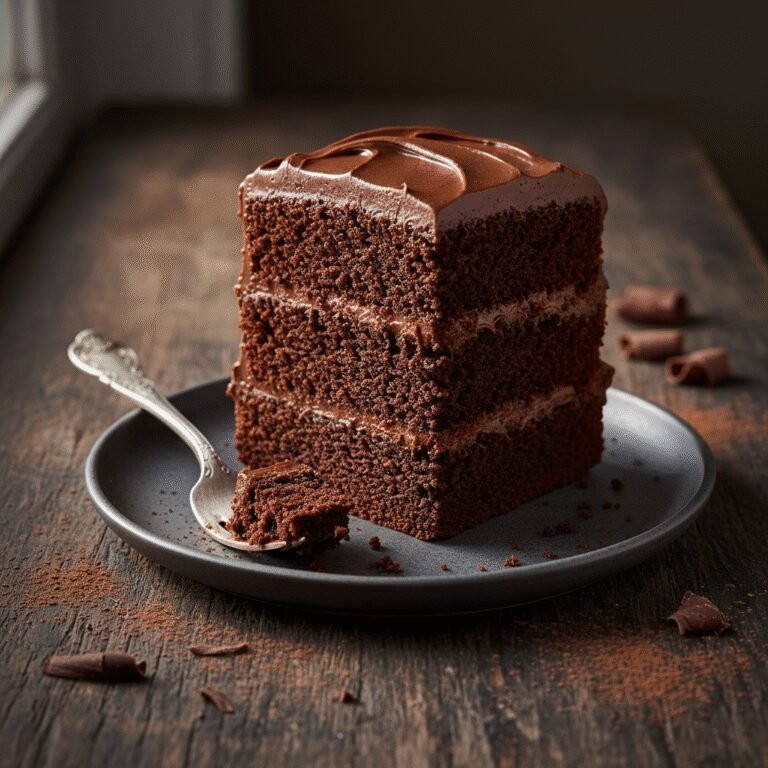
Moist Gluten Free Chocolate Cake Recipe
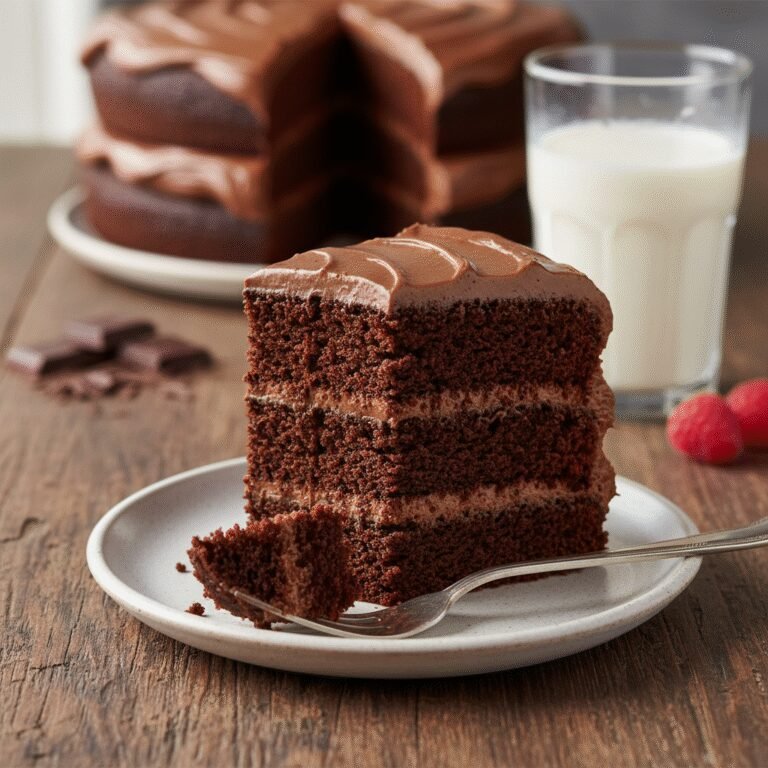
Forget dry, crumbly gluten-free desserts; this cake is rich, fudgy, and incredibly moist. Perfect for birthdays or indulgent weekends, it uses a secret blend of flours and hot coffee to bloom the cocoa for maximum flavor, ensuring a texture so velvety no one will believe it’s gluten-free.
20 minutes
35 minutes
55 minutes
12-14 servings (Two 8-inch rounds)
Dessert
Baking
American
Gluten-Free
For years, the gluten-free community has been plagued by a singular, heartbreaking stereotype: that gluten-free cake is destined to be dry, crumbly, and reminiscent of sweetened cardboard. If you have Celiac disease or a gluten intolerance, you know the disappointment of biting into a beautiful looking slice only to have it disintegrate into sand in your mouth. This recipe is my love letter to everyone who misses the decadent, sticky, fork-clinging texture of a classic bakery chocolate cake. After dozens of failed experiments and varying ratios of xanthan gum to starch, I have finally cracked the code. This isn’t just ‘good for a gluten-free cake’—it is quite simply one of the best chocolate cakes you will ever eat, period.
The secret lies in the hydration and the fat source. Unlike traditional butter cakes which can stiffen when cool, this recipe relies on high-quality vegetable oil and full-fat sour cream to maintain a luxurious moisture content that lasts for days. Furthermore, we utilize the ‘blooming’ technique, where boiling hot coffee is poured over the batter at the very end. This doesn’t make the cake taste like espresso; rather, the heat dissolves the cocoa solids instantly, releasing a depth of chocolate flavor that cold milk simply cannot achieve. Whether you are baking for a strictly gluten-free household or hosting a mixed crowd where you don’t want to bake two separate desserts, this cake is the ultimate crowd-pleaser. It stands up beautifully to stacking, holds its structure under heavy buttercream, and provides that quintessential tender crumb that we all crave.
History & Origins
The history of chocolate cake is a journey that spans centuries, evolving from a beverage to the fluffy confection we know today. Chocolate itself dates back to the ancient Mesoamericans, who consumed it as a bitter, spiced drink. It wasn’t until the 18th century that chocolate began to appear in solid forms in Europe, and even then, it was mostly used in glazes or cookies. The concept of a ‘chocolate cake’ as we recognize it didn’t truly take shape until 1886, when American cooks began adding chocolate to cake batter. Before this, yellow cakes with chocolate frosting were the standard. The introduction of chemical leavening agents like baking powder and baking soda in the mid-19th century revolutionized baking, allowing for lighter, airier textures that moved away from the dense, yeast-based cakes of the past.
The narrative of gluten-free baking is a much more modern chapter in culinary history. For decades, those with wheat allergies or Celiac disease relied on naturally gluten-free desserts like flourless chocolate tortes (which rely on whipped eggs for lift) or dense cakes made from bean pastes. It wasn’t until the late 20th and early 21st centuries, with the rise in Celiac diagnoses and general health awareness, that food scientists and home bakers began experimenting seriously with flour blends. Early iterations used simple rice flour, resulting in gritty textures. The game-changer was the widespread availability of xanthan gum and diverse starches like tapioca and potato, which mimic the elasticity of gluten. This recipe represents the pinnacle of that evolution: a modern marvel that combines the rich heritage of the 19th-century Devil’s Food Cake with cutting-edge gluten-free food science.
Why This Recipe Works
This recipe succeeds where many others fail due to a precise balance of moisture-retaining ingredients and structural agents. In traditional baking, gluten provides the elastic network that traps air bubbles and holds the cake together. Without it, we need a substitute. By using a high-quality 1:1 gluten-free flour blend that contains xanthan gum, we provide the necessary scaffolding. However, GF flours are notorious for being ‘thirsty’—they absorb more liquid than wheat flour, which is the primary cause of dryness. To combat this, we employ a three-pronged moisture attack: oil, sour cream, and liquid volume.
First, we use oil instead of butter. Butter is about 80% fat and 20% water, and it is solid at room temperature. Oil is 100% fat and liquid at room temperature. This means that as the cake cools, the fat remains fluid, coating the flour particles and ensuring the cake stays soft on the counter. Second, the acidic nature of the sour cream (or buttermilk) tenderizes the protein in the flour and reacts with the baking soda to create a superior rise. Finally, the addition of boiling hot coffee does two things: it ‘blooms’ the cocoa powder to intensify the chocolate notes, and the high temperature helps to start gelatinizing the starches in the gluten-free flour immediately upon contact, preventing a gritty texture. The result is a batter that is very thin (don’t be alarmed!) but bakes up into a structured, incredibly moist sponge.
Why You’ll Love This Recipe
- ✓Incredibly moist crumb that stays fresh for 3-4 days.
- ✓Deep, intense chocolate flavor enhanced by hot coffee.
- ✓Simple one-bowl method requiring no fancy mixer.
- ✓Undetectable as gluten-free to the average palate.
- ✓Sturdy enough for layer cakes and fondant work.
Equipment You’ll Need
- ✓Two 8-inch round cake pans
- ✓Large mixing bowl
- ✓Whisk or electric hand mixer
- ✓Parchment paper
- ✓Wire cooling rack
- ✓Measuring cups and spoons
- ✓Kitchen scale (highly recommended)
Ingredients
- ✓2 cups (approx. 280g) Gluten-Free 1:1 Baking Flour (ensure it contains xanthan gum)
- ✓2 cups (400g) granulated sugar
- ✓3/4 cup (65g) unsweetened cocoa powder (Dutch-processed preferred)
- ✓2 teaspoons baking powder
- ✓1 1/2 teaspoons baking soda
- ✓1 teaspoon salt
- ✓1 cup (240ml) buttermilk or whole milk, room temperature
- ✓1/2 cup (120ml) vegetable oil or canola oil
- ✓2 large eggs, room temperature
- ✓2 teaspoons pure vanilla extract
- ✓1 cup (240ml) boiling hot coffee (or boiling water)
Instructions
- Preheat your oven to 350°F (175°C). Grease two 8-inch round cake pans with butter or cooking spray and line the bottoms with parchment paper. This is crucial for gluten-free cakes to prevent sticking.
- In a large mixing bowl, sift together the gluten-free flour, sugar, cocoa powder, baking powder, baking soda, and salt. Whisk well to ensure all dry ingredients are evenly distributed.
- Add the buttermilk, vegetable oil, eggs, and vanilla extract to the dry ingredients. Beat with an electric mixer on medium speed (or whisk vigorously by hand) for about 2 minutes. You want the batter to be smooth and glossy.
- Reduce the mixer speed to low and carefully pour in the boiling hot coffee. Beat just until combined. The batter will be very thin and liquidy—this is completely normal and necessary for a moist gluten-free cake.
- Divide the batter evenly between the two prepared cake pans. Tap the pans gently on the counter to release any large air bubbles.
- Bake for 30-35 minutes, or until a wooden toothpick inserted into the center comes out clean or with just a few moist crumbs attached. Do not overbake, or the cake will lose its moisture.
- Remove from the oven and let the cakes cool in the pans for at least 15-20 minutes. Gluten-free cakes are more fragile when warm and need this time to set their structure.
- Run a knife around the edge to loosen, then invert the cakes onto a wire rack to cool completely before frosting. Do not attempt to frost while even slightly warm.
Expert Cooking Tips
- ✓Weigh your flour: For the most accurate results, use a kitchen scale. Cup measurements can vary wildly depending on how you scoop.
- ✓Room temperature ingredients: Ensure your eggs and buttermilk are at room temperature to allow the batter to emulsify properly.
- ✓Don’t skip the parchment: Gluten-free cakes can be stickier than wheat cakes; parchment paper guarantees a perfect release.
- ✓Quality Cocoa: Use a high-quality Dutch-processed cocoa powder for a darker color and smoother, less acidic flavor.
- ✓Let it cool: This cannot be stressed enough. The gums in the flour need to cool down to solidify the cake’s structure.
- ✓Check your baking powder: Ensure your leavening agents are fresh and certified gluten-free if you are very sensitive.
Substitutions and Variations
Dietary restrictions often come in clusters, so here is how to adapt this recipe. To make this cake **Dairy-Free**, substitute the buttermilk with a mixture of almond milk (or soy milk) and 1 tablespoon of apple cider vinegar or lemon juice (let it sit for 5 minutes to curdle). Replace the sour cream with a dairy-free yogurt or full-fat coconut cream. To make it **Egg-Free**, you can use a commercial gluten-free egg replacer (like Bob’s Red Mill) or flax eggs (2 tbsp ground flaxseed meal + 6 tbsp water, let sit for 10 mins), though note that the cake may be slightly denser and less fluffy without real eggs. If you are avoiding **Caffeine**, simply use boiling hot water or decaf coffee; the coffee flavor is undetectable but enhances the chocolate, so water will result in a slightly milder chocolate taste. Regarding **Flour**, this recipe was tested with ‘Measure for Measure’ or ‘1-to-1’ blends like King Arthur or Cup4Cup. If your flour blend does not contain xanthan gum, you must add 1 teaspoon of xanthan gum to the dry ingredients.
Common Mistakes to Avoid
The most common mistake in gluten-free baking is over-measuring the flour. If you scoop the measuring cup directly into the flour bag, you compress the flour and can end up with 20-30% more than the recipe calls for, resulting in a dry, brick-like cake. Always use the ‘spoon and level’ method or a scale. Another mistake is opening the oven door too early. Gluten-free structures are delicate; a rush of cold air before the cake is set can cause the center to collapse. Additionally, do not reduce the sugar. Sugar is not just for sweetness; it is a liquid ingredient when melted and is vital for moisture retention. Finally, do not substitute butter for the oil. While butter tastes great, it solidifies at room temperature, and since gluten-free flour is already prone to dryness, you need the oil to keep the crumb soft and moist for days.
Serving Suggestions
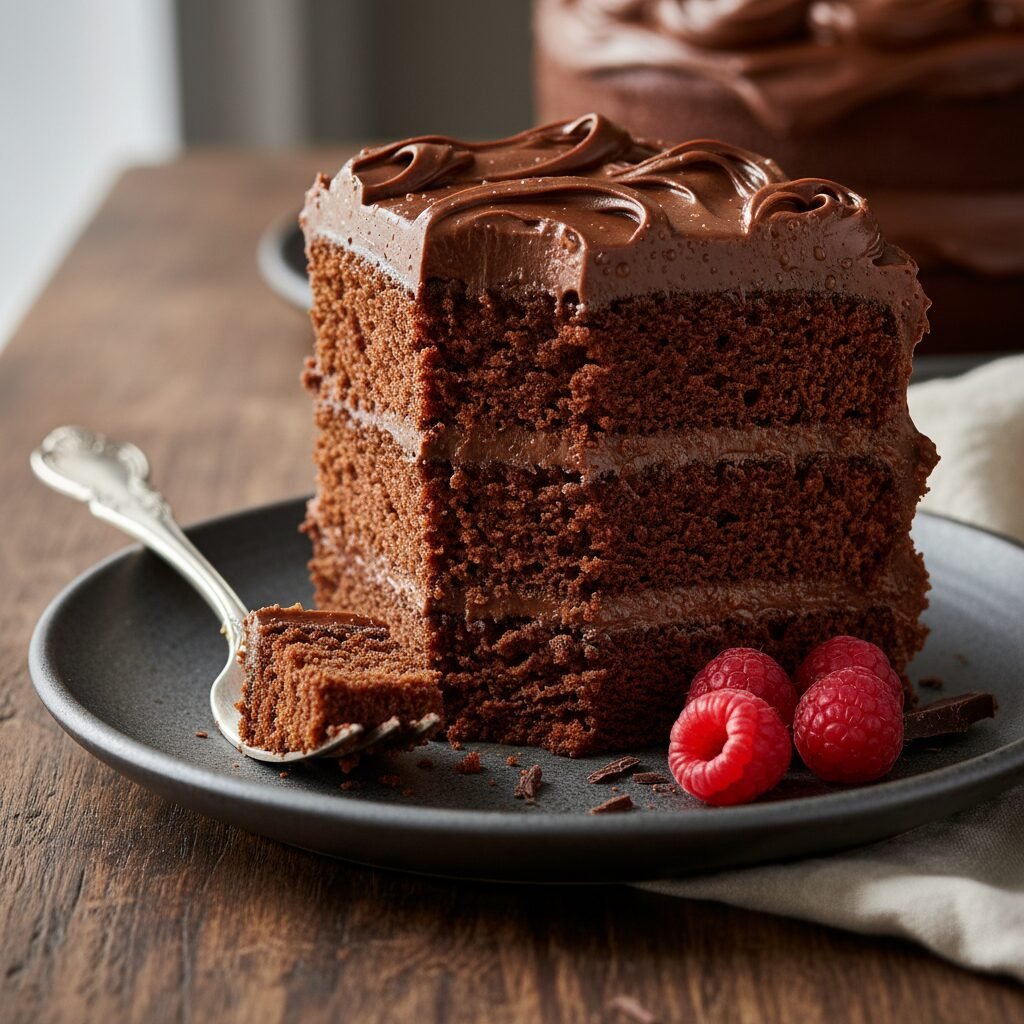
This cake is incredibly versatile. For a classic birthday cake, frost it with a rich chocolate buttercream or a Swiss meringue buttercream. If you want something lighter, serve a single layer with a dollop of freshly whipped cream and raspberries or strawberries; the tartness of the fruit cuts through the richness of the chocolate. For a sophisticated dinner party dessert, pour a warm dark chocolate ganache over the cake and sprinkle with sea salt flakes. It also pairs beautifully with vanilla bean ice cream or a side of espresso. If you are feeling festive, a dusting of powdered sugar and some edible flowers make for a stunning, rustic presentation.
Storage and Reheating Tips
One of the highlights of this cake is its shelf life. Because it is oil-based, it stays moist at room temperature for up to 3 days if kept in an airtight cake carrier or wrapped tightly in plastic wrap. If you have frosted the cake with a perishable frosting (like cream cheese or whipped cream), it must be stored in the refrigerator. However, cold air dries out baked goods, so ensure it is covered well. Allow the cake to come to room temperature before serving for the best texture. For long-term storage, wrap individual unfrosted layers in plastic wrap, then foil, and freeze for up to 3 months. Thaw in the refrigerator overnight or on the counter for a few hours before frosting.
Nutrition Facts (Estimated)
| Serving Size | 1 slice |
| Calories | 420 |
| Fat | 22g |
| Saturated Fat | 6g |
| Unsaturated Fat | 15g |
| Trans Fat | 0g |
| Cholesterol | 55mg |
| Sodium | 310mg |
| Carbohydrates | 58g |
| Fiber | 4g |
| Sugar | 35g |
| Protein | 5g |
Frequently Asked Questions
Can I make this recipe into cupcakes?
Yes! This batter makes excellent cupcakes. Line a muffin tin with paper liners and fill them about 2/3 full. Bake at 350°F for 18-22 minutes. This recipe yields approximately 24 cupcakes.
Why is my batter so runny?
Don’t panic! This is exactly how it should be. The high liquid content is necessary to hydrate the gluten-free flour and cocoa powder. It will bake up perfectly.
Can I use almond flour or coconut flour instead?
No. Almond flour and coconut flour have completely different absorption rates and lack the structure of a 1:1 rice-based blend. You cannot substitute them directly in this recipe without changing all other ratios.
My cake sank in the middle. What happened?
This usually happens if the oven door was opened too early, the oven wasn’t fully preheated, or the cake was underbaked. It can also happen if too much leavening (baking powder/soda) was used.
Do I really need to use coffee?
You don’t *have* to, but it is highly recommended. The coffee enhances the chocolate flavor without making the cake taste like coffee. If you strictly avoid it, boiling water works fine.
Is this cake safe for people with Celiac disease?
Yes, provided you use certified gluten-free flour and ensure all other ingredients (like baking powder and vanilla) are GF certified and prepared in a cross-contamination-free environment.
Can I reduce the sugar?
I do not recommend reducing the sugar by more than 1/4 cup. Sugar provides moisture and tenderness. Reducing it too much will result in a rubbery, dry cake.
What is the best brand of gluten-free flour for this?
I recommend King Arthur Measure for Measure or Bob’s Red Mill 1-to-1 Baking Flour. Both contain xanthan gum and have a neutral taste.
Can I bake this in a 9×13 pan?
Yes, you can bake this in a standard 9×13 inch rectangular pan. The baking time will likely increase to 35-45 minutes. Keep an eye on it and use the toothpick test.
Conclusion
There is something truly magical about finding a recipe that restores a lost comfort, and for those living a gluten-free lifestyle, this chocolate cake does exactly that. It bridges the gap between dietary necessity and pure culinary indulgence. Whether you are celebrating a milestone or just need a chocolate fix on a Tuesday night, this moist, rich, and foolproof cake is ready to become a staple in your kitchen. No one should have to compromise on taste, and with this recipe, you never will again. Happy baking, and don’t forget to share your creations on Pinterest!