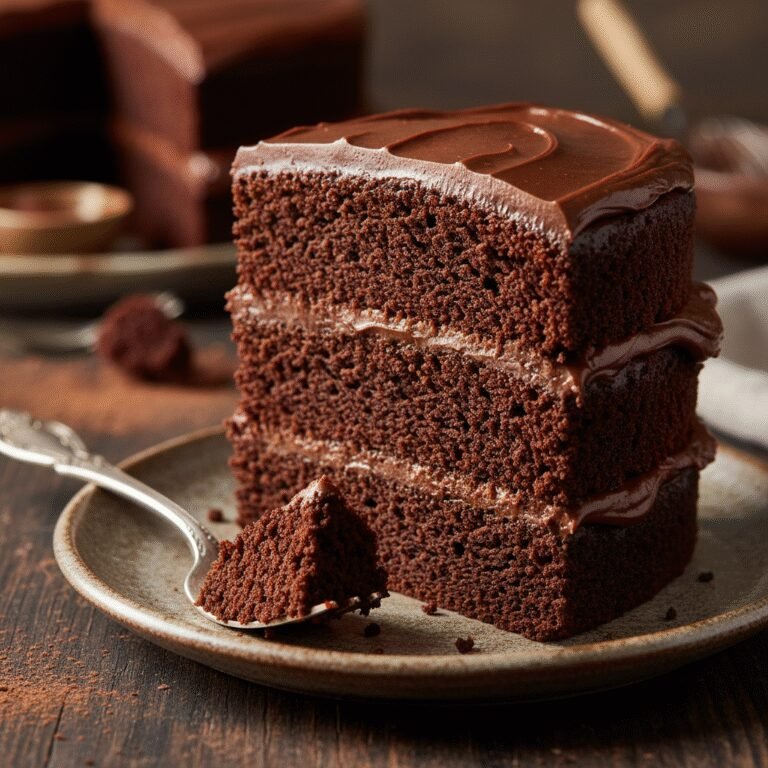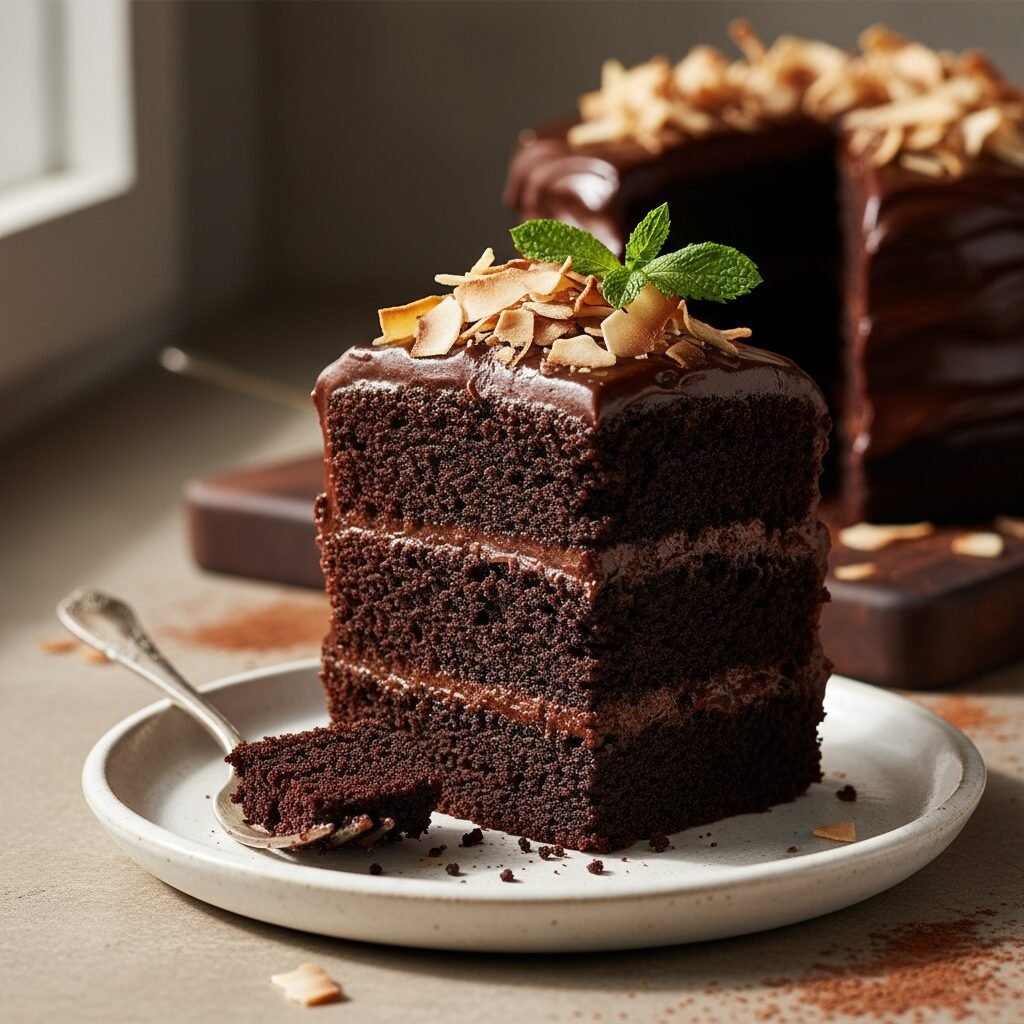
The Ultimate Moist Coconut Milk Chocolate Cake with Silky Dairy-Free Frosting
Moist Coconut Milk Chocolate Cake With Dairy Free Chocolate Frosting Recipe
Discover the secret to the most decadent, velvety chocolate cake that happens to be completely dairy-free. This recipe uses full-fat coconut milk to achieve an impossibly moist crumb, topped with a luscious, ganache-style frosting that rivals any bakery favorite.
20 minutes
35 minutes
1 hour 15 minutes
12 servings
Dessert
Baking
American
Dairy-Free
There is a common misconception in the world of baking that removing dairy means sacrificing texture and flavor. Many home bakers fear that without butter or heavy cream, a cake will turn out dry, crumbly, or lacking that quintessential richness we all crave in a chocolate dessert. This Moist Coconut Milk Chocolate Cake is here to shatter those myths once and for all. It is, quite simply, one of the best chocolate cakes you will ever eat, regardless of your dietary preferences. The magic ingredient here is full-fat canned coconut milk. Unlike almond or soy milk, which are primarily water, coconut milk is rich in healthy fats that mimic the tenderness usually provided by butter and buttermilk. When combined with high-quality cocoa powder and the right leavening agents, it creates a crumb structure that is dense yet fluffy, and deeply chocolatey without being overly heavy.
What truly sets this recipe apart is the double dose of chocolate luxury. Not only is the sponge itself infused with cocoa, but the frosting is a revelation in itself. It is a whipped chocolate ganache made from dairy-free chocolate chips and coconut cream, resulting in a glossy, spreadable topping that melts in your mouth. Whether you are baking for a vegan friend, someone with a lactose intolerance, or just want to use up that can of coconut milk in your pantry, this cake is a showstopper. It is the kind of dessert that has people asking for the recipe after the first bite, usually followed by a look of disbelief when you tell them it contains absolutely no dairy. Prepare to fall in love with baking all over again.
History & Origins
The history of chocolate cake is a journey that spans centuries, evolving from a drink for the elite to the fluffy sponges we know today. In the 18th and 19th centuries, chocolate was primarily consumed as a beverage. It wasn’t until the mid-1800s, with the extraction of cocoa butter and the production of cocoa powder, that chocolate began to find its way into solid confections and cakes. The term ‘Devil’s Food Cake’ appeared in the early 20th century, distinguishing itself from the lighter ‘Angel Food Cake’ by its dark color and rich density. During the Great Depression, ingredients like butter, milk, and eggs were scarce and expensive. This necessity birthed ‘Wacky Cake’ or ‘Depression Cake,’ which relied on vinegar and baking soda for lift and oil for fat, proving that delicious cakes could be made without traditional dairy and eggs.
The use of coconut milk in baking has deep roots in tropical cuisines, particularly in Southeast Asia, the Caribbean, and parts of South America, where coconuts are abundant. In these cultures, coconut milk has long been the primary liquid for sweets and puddings. However, its integration into Western-style sponge cakes is a more modern phenomenon, largely driven by the rise of plant-based diets and the global wellness movement of the late 20th and early 21st centuries. As bakers sought alternatives to dairy that didn’t compromise on richness, they looked to the culinary traditions of the tropics. Today, the fusion of classic American chocolate cake techniques with the richness of coconut milk represents a global culinary evolution, creating a dessert that honors the past while embracing modern dietary needs.
Why This Recipe Works
This recipe succeeds where many other dairy-free cakes fail because of the science of fat and emulsification. Traditional cakes rely on the fat in butter to coat flour proteins, inhibiting gluten formation and ensuring tenderness. In this recipe, full-fat coconut milk provides a high concentration of medium-chain triglycerides (MCTs). These fats perform the same function as butterfat but are liquid at room temperature (in the batter state) and semi-solid once cooled, contributing to a sensation of moistness that lasts for days. Furthermore, coconut milk is naturally slightly acidic. When this acidity interacts with the baking powder and baking soda, it creates a robust leavening reaction, giving the cake a fantastic rise and a tender, airy crumb structure.
Another key factor is the ‘blooming’ of the cocoa powder. By mixing the cocoa with warm liquids or ensuring it is thoroughly hydrated by the fats in the coconut milk, we unlock the full depth of the chocolate flavor, preventing the cake from tasting dusty or bland. For the frosting, using the solid cream from a chilled can of coconut milk creates a stable emulsion with the melted chocolate. As the chocolate sets, it stabilizes the coconut cream, resulting in a frosting that holds its shape for piping but instantly dissolves into a creamy pool of chocolate upon eating. It is a perfect chemical balance that yields professional-quality results.
Why You’ll Love This Recipe
- ✓Completely dairy-free and vegan-friendly
- ✓Uses pantry staples with no hard-to-find substitutes
- ✓Incredibly moist texture that stays fresh for days
- ✓Rich, fudgy frosting that pipes beautifully
- ✓Subtle coconut undertone that enhances the chocolate flavor
- ✓One-bowl batter method for easy cleanup
Equipment You’ll Need
- ✓Two 8-inch round cake pans
- ✓Large mixing bowl
- ✓Medium mixing bowl
- ✓Whisk
- ✓Electric hand mixer or stand mixer
- ✓Rubber spatula
- ✓Measuring cups and spoons
- ✓Parchment paper
- ✓Wire cooling rack
Ingredients
- ✓2 cups all-purpose flour
- ✓1 3/4 cups granulated sugar
- ✓3/4 cup unsweetened cocoa powder (Dutch-processed preferred)
- ✓1 1/2 teaspoons baking powder
- ✓1 1/2 teaspoons baking soda
- ✓1 teaspoon salt
- ✓1 can (13.5 oz) full-fat unsweetened coconut milk (shaken well)
- ✓1/2 cup vegetable oil or melted coconut oil
- ✓2 teaspoons pure vanilla extract
- ✓1 teaspoon apple cider vinegar or white vinegar
- ✓1 cup boiling water
- ✓FOR THE FROSTING:
- ✓1 cup dairy-free semi-sweet chocolate chips
- ✓1/2 cup solid coconut cream (scooped from the top of a chilled can)
- ✓2 cups powdered sugar, sifted
- ✓1 teaspoon vanilla extract
- ✓Pinch of sea salt
Instructions
- Preheat your oven to 350°F (175°C). Grease two 8-inch round cake pans with oil and line the bottoms with parchment paper to ensure easy release.
- In a large mixing bowl, sift together the flour, sugar, cocoa powder, baking powder, baking soda, and salt. Whisk well to ensure all dry ingredients are evenly distributed.
- In a separate medium bowl, whisk together the shaken coconut milk, vegetable oil, vanilla extract, and vinegar.
- Pour the wet ingredients into the dry ingredients. Mix on low speed with an electric mixer or by hand with a whisk until just combined. Do not overmix.
- Carefully pour the boiling water into the batter. Whisk gently by hand until the water is fully incorporated. The batter will be very thin and liquid; this is normal and essential for moisture.
- Divide the batter evenly between the two prepared cake pans.
- Bake in the preheated oven for 30 to 35 minutes, or until a toothpick inserted into the center comes out clean or with just a few moist crumbs attached.
- Remove the cakes from the oven and let them cool in the pans for about 10-15 minutes. Then, carefully run a knife around the edges and invert them onto a wire rack to cool completely before frosting.
- While the cakes cool, prepare the frosting. Melt the dairy-free chocolate chips in a microwave-safe bowl in 30-second intervals, stirring in between, until smooth. Let it cool slightly to room temperature but remain liquid.
- In a large bowl, beat the solid coconut cream (discard the liquid water or save for smoothies) with the powdered sugar, vanilla, and salt until creamy.
- Pour in the melted, cooled chocolate and whip on high speed until the frosting is fluffy, glossy, and holds stiff peaks. If it is too soft, refrigerate for 15 minutes and whip again.
- Once the cakes are fully cool, spread a layer of frosting on top of one cake layer, place the second layer on top, and frost the top and sides of the entire cake.
Expert Cooking Tips
- ✓Use full-fat canned coconut milk, not the beverage type found in cartons. The fat content is crucial for the structure.
- ✓Do not skip the boiling water step; it blooms the cocoa powder for a richer chocolate flavor.
- ✓Ensure all ingredients like the coconut milk are at room temperature before mixing to prevent clumping.
- ✓When making the frosting, make sure your chocolate is not hot, or it will melt the coconut cream.
- ✓Chill your can of coconut milk for the frosting overnight so the cream separates easily from the water.
- ✓If the frosting is too runny, add more powdered sugar; if too stiff, add a teaspoon of the reserved coconut water.
- ✓Let the cake cool completely before frosting, otherwise, the coconut-based frosting will slide right off.
Substitutions and Variations
This recipe is quite versatile, but careful substitutions are needed to maintain the texture. For a gluten-free version, swap the all-purpose flour for a high-quality 1:1 gluten-free baking flour blend that contains xanthan gum. If you do not have apple cider vinegar, white vinegar or fresh lemon juice works perfectly to activate the baking soda. Instead of vegetable oil, you can use melted coconut oil, avocado oil, or even light olive oil, though olive oil may impart a slight flavor. For the sweetener, granulated sugar is best for structure, but coconut sugar can be used for a deeper, caramel-like flavor, though the cake will be darker. In the frosting, if you cannot find coconut cream, you can use a store-bought vegan butter stick, beating it with the powdered sugar and cocoa powder instead of the melted chocolate method.
Common Mistakes to Avoid
The most common mistake is using ‘light’ coconut milk or coconut milk from a carton intended for cereal. These lack the necessary fat solids, resulting in a rubbery cake. Another error is overmixing the batter after adding the flour; this develops gluten and makes the cake tough. Be careful not to overbake; check the cake at the 30-minute mark, as ovens vary. A dry cake is often just an overbaked one. For the frosting, a frequent issue is trying to whip the coconut cream when it is warm. The coconut cream must be solid and cold from the fridge, and the melted chocolate must be cooled down, or the mixture will curdle or turn into soup.
Serving Suggestions
This rich cake pairs beautifully with fresh berries like raspberries or strawberries, which cut through the richness of the chocolate. A dollop of coconut whipped cream on the side is a lovely addition. For a crunch, sprinkle toasted coconut flakes, chopped almonds, or cacao nibs over the frosting. Serve it alongside a hot cup of coffee or espresso to enhance the chocolate notes, or a cold glass of almond milk for a nostalgic treat.
Storage and Reheating Tips
Because of the coconut milk content in the frosting, this cake is best stored in the refrigerator, especially in warm climates. Place it in an airtight cake carrier or wrap slices individually in plastic wrap. It will stay fresh in the fridge for up to 5 days. Allow the cake to sit at room temperature for 20-30 minutes before serving to soften the frosting and crumb. You can also freeze the unfrosted cake layers for up to 3 months; wrap them tightly in plastic wrap and foil. Thaw in the refrigerator overnight before frosting.
Nutrition Facts (Estimated)
| Serving Size | 1 slice |
| Calories | 450 |
| Fat | 24g |
| Saturated Fat | 16g |
| Unsaturated Fat | 7g |
| Trans Fat | 0g |
| Cholesterol | 0mg |
| Sodium | 310mg |
| Carbohydrates | 58g |
| Fiber | 4g |
| Sugar | 32g |
| Protein | 5g |
Frequently Asked Questions
Does this cake taste strongly of coconut?
The cake has a very subtle coconut undertone, but the primary flavor is rich, dark chocolate. The cocoa powder masks most of the coconut flavor. The frosting has a slightly stronger coconut note due to the coconut cream, but the chocolate dominates.
Can I make this into cupcakes?
Yes! This batter works perfectly for cupcakes. Line a muffin tin with liners and fill them 2/3 full. Bake at 350°F for 18-22 minutes. This recipe yields approximately 24 cupcakes.
Why is my batter so runny?
The batter is supposed to be very thin and liquid, similar to a chocolate soup. This is due to the boiling water and ensures the cake bakes up incredibly moist. Do not add more flour.
Can I use almond flour?
No, almond flour behaves very differently from wheat flour and absorbs liquid differently. You cannot swap it 1:1 in this specific recipe without altering the other ingredients significantly.
What if my coconut milk didn’t separate for the frosting?
This happens if the can contains emulsifiers like guar gum or wasn’t cold enough. If it doesn’t separate, you might need to buy a can specifically labeled ‘Coconut Cream’ or use vegan butter instead.
Can I use Dutch-processed cocoa?
Yes, Dutch-processed cocoa is actually preferred for a darker color and smoother, less acidic flavor. However, natural cocoa powder works fine too.
Is this cake soy-free?
Yes, as long as you ensure your vegetable oil is not soybean oil (use canola or sunflower) and that your chocolate chips are soy-free (many brands use soy lecithin, so check the label).
Can I use a Bundt pan?
Yes, but grease the pan extremely well with shortening and cocoa powder. Bake for 45-55 minutes, checking for doneness with a long skewer.
Conclusion
This Moist Coconut Milk Chocolate Cake is more than just a dietary alternative; it is a standout dessert in its own right that deserves a place in your permanent recipe rotation. The combination of the deep, dark sponge and the silky, melt-in-your-mouth frosting creates a texture that is undeniably luxurious. Whether you are a seasoned vegan baker or just dipping your toes into dairy-free cooking, this recipe guarantees success and satisfaction. Bake it for a birthday, a dinner party, or a quiet weekend treat, and enjoy the bliss of chocolate perfection.