The Ultimate Fun Vanilla Unicorn Birthday Cake For Class Party Recipe
Fun Vanilla Unicorn Birthday Cake For Class Party Recipe
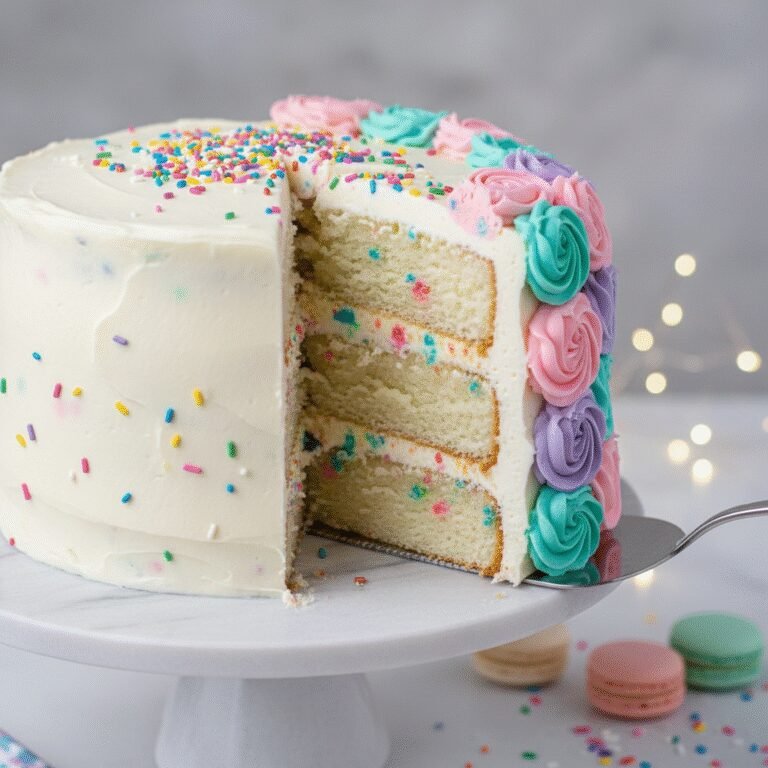
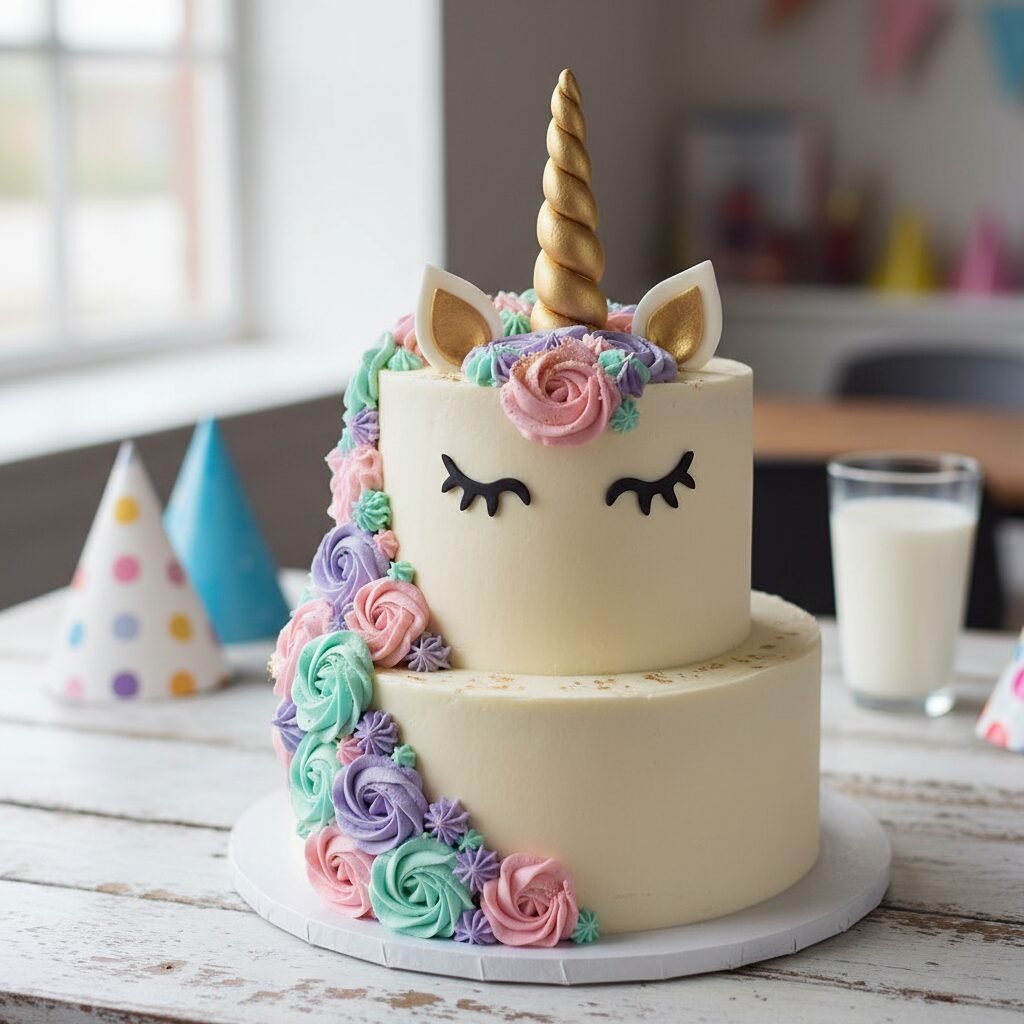
Transform your next classroom celebration into a magical event with this Fun Vanilla Unicorn Birthday Cake! Featuring tender, moist vanilla layers and a whimsical mane of pastel buttercream, this show-stopping dessert is surprisingly easy to make and guaranteed to spark joy for kids and adults alike.
60 minutes
35 minutes
1 hour 35 minutes
12-15 servings
Dessert
Baking
American
Vegetarian
There is something undeniably magical about a classroom birthday party. The anticipation in the air, the handmade cards from friends, and, of course, the moment the treat box is opened. In the world of elementary school soirees, nothing captures the imagination quite like the unicorn trend. It represents color, creativity, and a dash of pure fantasy that childhood is all about. This Fun Vanilla Unicorn Birthday Cake is not just a dessert; it is a centerpiece of joy designed to make your little one feel like the star of their own fairy tale. But let’s be real for a moment—Pinterest-perfect cakes can often taste like cardboard covered in fondant. That is where this recipe differs. We believe that a cake should taste even better than it looks. We are talking about a classic, high-quality vanilla base that uses both butter for flavor and oil for moisture, ensuring that the cake stays soft even if you bake it a day in advance. The crumb is tender and tight, perfect for holding up the structure of a unicorn horn without collapsing. We pair this with a silky Swiss Meringue Buttercream that is far less sweet than traditional American buttercream, allowing the kids to enjoy the colorful frosting without an immediate sugar crash. The design features a golden horn, sleepy eye lashes, and a flowing mane of piped rosettes in purple, pink, and teal. Whether you are a seasoned baker or a parent trying your hand at cake decorating for the first time, this guide breaks down every step to ensure you achieve that bakery-quality look right in your home kitchen. Get ready to become the legend of the PTA with a cake that screams magic in every slice.
History & Origins
The concept of the birthday cake dates back centuries, with roots in the German Kinderfest of the 15th century, where cakes were used to celebrate children’s birthdays. However, the specific phenomenon of the ‘Unicorn Cake’ is a much more modern marvel, born from the visual-first culture of social media. The trend exploded around 2016, largely credited to cake designers and food bloggers who began experimenting with ‘fat unicorn’ toppers and sleek, closed-eye designs. This aesthetic shifted the focus from elaborate fondant sculptures to buttercream artistry, making beautiful cakes more accessible to home bakers. The unicorn motif taps into a nostalgic and timeless love for mythology, symbolizing purity and grace, but in the culinary world, it became a symbol of maximalism—more sprinkles, more color, and more gold dust. Before the unicorn craze, ‘Funfetti’ or confetti cakes were the standard for children’s parties, introduced by Pillsbury in 1989. This recipe marries that classic nostalgia of speckled, colorful batter with the modern, chic aesthetic of the unicorn design. It is a culinary bridge between the comfort of a traditional 90s birthday party and the Instagram-ready expectations of today’s celebrations. By baking this, you are participating in a sweet evolution of party culture that prioritizes visual storytelling just as much as flavor.
Why This Recipe Works
This recipe succeeds where others fail because it prioritizes structural integrity without sacrificing texture. Many vanilla cakes are either too dense (like a pound cake) or too fluffy and airy (like a sponge), which makes decorating difficult. This recipe uses a ‘reverse creaming’ method—or a modified mixing method—where the dry ingredients are coated with butter before the liquids are added. This coats the flour proteins in fat, inhibiting gluten formation, which results in a velvety, tender crumb that is sturdy enough to stack and decorate. Furthermore, we use a combination of whole eggs and egg whites. The whites keep the batter pale, allowing the colorful sprinkles to pop visually, while the yolks add richness and tenderness. For the frosting, we opt for a Swiss Meringue Buttercream over American Buttercream. American buttercream is often gritty and crusts over, making it hard to pipe delicate details like a unicorn mane. Swiss Meringue is silky, stable at room temperature, and takes gel food coloring beautifully without seizing. The balance of salt in the batter also cuts through the sweetness of the frosting, ensuring that the cake is palatable for adults, not just a sugar bomb for the kids.
Why You’ll Love This Recipe
- ✓Sturdy yet moist crumb perfect for stacking layers.
- ✓Silky Swiss Meringue Buttercream that pipes like a dream.
- ✓Vibrant, magical colors that do not bleed into the batter.
- ✓Detailed instructions for the iconic unicorn horn and eyes.
- ✓Can be made ahead of time for stress-free party planning.
- ✓Uses a mix of butter and oil for the ultimate texture balance.
Equipment You’ll Need
- ✓Three 6-inch round cake pans
- ✓Stand mixer with paddle and whisk attachments
- ✓Digital kitchen scale
- ✓Piping bags and tips (1M, 2D, 4B)
- ✓Offset spatula
- ✓Cake turntable
- ✓Bench scraper
- ✓Gel food coloring (Pink, Purple, Teal, Gold)
- ✓Fondant (White and Black)
- ✓Wooden skewer
Ingredients
- ✓2 1/2 cups Cake Flour, sifted
- ✓1 1/2 cups Granulated Sugar
- ✓2 1/2 tsp Baking Powder
- ✓1/2 tsp Salt
- ✓3/4 cup Unsalted Butter, room temperature, cubed
- ✓2 tbsp Vegetable Oil
- ✓4 large Egg Whites, room temperature
- ✓1 large Whole Egg, room temperature
- ✓1 cup Whole Milk, room temperature
- ✓2 tsp Pure Vanilla Extract or Vanilla Bean Paste
- ✓1/2 cup Rainbow Sprinkles (Jimmies, not Nonpareils)
- ✓FOR THE FROSTING: 6 large Egg Whites
- ✓2 cups Granulated Sugar
- ✓3 cups Unsalted Butter, cubed and cool
- ✓1 tbsp Vanilla Extract
- ✓Pinch of salt
- ✓White fondant for the horn and ears
- ✓Edible gold paint
Instructions
- Preheat your oven to 350°F (175°C). Grease three 6-inch cake pans with butter, line the bottoms with parchment paper, and dust the sides with flour.
- In the bowl of a stand mixer fitted with the paddle attachment, combine the cake flour, sugar, baking powder, and salt. Mix on low speed for 30 seconds to combine.
- Add the cubed butter and vegetable oil to the dry ingredients. Mix on low speed until the mixture resembles coarse sand and no large chunks of butter remain.
- In a separate jug, whisk together the egg whites, whole egg, milk, and vanilla extract.
- With the mixer on low, slowly pour in half of the wet ingredients. Increase speed to medium and beat for 2 minutes to build structure.
- Scrape down the sides of the bowl. Add the remaining wet ingredients in two batches, mixing on low for about 30 seconds after each addition. Do not overmix.
- Gently fold in the rainbow sprinkles by hand using a spatula.
- Divide the batter evenly among the three prepared pans (use a scale for accuracy). Bake for 30-35 minutes, or until a toothpick inserted into the center comes out clean.
- Let the cakes cool in the pans for 10 minutes, then turn them out onto a wire rack to cool completely.
- While cakes cool, make the frosting. Whisk egg whites and sugar in a heatproof bowl over a pot of simmering water until the sugar dissolves and the mixture reaches 160°F.
- Transfer to a stand mixer with the whisk attachment. Whip on high speed until stiff peaks form and the bowl feels cool to the touch (about 10-15 minutes).
- Switch to the paddle attachment. Add the cool cubed butter one piece at a time, mixing on medium speed. Once all butter is added, increase speed and whip until silky smooth. Add vanilla and salt.
- To assemble, level the cake tops. Place the first layer on a board, spread a layer of frosting, and repeat with the remaining layers.
- Crumb coat the entire cake with a thin layer of frosting and chill for 20 minutes.
- Divide the remaining frosting into four bowls. Leave one white, and tint the others pink, purple, and teal. Frost the cake smooth with the white frosting.
- Roll out white fondant into a tapered snake and twist it around a skewer to create a horn. Paint with gold edible paint. Create ears and eyes with fondant.
- Place the horn and ears on top of the cake. Fill piping bags with the colored frosting using various tips. Pipe rosettes and dollops down one side of the cake to create the unicorn’s ‘mane’.
- Add the fondant eyes to the front of the cake. Chill for 30 minutes before serving to set the design.
Expert Cooking Tips
- ✓Ingredients must be at room temperature to ensure the batter emulsifies properly.
- ✓Use ‘Jimmies’ type sprinkles (the little rods) rather than nonpareils (the tiny balls), as nonpareils can bleed color and make the batter muddy.
- ✓If your buttercream looks curdled after adding the butter, keep whipping! It will come together. If it is too soupy, chill the bowl for 10 minutes then whip again.
- ✓Weigh your batter into the pans to ensure perfectly even layers.
- ✓Make the fondant horn a few days in advance so it has time to dry and harden completely.
Substitutions and Variations
If you cannot find cake flour, you can make a substitute by removing 2 tablespoons of all-purpose flour from every cup and replacing it with 2 tablespoons of cornstarch; sift together twice. For a dairy-free version, replace the butter in the cake with a high-quality vegan butter stick and use almond or soy milk; however, the Swiss Meringue Buttercream relies heavily on real butter, so you would need to switch to a vegan shortening-based frosting. If you do not have a stand mixer, a hand mixer can work, but be prepared for a workout, especially when making the meringue. You can replace the vanilla bean paste with equal parts vanilla extract, though you will miss the visual appeal of the specks. For the egg whites in the frosting, carton egg whites generally do not whip up as well as fresh eggs, so stick to cracking them yourself for the best volume.
Common Mistakes to Avoid
The most common mistake is not cooling the cake layers completely before frosting. Even a slightly warm cake will melt the butter in the frosting, causing your layers to slide and the unicorn mane to droop. Another issue is overmixing the batter after adding the wet ingredients; this develops gluten and leads to a tough, chewy cake rather than a tender one. When making the horn, avoid making it too heavy or thick, as it might topple over; using a wooden skewer inside provides necessary support. Finally, do not skip the crumb coat step. It locks in the loose crumbs so your final white layer remains pristine and free of brown specks.
Serving Suggestions
Serve this cake on a tall cake stand to elevate the presentation and make it the focal point of the party table. Use a sharp knife dipped in hot water and wiped dry between cuts to get clean, professional-looking slices that show off the sprinkles inside. Pair the cake with rainbow fruit skewers or pink lemonade to continue the colorful theme. If you are serving this for a class party, pre-cutting the slices and serving them on individual colorful paper plates with gold forks adds a nice touch of elegance to the classroom setting.
Storage and Reheating Tips
This cake can be stored at room temperature in a cake box for up to 2 days, provided the room is cool. If you are in a warm climate, store it in the refrigerator. The buttercream acts as a seal, keeping the inside moist. Once cut, press a piece of plastic wrap directly against the exposed cake crumb to prevent it from drying out. Leftover slices can be wrapped individually in plastic wrap and foil, then frozen for up to 3 months. To eat, thaw the slices on the counter for an hour so the buttercream returns to its silky texture; eating it cold will result in a hard, waxy frosting texture.
Nutrition Facts (Estimated)
| Serving Size | 1 slice |
| Calories | 450 |
| Fat | 24g |
| Saturated Fat | 14g |
| Unsaturated Fat | 8g |
| Trans Fat | 0g |
| Cholesterol | 85mg |
| Sodium | 280mg |
| Carbohydrates | 58g |
| Fiber | 1g |
| Sugar | 35g |
| Protein | 5g |
Frequently Asked Questions
Can I make the cake layers ahead of time?
Yes, absolutely. You can bake the layers, let them cool completely, wrap them tightly in cling film, and freeze them for up to a month. Thaw them while still wrapped to prevent condensation from making the cake soggy.
Do I have to use Swiss Meringue Buttercream?
You don’t have to, but it is highly recommended for its stability and smoothness. American buttercream is sweeter and crusts over, which is fine, but it might not pipe as beautifully for the mane.
How do I get the gold color on the horn?
Mix edible gold luster dust with a tiny amount of vodka or lemon extract to create a thick paint. Brush this onto the dry fondant horn.
Why did my sprinkles sink to the bottom?
This happens if the batter is too thin or if you use heavy sprinkles. This recipe’s reverse creaming method creates a thick batter that suspends the sprinkles well.
Can I use this recipe for cupcakes?
Yes! This batter will make about 24 standard cupcakes. Bake them for 18-22 minutes at the same temperature.
What size pans should I use if I don’t have 6-inch pans?
You can use two 8-inch pans instead. The baking time may need to be adjusted slightly; check around the 25-minute mark.
Is the raw egg white in the frosting safe?
Yes, because you heat the egg whites and sugar to 160°F (71°C) over the double boiler, which pasteurizes them and makes them safe to eat.
How do I transport this cake to school?
Use a tall cake box. If the horn is very tall, you might need to leave the lid open or transport the horn separately and insert it upon arrival.
Conclusion
Creating a Fun Vanilla Unicorn Birthday Cake for a class party is more than just baking; it is about crafting a memory. The look of wonder on the kids’ faces when they see the golden horn and the vibrant mane is worth every minute of mixing and piping. While the design looks intricate, breaking it down into manageable steps—baking, making the frosting, and decorating—makes it completely achievable for any home baker. Plus, the reliable, moist vanilla base ensures that there are no leftovers to bring home. So grab your sprinkles, dust off your mixer, and get ready to bring a little bit of edible magic to the classroom!