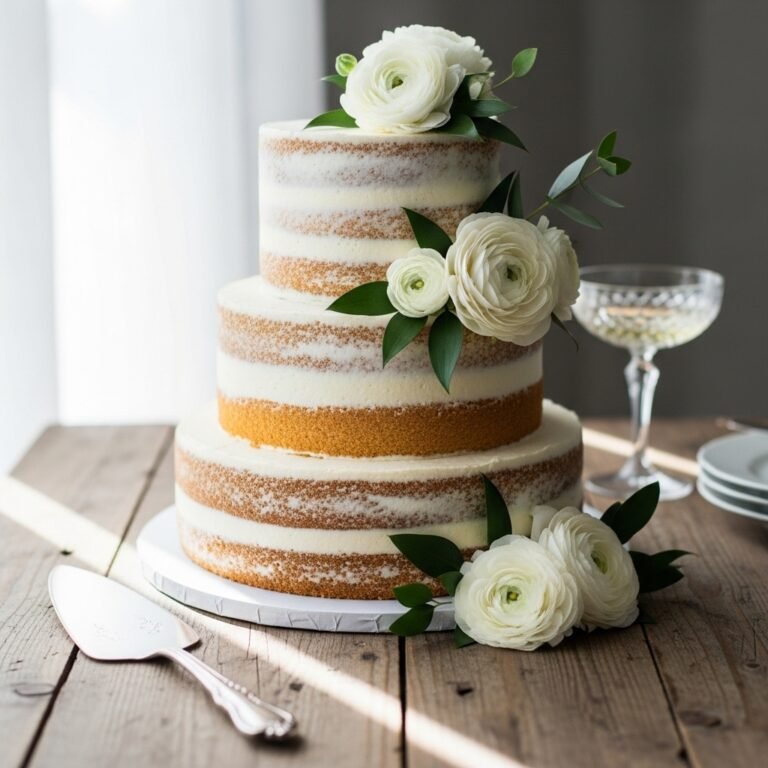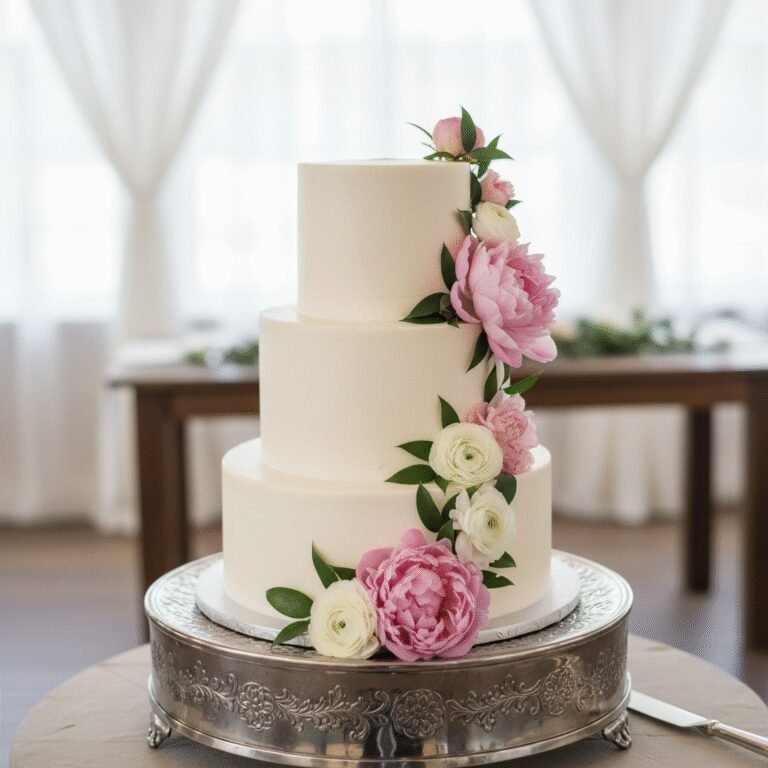
The Ultimate Elegant White Wedding Cake with Velvety Almond Buttercream
Elegant White Wedding Cake Recipe
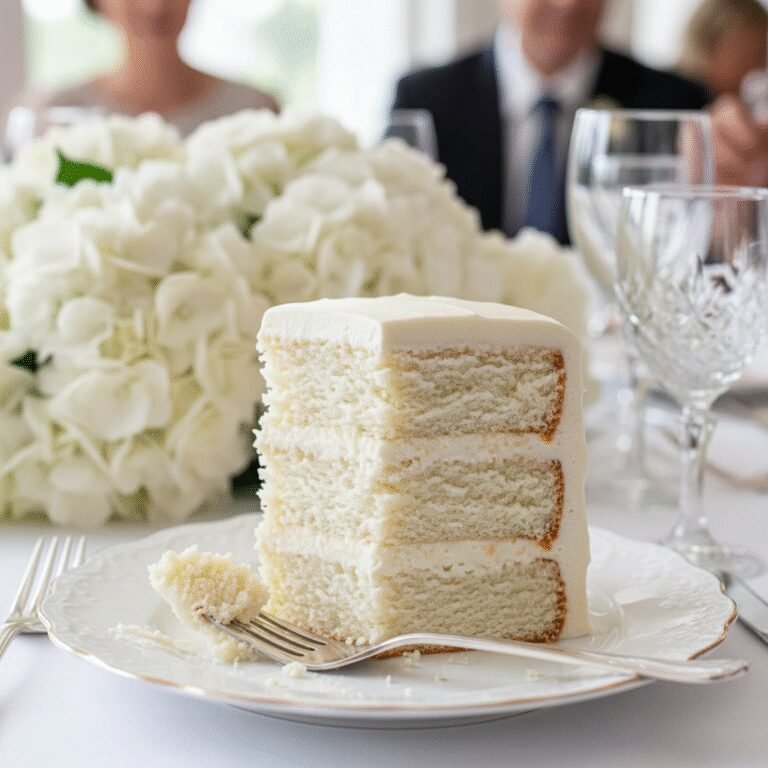
Achieve bakery-quality perfection at home with this Elegant White Wedding Cake recipe. Featuring a pristine, snow-white crumb that is incredibly moist and sturdy enough for stacking, this cake pairs perfectly with a silky almond buttercream for that classic, nostalgic wedding flavor.
45 minutes
35 minutes
1 hour 20 minutes
3 8-inch round cakes (approx. 24 servings)
Dessert
Baking
American
Vegetarian
There is something undeniably magical about the presence of a classic white wedding cake. It stands as a centerpiece of celebration, a symbol of new beginnings, and a vessel for sweet memories. However, for many home bakers and aspiring pastry chefs, achieving that elusive ‘bakery-white’ appearance while maintaining a moist, tender crumb can feel like an impossible feat. Often, white cakes sacrifice texture for color, ending up dry or bland. This recipe changes everything. We have meticulously developed a formula that balances the structural integrity needed for tiered cakes with a melt-in-your-mouth texture that rivals the finest patisseries.
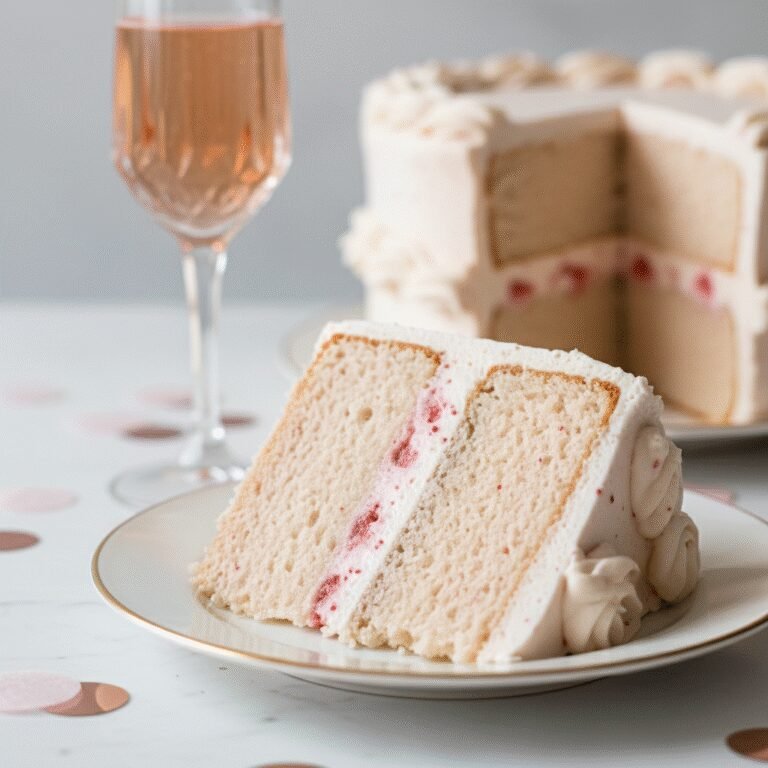
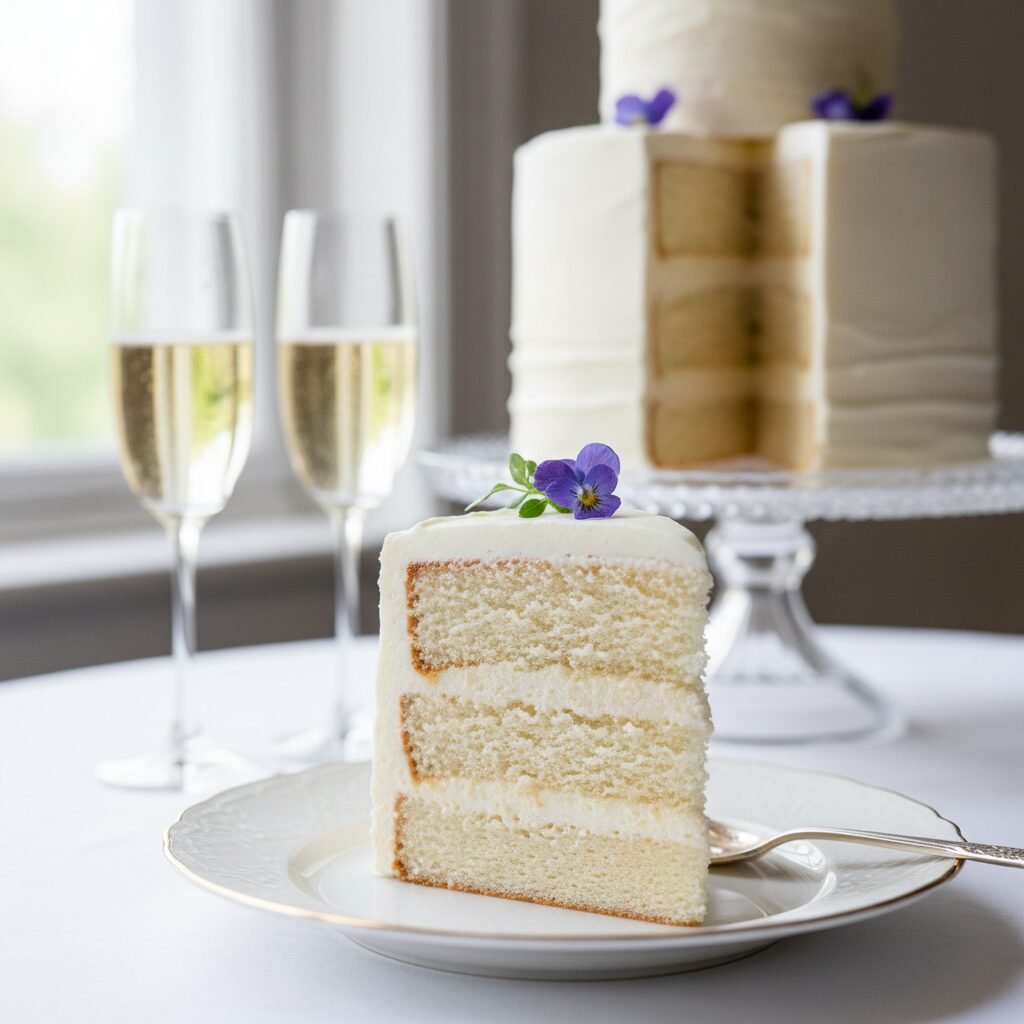
The flavor profile is delicately complex; while it is a vanilla-based cake, the addition of high-quality almond extract provides that distinct ‘wedding cake’ aroma that triggers nostalgia with every bite. The texture is akin to ‘white velvet’—dense enough to slice cleanly without crumbling, yet soft enough to feel light on the palate. Unlike yellow cakes that rely on whole eggs, this recipe utilizes egg whites and a specific mixing method to ensure the crumb remains starkly white. Whether you are baking for a wedding, a sophisticated bridal shower, or simply want to master the art of the white cake, this comprehensive guide will walk you through every step of the process. From the science of the reverse-creaming method to the secrets of keeping your edges from browning, we are diving deep into the art of elegant baking. Prepare to create a masterpiece that tastes even better than it looks.
History & Origins
The history of the wedding cake is a fascinating journey that spans centuries, evolving from humble grain cakes to the elaborate, multi-tiered confections we recognize today. The tradition traces its roots back to Ancient Rome, where a cake made of wheat or barley was broken over the bride’s head to symbolize good fortune and fertility. The guests would then scramble to collect the crumbs as tokens of luck. By Medieval England, the tradition had shifted to a pile of small, spiced buns. The couple would attempt to kiss over the towering stack; if successful, it promised a prosperous life together. This practice eventually inspired the French pastry chef creating the Croquembouche, but in England, it evolved into the tiered cakes we know today.
The concept of the ‘white’ wedding cake, however, is a specifically Victorian innovation. Before the 19th century, cakes were often fruitcakes, dark and dense. It was Queen Victoria’s wedding to Prince Albert in 1840 that popularized the pure white icing, which later became known as ‘Royal Icing.’ At the time, refined white sugar was incredibly expensive, making a white cake a supreme status symbol indicating the family’s wealth and social standing. The color white was also intended to symbolize purity and virginity, mirroring the bride’s dress—another trend popularized by Queen Victoria. Over the decades, as refined sugar became more accessible, the white cake became a staple of American weddings, evolving from heavy fruitcakes to the lighter, chemically leavened butter and sponge cakes that dominate the modern palate. Today, the white wedding cake remains an enduring icon of celebration, blending centuries of tradition with modern culinary techniques.
Why This Recipe Works
This recipe succeeds where many others fail due to a combination of specific ingredients and the ‘reverse creaming’ mixing technique. First, let’s talk about the color. To achieve a true white crumb, we eliminate egg yolks entirely, relying solely on egg whites for structure. However, removing yolks removes fat and emulsifiers, which can lead to dryness. To counteract this, we incorporate sour cream and whole milk. The acidity in the sour cream tenderizes the gluten strands in the flour, ensuring a soft bite, while the extra fat content compensates for the missing yolks.
Secondly, the mixing method is crucial. Traditional creaming (beating butter and sugar first) incorporates air but can sometimes lead to large tunnels or a domed top that needs trimming. This recipe uses the ‘reverse creaming’ or ‘paste’ method. We mix the dry ingredients with the butter first, coating the flour particles in fat before any liquid is added. This inhibits gluten formation (preventing toughness) and creates a finer, tighter crumb structure that is velvety and flat—perfect for stacking tiers without worrying about them collapsing. Finally, the use of cake flour instead of all-purpose flour lowers the protein content, further guaranteeing a delicate texture that melts in the mouth. The result is a cake that is structurally sound for architecture but texturally divine for eating.
Why You’ll Love This Recipe
- ✓Pristine white color perfect for elegant occasions.
- ✓Sturdy structure suitable for stacking multiple tiers.
- ✓Uses the reverse-creaming method for a flat, velvety crumb.
- ✓Infused with a nostalgic blend of vanilla and almond.
- ✓Stays moist for days thanks to sour cream and simple syrup.
- ✓Freezes exceptionally well for advance preparation.
Equipment You’ll Need
- ✓Stand mixer with paddle attachment
- ✓3 x 8-inch round cake pans
- ✓Kitchen scale (highly recommended)
- ✓Parchment paper
- ✓Sifter or fine-mesh sieve
- ✓Offset spatula
- ✓Wire cooling racks
- ✓Cake turntable (for decorating)
Ingredients
- ✓3 3/4 cups (430g) Cake flour, sifted
- ✓2 cups (400g) Granulated white sugar
- ✓1 tablespoon Baking powder
- ✓1 teaspoon Salt
- ✓1 cup (226g) Unsalted butter, room temperature but not melting
- ✓1 cup (240ml) Egg whites (approx. 7-8 large eggs), room temperature
- ✓1/2 cup (120g) Sour cream, full fat, room temperature
- ✓1 cup (240ml) Whole milk, room temperature
- ✓1 tablespoon Clear vanilla extract (for pure white color) or pure vanilla extract
- ✓1 teaspoon Almond extract
- ✓For the Buttercream: 2 cups (452g) Unsalted butter, softened
- ✓7-8 cups (900g) Powdered sugar, sifted
- ✓1/4 cup (60ml) Heavy cream
- ✓Pinch of salt
Instructions
- Preheat your oven to 340°F (170°C). This slightly lower temperature helps keep the cake flat and prevents the edges from browning too quickly. Grease three 8-inch cake pans, line the bottoms with parchment paper, and grease the paper. Dust with flour and tap out the excess.
- In a medium bowl, whisk together the egg whites, 1/4 cup of the milk, sour cream, vanilla extract, and almond extract. Set this liquid mixture aside.
- In the bowl of a stand mixer fitted with the paddle attachment, combine the sifted cake flour, sugar, baking powder, and salt. Mix on low speed for 30 seconds to combine.
- Add the softened butter and the remaining 3/4 cup of milk to the dry ingredients. Mix on low speed until the dry ingredients are moistened, then increase to medium speed and beat for exactly 2 minutes. The batter will look thick and creamy. Scrape down the sides and bottom of the bowl.
- Add the egg white liquid mixture in three separate batches, beating on medium speed for 20 seconds after each addition. Scrape down the bowl frequently to ensure everything is incorporated. Do not overmix after the last addition; the batter should be smooth and velvety.
- Divide the batter evenly between the three prepared pans. A kitchen scale is best for this to ensure even layers (approx. 550g per pan). Smooth the tops with an offset spatula.
- Bake for 30-35 minutes, or until a toothpick inserted into the center comes out with a few moist crumbs attached, but not wet batter. Do not overbake, or the white cake will become dry.
- Remove from the oven and let the cakes cool in the pans for 10-15 minutes. Then, run a knife around the edges and invert them onto wire racks to cool completely before decorating.
- While cakes cool, prepare the buttercream. Beat the butter on medium-high speed for 5-7 minutes until it is pale, almost white, and fluffy. Add the powdered sugar one cup at a time, mixing on low. Add salt, heavy cream, and extracts. Whip on high for another 3-5 minutes until airy.
- Once cakes are completely cool, level the tops if necessary. Stack and frost with the almond buttercream.
Expert Cooking Tips
- ✓Use clear vanilla extract if you want the cake to be absolutely stark white; regular vanilla adds a slight ivory tint.
- ✓Room temperature ingredients are non-negotiable. Cold eggs or milk will curdle the batter and ruin the emulsion.
- ✓Weigh your flour. Scooping with a cup often packs the flour down, leading to a dry, dense cake. Use a scale for precision.
- ✓Do not open the oven door before the 25-minute mark. The rush of cold air can cause the delicate protein structure to collapse.
- ✓Use cake strips (damp fabric strips wrapped around the pan) to insulate the edges. This prevents the outside from baking faster than the center, keeping the cake level and white.
- ✓Beat the butter for the frosting for a long time. The longer you beat butter, the whiter and lighter it becomes, removing the yellow hue.
- ✓Make a simple syrup (1:1 sugar and water) and brush it over the cooled layers before frosting to lock in moisture.
Substitutions and Variations
If you cannot find cake flour, you can make a substitute by removing 2 tablespoons of all-purpose flour from every cup and replacing it with cornstarch, sifting five times. However, real cake flour yields better results. For a dairy-free version, substitute the butter with a high-quality plant-based butter stick (not tub margarine), use full-fat coconut milk or almond milk instead of cow’s milk, and use a dairy-free sour cream or coconut yogurt. Note that the texture may be slightly less tender without the dairy proteins. If you have a nut allergy, simply omit the almond extract and double the vanilla; the cake will still be delicious but will lack that specific ‘wedding’ flavor profile. For the frosting, high-ratio shortening can be used in place of half the butter for a pure white, heat-stable frosting, which is often done in commercial bakeries.
Common Mistakes to Avoid
The most common mistake with white cake is overmixing the batter once the egg whites are added. This develops too much gluten, resulting in a tough, rubbery texture rather than a tender crumb. Another frequent error is overbaking. Because white cake doesn’t turn golden brown like a yellow cake, it can be hard to tell when it’s done visually. Rely on the toothpick test and check early. Using cold ingredients is another pitfall; if your butter or milk is cold, the batter will separate and look curdled, leading to an uneven bake. Finally, failing to prepare pans properly can lead to the cake sticking; always use parchment paper for the bottom of the pans.
Serving Suggestions
This elegant cake is versatile in its presentation. For a classic wedding look, serve slices on fine china with a glass of champagne or sparkling rosé. The almond flavor pairs beautifully with fresh fruit; consider serving with macerated raspberries, strawberries, or a tart apricot coulis to cut through the sweetness of the buttercream. For a floral touch, garnish the plate with edible flowers like pansies or violets. If serving at a summer event, a side of lemon curd or a scoop of raspberry sorbet complements the vanilla-almond profile perfectly.
Storage and Reheating Tips
Unfrosted cake layers can be wrapped tightly in plastic wrap and stored at room temperature for up to 2 days. For longer storage, wrap the layers in plastic wrap and then aluminum foil, and freeze for up to 3 months. Thaw frozen layers in the refrigerator overnight before decorating. Once frosted, the cake can sit at room temperature (in a cool room) for 2-3 days. The sugar and fat act as preservatives. If the weather is hot or humid, store the cake in the refrigerator, but allow it to come to room temperature for at least 2-3 hours before serving. Cold cake has a waxy texture and muted flavor; it must be eaten at room temperature for the full ‘velvet’ experience.
Nutrition Facts (Estimated)
| Serving Size | 1 slice (1/24th of cake) |
| Calories | 450 |
| Fat | 22g |
| Saturated Fat | 14g |
| Unsaturated Fat | 7g |
| Trans Fat | 0.5g |
| Cholesterol | 65mg |
| Sodium | 210mg |
| Carbohydrates | 58g |
| Fiber | 0.5g |
| Sugar | 38g |
| Protein | 4g |
Frequently Asked Questions
Why did my white cake turn out dry?
Dryness is usually caused by overbaking or measuring flour incorrectly. If you scoop the flour with the cup, you might be adding up to 30% more flour than the recipe calls for. Always spoon and level or use a scale. Also, ensure you didn’t skip the simple syrup soak if you baked it days in advance.
Can I use all-purpose flour instead of cake flour?
Technically yes, but the texture will be more like a muffin or bread—heavier and chewier. Cake flour has a lower protein content (around 7-9%) compared to AP flour (10-12%), which is essential for that delicate, melt-in-your-mouth texture specific to wedding cakes.
How do I get my buttercream perfectly white?
Butter is naturally yellow. To get it white, beat the butter alone for 5-10 minutes to aerate it. You can also add a tiny, tiny drop of violet food coloring to counteract the yellow tones (color theory!), or swap half the butter for high-ratio shortening.
Can I make this cake ahead of time?
Absolutely. In fact, professional bakers often bake layers weeks in advance. Wrap the cooled layers tightly in double layers of plastic wrap and freeze. Freezing actually helps lock in moisture, making the cake even more tender when thawed.
Why did my cake sink in the middle?
Sinking is usually caused by underbaking (the structure wasn’t set) or opening the oven door too early. It can also happen if there is too much leavening (baking powder) or if the batter was overmixed, incorporating too much air that collapses later.
Can I use this recipe for cupcakes?
Yes! This batter works wonderfully for cupcakes. Bake them at 350°F for about 18-22 minutes. It should yield approximately 24-30 cupcakes.
What is the best way to cut a tall cake?
Don’t cut wedges like a pie! For tall barrel cakes, use the grid method. Cut a straight line across the cake about 1 inch from the edge, then slice that rectangular slab into portions. Repeat moving inward.
Can I add fruit to the batter?
Adding fresh fruit directly to this batter can be risky as the extra moisture can cause the cake to become soggy or sink. It is better to use fruit as a filling between layers rather than baking it into the cake itself.
Is this cake sturdy enough for fondant?
Yes, the reverse creaming method creates a dense enough structure to support the weight of fondant without squishing, provided you use proper doweling support for tiered cakes.
Conclusion
Mastering the Elegant White Wedding Cake is a feather in the cap of any home baker. While it requires precision, patience, and respect for the science of baking, the reward is a dessert that creates a lasting memory. This cake is more than just flour and sugar; it is a labor of love, designed to celebrate life’s most beautiful moments. Whether you are stacking it three tiers high for a nuptial celebration or baking a single layer for a quiet anniversary dinner, the timeless combination of vanilla, almond, and a tender white crumb never goes out of style. So, preheat your oven, separate your eggs, and prepare to bake something truly spectacular.