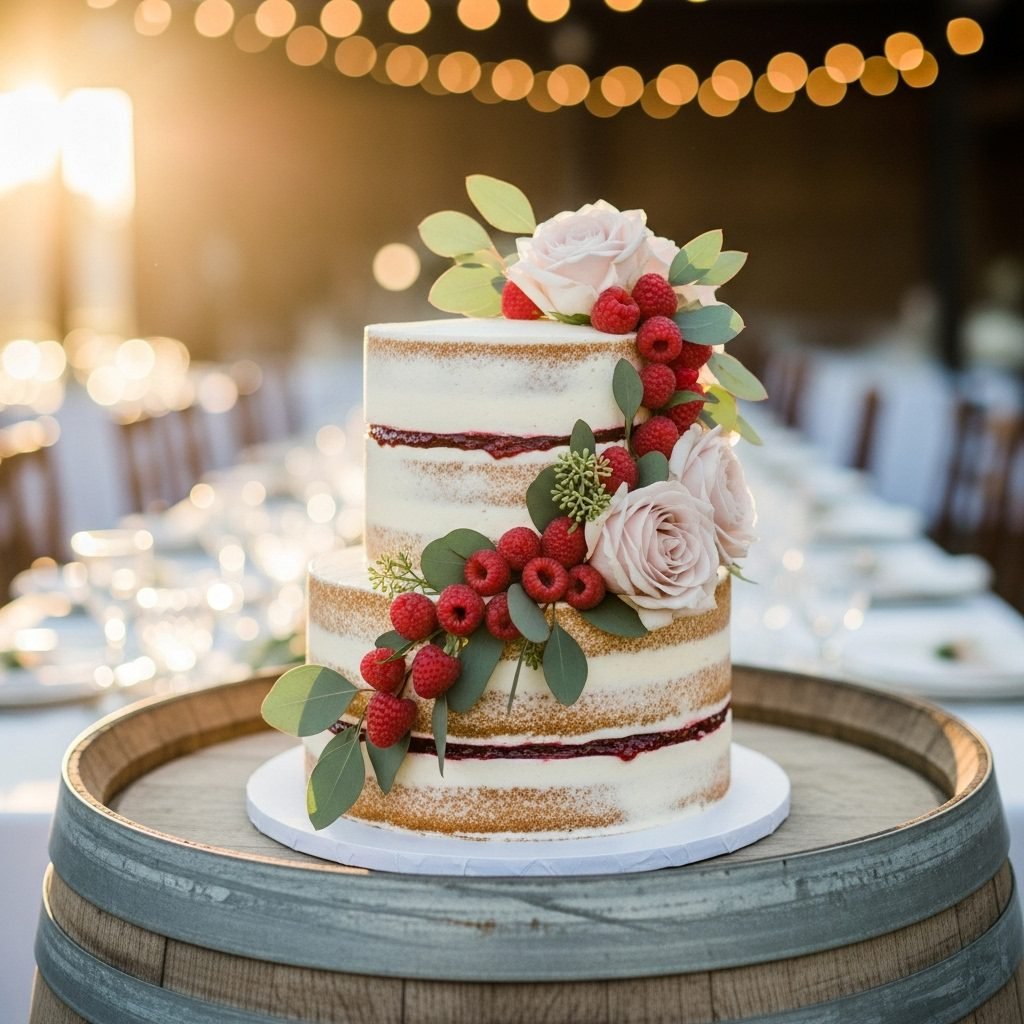
Elegant Vanilla Raspberry Wedding Cake With Naked Frosting Style Recipe
Elegant Vanilla Raspberry Wedding Cake With Naked Frosting Style Recipe
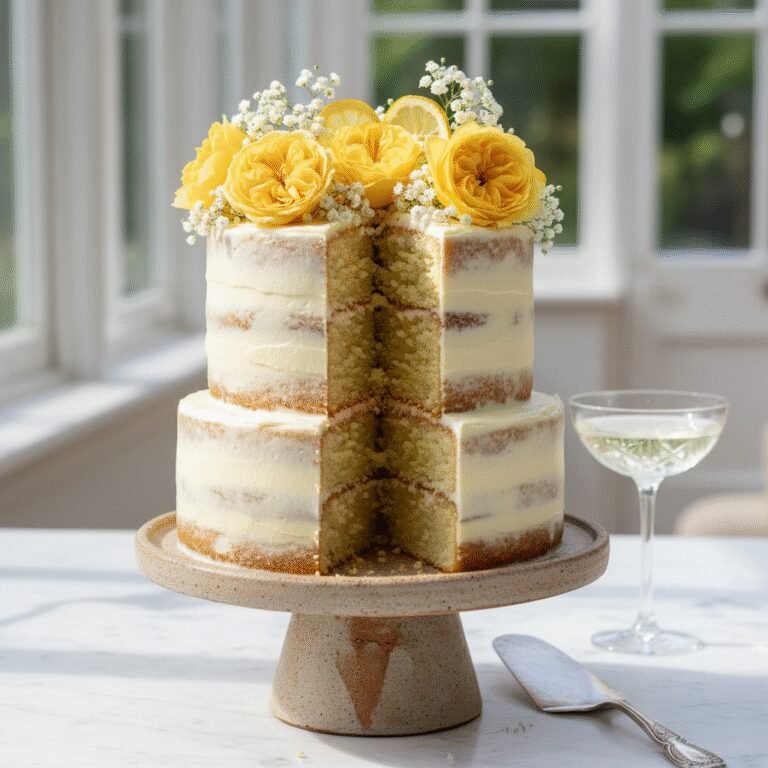
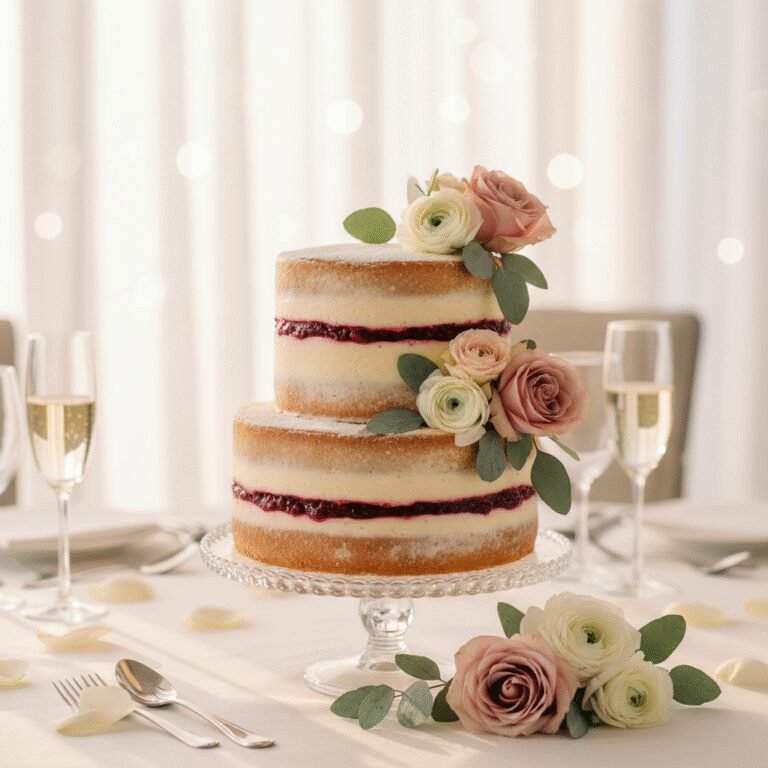
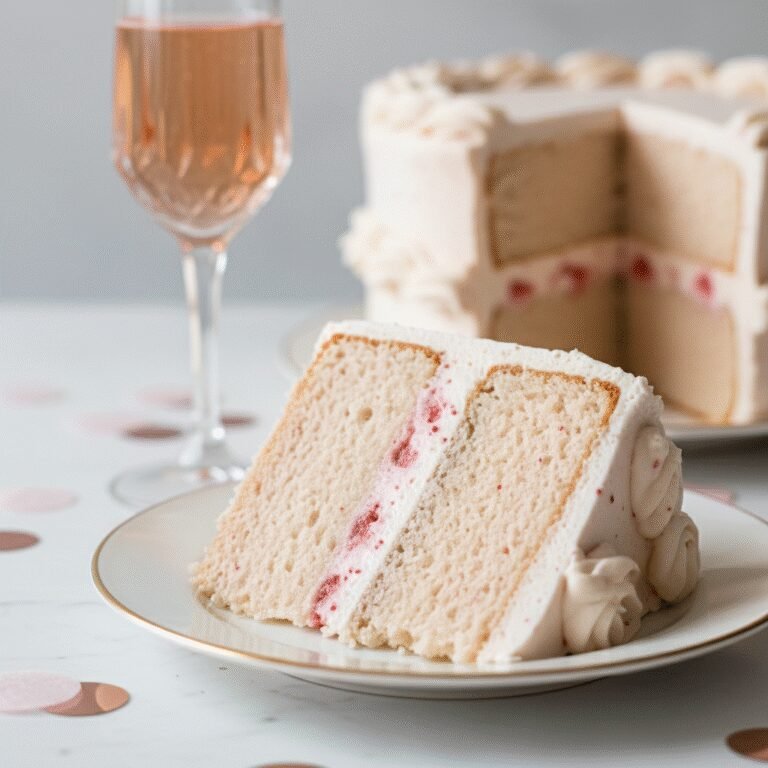
This breathtaking semi-naked wedding cake combines tender layers of vanilla bean sponge with tart raspberry filling and silky Swiss meringue buttercream. Perfect for rustic, bohemian, or elegant DIY weddings, this recipe delivers professional bakery results with a stunning, exposed-layer aesthetic.
2 hours
45 minutes
4 hours (plus cooling)
2-Tier Cake (approx. 25-30 servings)
Dessert
Baking
American / Modern European
Vegetarian
There is something undeniably romantic and effortlessly chic about a naked wedding cake. In a world often dominated by stiff fondant and overly manicured sugar flowers, the naked cake—or more accurately, the semi-naked cake—stands out by baring its soul. This Elegant Vanilla Raspberry Wedding Cake is the epitome of that rustic sophistication. It invites guests to feast with their eyes on the tender, golden crumb peeking through a sheer veil of buttercream, promising a dessert that prioritizes flavor and texture over rigid perfection.
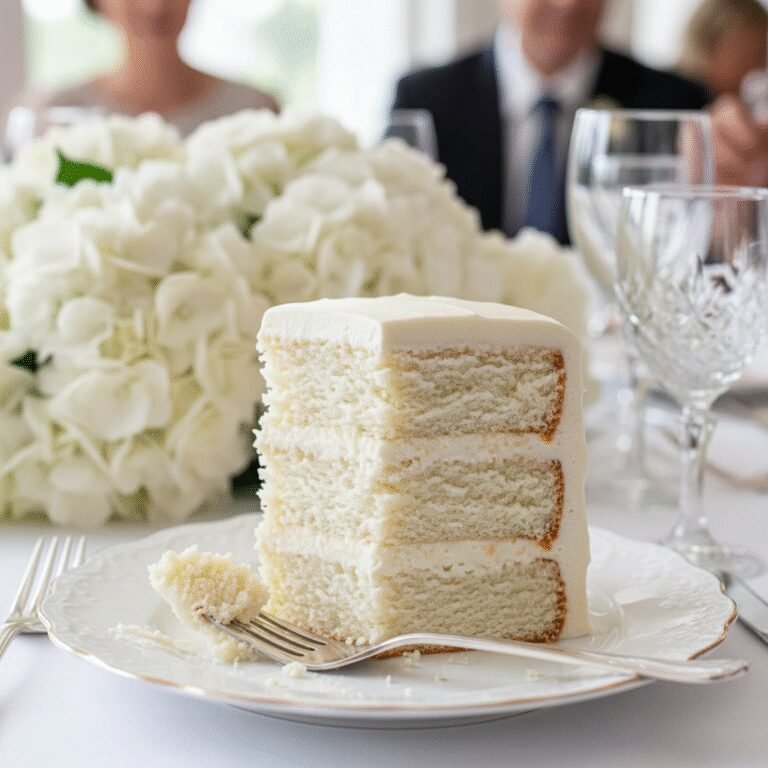
This recipe is designed for the ambitious home baker or the DIY bride who wants to create a centerpiece that tastes as incredible as it looks. We start with a white velvet vanilla cake base. Unlike standard yellow cakes, this sponge uses egg whites and sour cream to achieve a plush, tight crumb that is sturdy enough for stacking yet melts in your mouth. The flavor is infused with high-quality vanilla bean paste, providing those signature black speckles that signal luxury to the palate.
Between these cloud-like layers lies a vibrant contrast: a sharp, homemade raspberry coulis and fresh berries. The tartness of the fruit cuts through the richness of the cake, creating a balanced bite that prevents the dessert from becoming cloyingly sweet. Enveloping the entire creation is a Swiss Meringue Buttercream. Unlike the gritty sweetness of American buttercream, this frosting is silky, buttery, and stable, making it the perfect medium for the ‘scrape-down’ technique required for the naked look. Whether you are celebrating a wedding, a milestone anniversary, or an upscale garden party, this cake captures the essence of modern elegance.
History & Origins
The history of the wedding cake is a fascinating journey through centuries of symbolism, wealth, and culinary evolution. In Ancient Rome, the tradition began not with a sweet confection, but with a loaf of barley bread broken over the bride’s head to symbolize fertility and good fortune. By medieval England, this evolved into a custom where guests brought small spiced buns, stacking them in a high mound; if the bride and groom could kiss over the top without knocking it over, a lifetime of prosperity was guaranteed. This tradition eventually inspired the French Croquembouche.
However, the precursor to the modern tiered cake emerged in 19th-century Britain. Queen Victoria’s 1840 wedding cake is largely credited with popularizing the ‘white wedding cake.’ At the time, refined white sugar was incredibly expensive, so a pure white icing (later dubbed Royal Icing) was a supreme status symbol, indicating the family’s wealth. For over a century, the standard remained heavy fruitcakes covered in marzipan and rock-hard royal icing, prioritizing preservation and display over texture.
The ‘Naked Cake’ phenomenon is a relatively recent chapter in this history, emerging prominently around the early 2010s. As the culinary world shifted towards farm-to-table movements and rustic aesthetics, pastry chefs like Christina Tosi of Momofuku Milk Bar began championing the idea of exposing the cake’s interior. This style rejected the artifice of fondant, celebrating the honest ingredients and the architectural beauty of the layers themselves. It became the darling of Pinterest-era weddings, perfectly suiting the rise of barn venues, botanical themes, and a cultural shift towards authenticity. This Vanilla Raspberry version honors that modern tradition, blending the classic Victorian flavor profile with the contemporary, unpretentious aesthetic of the 21st century.
Why This Recipe Works
This recipe succeeds where many wedding cakes fail because it prioritizes structural integrity without sacrificing moisture—a delicate balance in tier cakes. The foundation of this success is the ‘Reverse Creaming Method’ (also known as the paste method). By mixing the butter directly into the dry ingredients before adding liquids, we coat the flour proteins in fat. This inhibits gluten formation, resulting in a cake that is velvety and tender rather than tough or bready, yet it remains dense enough to support the weight of multiple tiers.
Furthermore, the use of sour cream introduces acidity and fat, which tenderizes the crumb and keeps the cake moist for days—a critical feature for wedding cakes that are often baked in advance. We specifically use Swiss Meringue Buttercream (SMBC) for the frosting. SMBC is made by cooking egg whites and sugar to a safe temperature before whipping them into a stable meringue and emulsifying with butter. This creates a frosting that hardens slightly when chilled (due to the high butter content), acting as a cement to hold the layers and raspberry filling in place, but softens to a luscious, ice-cream-like texture at room temperature. The ‘naked’ scraping technique also serves a functional purpose: by removing the bulk of the outer frosting, the sugar-to-cake ratio is reduced, allowing the fresh raspberry flavor to shine through without overwhelming the palate.
Why You’ll Love This Recipe
- ✓Stunning rustic-chic visual appeal perfect for modern weddings.
- ✓Swiss Meringue Buttercream offers superior stability and silky texture.
- ✓Reverse creaming method ensures a flat, tender, and moist crumb.
- ✓Fresh raspberry filling provides a tart contrast to the sweet vanilla.
- ✓Highly customizable decoration with fresh flowers or seasonal fruits.
- ✓Detailed instructions make professional stacking achievable at home.
Equipment You’ll Need
- ✓Stand mixer with paddle and whisk attachments
- ✓Three 6-inch round cake pans
- ✓Three 8-inch round cake pans
- ✓Digital kitchen scale
- ✓Cake turntable
- ✓Offset spatula
- ✓Bench scraper (metal or acrylic)
- ✓Piping bags
- ✓Cake boards (6-inch and 8-inch)
- ✓Bubble tea straws or wooden dowels (for support)
- ✓Serrated knife
Ingredients
- ✓FOR THE CAKE:
- ✓5 cups (600g) Cake flour, sifted
- ✓3 cups (600g) Granulated sugar
- ✓2 1/2 tbsp Baking powder
- ✓1 tsp Salt
- ✓1 1/2 cups (340g) Unsalted butter, room temperature, cubed
- ✓1 1/2 cups (360ml) Egg whites (approx. 10-12 large eggs)
- ✓1/2 cup (120g) Sour cream, room temperature
- ✓1 1/2 cups (360ml) Whole milk, room temperature
- ✓2 tbsp Vanilla bean paste
- ✓FOR THE FILLING:
- ✓1 1/2 cups High-quality raspberry jam (seedless preferred)
- ✓2 cups Fresh raspberries, washed and thoroughly dried
- ✓FOR THE SWISS MERINGUE BUTTERCREAM:
- ✓10 Large egg whites (300g)
- ✓2 1/2 cups (500g) Granulated sugar
- ✓3 cups (680g) Unsalted butter, cubed and slightly cool
- ✓1 tbsp Pure vanilla extract
- ✓Pinch of salt
Instructions
- 1. PREPARE PANS AND OVEN: Preheat oven to 335°F (170°C). Grease three 8-inch pans and three 6-inch pans. Line the bottoms with parchment paper and grease the paper. Dust with flour, tapping out excess.
- 2. MIX DRY INGREDIENTS: In the bowl of a stand mixer fitted with the paddle attachment, combine cake flour, sugar, baking powder, and salt. Mix on low speed for 30 seconds to blend.
- 3. REVERSE CREAMING: Add the cubed, room-temperature butter to the dry ingredients. Mix on low speed until the mixture resembles coarse sand and no large chunks of butter remain (approx. 2-3 minutes).
- 4. ADD WET INGREDIENTS: In a separate jug, whisk together the egg whites, sour cream, milk, and vanilla bean paste. With the mixer on low, slowly pour in half of the liquid mixture. Increase speed to medium-high and beat for 2 minutes to develop structure. Scrape down the bowl. Add the remaining liquids in two batches, mixing on low just until combined.
- 5. BAKE: Distribute batter among the pans (fill about 2/3 full). Bake for 25-35 minutes, or until a toothpick inserted into the center comes out clean. The 6-inch cakes will bake faster than the 8-inch ones. Remove from oven and let cool in pans for 10 minutes, then turn out onto wire racks to cool completely.
- 6. MAKE THE BUTTERCREAM: Whisk egg whites and sugar in a heatproof bowl over a pot of simmering water (double boiler). Whisk constantly until sugar is dissolved and mixture reaches 160°F (71°C). Transfer to stand mixer with whisk attachment. Whip on high speed until stiff peaks form and the bowl feels cool to the touch (approx. 10-15 minutes).
- 7. EMULSIFY: Switch to the paddle attachment. With the mixer on low, add the butter one cube at a time. Once all butter is added, increase speed to medium-high and whip until silky and smooth. Add vanilla and salt.
- 8. ASSEMBLE TIERS: Level the tops of all cooled cakes with a serrated knife. Place an 8-inch cake layer on the 8-inch board. Pipe a dam of buttercream around the edge. Fill the center with raspberry jam and press fresh raspberries into the jam. Top with the next layer and repeat. Do the same for the 6-inch tier on its own board.
- 9. CRUMB COAT (NAKED STYLE): Cover the sides and top of the tiers with a layer of buttercream. Using a bench scraper, smooth the sides while applying pressure to scrape away most of the frosting, revealing the cake layers underneath. Chill both tiers for at least 30 minutes.
- 10. STACKING: Insert 4-5 dowels/straws into the center of the bottom (8-inch) tier, cutting them flush with the top of the cake. Carefully place the 6-inch tier on top. Decorate with fresh flowers, extra berries, and a dusting of powdered sugar.
Expert Cooking Tips
- ✓Ensure all ingredients, especially butter and eggs, are truly at room temperature to prevent the batter from curdling.
- ✓Weigh your flour. Scooping with a cup often leads to over-packing, resulting in a dense, dry cake.
- ✓Do not over-bake. White cakes dry out faster than yellow cakes; check them a few minutes before the timer goes off.
- ✓If your buttercream looks curdled (soupy or chunky) after adding butter, keep whipping! It will come together. If it’s too soupy, chill the bowl for 10 minutes then whip again.
- ✓Wash and dry berries thoroughly. Any water left on the raspberries can cause the filling to bleed into the cake.
- ✓Chill the cakes before leveling. Cold cake produces fewer crumbs and is much easier to cut straight.
- ✓Use a ‘dam’ of buttercream when filling. This ring of frosting prevents the raspberry jam from leaking out the sides.
Substitutions and Variations
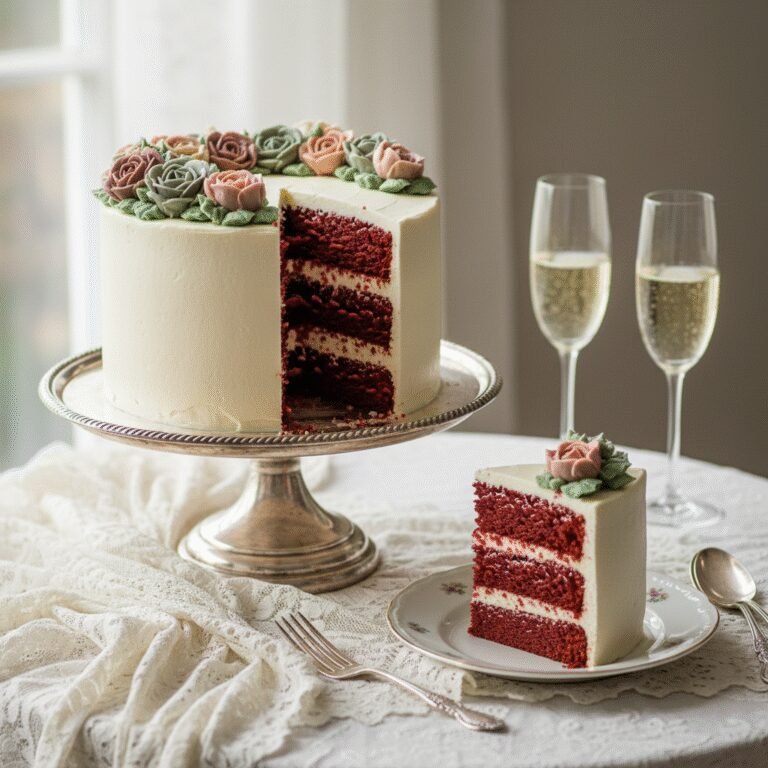
If you cannot find cake flour, you can make a substitute by removing 2 tablespoons of all-purpose flour per cup and replacing it with cornstarch, sifted together multiple times. For a gluten-free version, use a high-quality 1:1 gluten-free baking flour blend that contains xanthan gum. If you prefer a different fruit profile, strawberry or blackberry preserves work beautifully in place of raspberry. For the frosting, if Swiss Meringue is too intimidating, you can use American Buttercream, though it will be much sweeter and crust over. If you don’t have vanilla bean paste, pure vanilla extract is fine, though you will miss the visual speckles. Sour cream can be substituted with full-fat Greek yogurt.
Common Mistakes to Avoid
The most common mistake with naked cakes is drying out the exposed edges. Because there is no thick layer of fondant or buttercream to seal moisture in, these cakes should be assembled as close to the event as possible or brushed with a simple syrup (sugar and water) to lock in moisture. Another error is insufficient structural support; never stack tiers without dowels, or the bottom cake will collapse under the weight. Finally, rushing the cooling process of the buttercream base often leads to a runny frosting that slides off the cake; ensure the meringue is completely cool before adding butter.
Serving Suggestions
Serve this cake at room temperature. Butter-based cakes become firm in the fridge, so allow the cake to sit out for at least 2-3 hours before serving to ensure the texture is soft and the buttercream is creamy. Garnish the cake plate with loose greenery, eucalyptus, or scattered rose petals for a cohesive look. A glass of chilled Prosecco or a Rosé pairs perfectly with the raspberry notes. For a wedding, slice using a clean, warm knife (dipped in hot water and wiped dry) for sharp, professional cuts.
Storage and Reheating Tips
Store the fully assembled cake in the refrigerator if making a day ahead, but ensure it is in a cake box to prevent it from absorbing fridge odors. Leftovers can be stored in an airtight container in the fridge for up to 4 days. The buttercream acts as a barrier, but the exposed cake edges will dry out faster than a fully frosted cake. For long-term storage, wrap individual slices tightly in plastic wrap and then foil, and freeze for up to 3 months. Thaw in the fridge overnight before eating.
Nutrition Facts (Estimated)
| Serving Size | 1 slice |
| Calories | 580 |
| Fat | 32g |
| Saturated Fat | 19g |
| Unsaturated Fat | 11g |
| Trans Fat | 0.5g |
| Cholesterol | 95mg |
| Sodium | 310mg |
| Carbohydrates | 68g |
| Fiber | 1g |
| Sugar | 42g |
| Protein | 6g |
Frequently Asked Questions
Can I bake the cake layers ahead of time?
Yes! You can bake the layers up to 3 days in advance if wrapped tightly in plastic wrap and stored in the fridge, or up to 1 month if frozen. Frozen layers are actually easier to stack and frost.
Why is my Swiss Meringue Buttercream soupy?
This happens if the meringue was too warm when you added the butter, causing the butter to melt. Put the bowl in the fridge for 15-20 minutes, then whip again on high speed. It will come together.
Do I really need dowels for just two tiers?
Absolutely. Even a small 6-inch cake is heavy. Without dowels in the bottom tier to support the weight, the bottom cake will compress, bulge, and potentially collapse.
Can I use frozen raspberries for the filling?
It is not recommended to use whole frozen raspberries inside the cake as they release too much water when thawing, which can make the cake soggy. Use fresh berries for texture, or cook frozen berries down into a thick compote.
How do I get smooth sides on a naked cake?
The key is a good metal bench scraper and a turntable. Apply a thick coat first, then hold the scraper stationary while rotating the table to remove the excess.
Is this cake stable for an outdoor summer wedding?
Swiss Meringue Buttercream is butter-based, so it will melt in direct hot sun or temperatures above 80°F (27°C). Keep it in a cool, shaded area or air-conditioned room until display time.
Can I make this cake dairy-free?
You can substitute butter with high-quality plant-based butter sticks (not tub margarine) and use almond or soy milk. However, the structural integrity of vegan buttercream can vary.
What flowers are safe to put on a cake?
Ensure any flowers used are non-toxic and pesticide-free (organic). Common safe choices include roses, peonies, and chamomile. Wrap stems in floral tape or insert them into a straw before placing in the cake.
Why did my cake sink in the middle?
This usually happens if the oven door was opened too early, causing a temperature drop, or if the cake was underbaked. Use an oven thermometer to ensure accuracy.
Conclusion
Creating your own wedding cake is a labor of love that pays off in spectacular fashion. This Elegant Vanilla Raspberry Naked Cake offers the perfect blend of professional structure and homemade charm. The visual of the golden layers peeking through the frosting, combined with the burst of fresh fruit and vanilla, creates a sensory experience that guests will remember long after the last dance. Whether you are a bride on a budget or a baker looking to expand your repertoire into tiered cakes, this recipe provides the roadmap to a centerpiece that is as delicious as it is beautiful. Trust the process, take your time with the chilling steps, and enjoy the creative freedom of decorating your masterpiece.