Elegant Vanilla Bean & Raspberry Wedding Cake with Swiss Meringue Buttercream
Elegant Vanilla Raspberry Wedding Cake Recipe
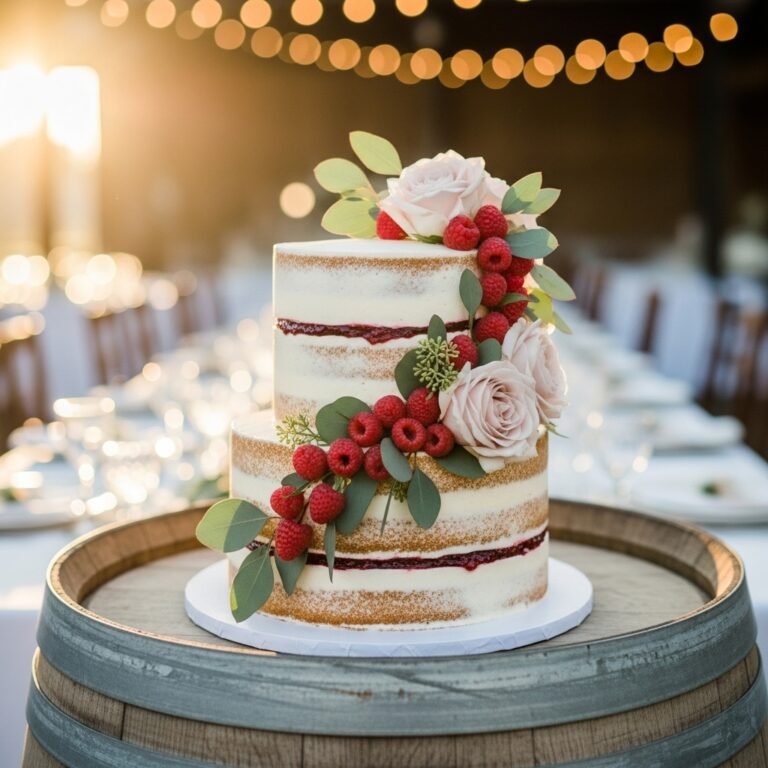
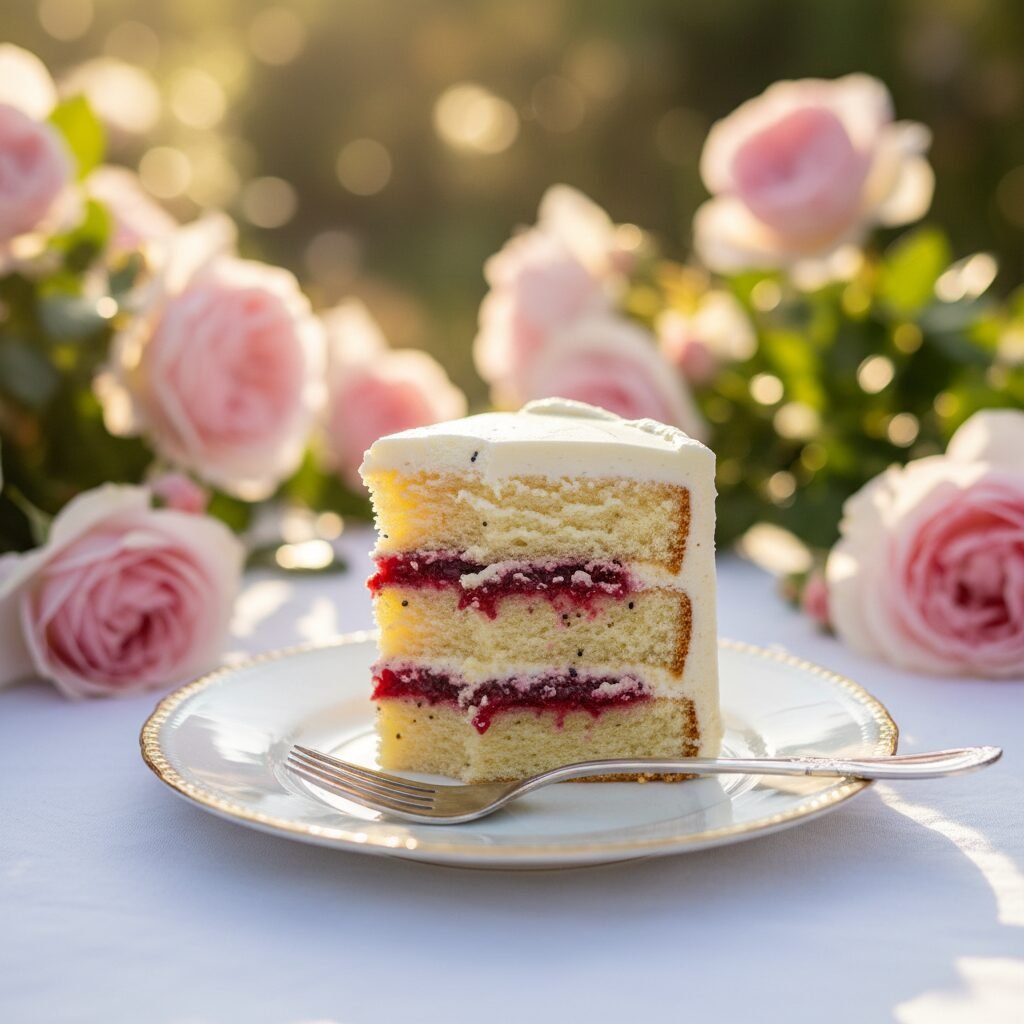
This show-stopping Elegant Vanilla Raspberry Wedding Cake features tender, melt-in-your-mouth vanilla bean layers filled with a vibrant, tart raspberry coulis and enveloped in silky smooth Swiss meringue buttercream. It is the ultimate celebration dessert, designed to impress both visually and gastronomically with its sophisticated flavor profile and professional finish.
2 hours
35 minutes
4 hours
One 3-layer 8-inch cake (12-16 servings)
Dessert
Baking
American / French Inspired
Vegetarian
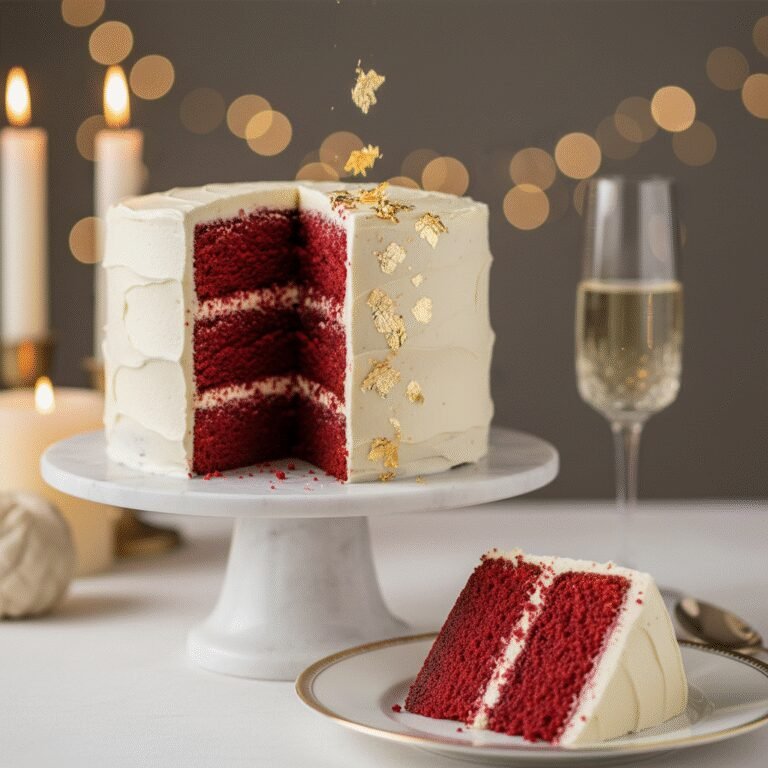
There is something undeniably magical about slicing into a pristine, tall cake to reveal layers of soft, white sponge contrasted by a striking ribbon of ruby-red fruit. This Elegant Vanilla Raspberry Wedding Cake is more than just a dessert; it is a culinary centerpiece designed for life’s most beautiful moments. Whether you are baking for an intimate backyard wedding, a milestone anniversary, or simply because you believe dessert should be an event in itself, this recipe delivers bakery-quality results right from your home kitchen. The foundation of this masterpiece is the vanilla bean cake. Unlike standard yellow cakes, this white velvet sponge relies on egg whites and sour cream to achieve a texture that is both sturdy enough to stack and incredibly tender on the palate. We use real vanilla bean paste to speckle the crumb with aromatic black seeds, offering a depth of flavor that extracts simply cannot match. But the true star is the filling. A layer of sweet buttercream can sometimes be overwhelming, so we introduce a sharp, homemade raspberry reduction. This tart, jammy filling cuts through the richness of the butter and sugar, awakening the taste buds and providing a moisture barrier that keeps the cake fresh for days. Finally, the entire confection is cloaked in Swiss Meringue Buttercream—a frosting known for its stability and cloud-like texture. It pipes beautifully, holds up in warmer temperatures better than American buttercream, and has a restrained sweetness that allows the vanilla and fruit to shine. This recipe is a labor of love, but the detailed steps below will guide you to a flawless, professional finish that will have your guests asking which bakery you ordered it from.
History & Origins
The tradition of the wedding cake is steeped in centuries of folklore, symbolism, and culinary evolution. Its origins can be traced back to ancient Rome, where a cake made of wheat or barley was broken over the bride’s head to symbolize good fortune and fertility. The guests would then scramble for the crumbs to share in the couple’s luck. By the Medieval period in England, this evolved into a tradition where guests brought small buns or spiced cakes to the wedding, stacking them in a high pile. If the bride and groom could kiss over the top of the stack without knocking it over, it was believed they would enjoy a lifetime of prosperity. This practice eventually inspired the French croquembouche and the tiered cakes we recognize today. The modern ‘white wedding cake’ gained prominence in the Victorian era. Before this, cakes were often fruitcakes, dark and dense, capable of being preserved for long periods. The white icing, known as ‘royal icing,’ was a status symbol; refined white sugar was incredibly expensive, so a pure white cake indicated the family’s wealth and social standing. Queen Victoria’s wedding cake in 1840 weighed 300 pounds and popularized the tiered structure and elaborate white decoration. As milling technology improved in the 20th century, finer cake flours became available in America, leading to the rise of the ‘high-ratio’ cake—cakes with a higher ratio of sugar and liquid to flour—resulting in the lighter, fluffier sponges we prefer today. The addition of fresh fruit fillings, like raspberry, is a more modern twist, moving away from heavy marzipan and dried fruits toward fresher, brighter flavor profiles that celebrate seasonal produce.
Why This Recipe Works
This recipe succeeds because it meticulously balances structural integrity with delicate texture—two qualities often at odds in cake baking. First, we utilize the ‘reverse creaming’ method for the sponge. Instead of creaming butter and sugar first, we mix the butter into the dry ingredients until the flour particles are coated in fat. This inhibits gluten formation when the wet ingredients are added, resulting in a ‘velvety’ crumb that is dense enough to support tiers but soft enough to melt in your mouth. Secondly, the inclusion of sour cream and egg whites is crucial. Egg whites provide the protein structure without the yellow yolk color, keeping the crumb white, while the acidity in the sour cream tenderizes the gluten strands and adds moisture. For the filling, we don’t just use raw berries or jarred jam. We cook down fresh or frozen raspberries with a touch of cornstarch and lemon juice. This reduction concentrates the raspberry flavor, removing excess water that would otherwise make the cake soggy. The resulting coulis is thick and stable, sitting perfectly between the layers. Finally, the Swiss Meringue Buttercream is the glue that holds it all together. By heating egg whites and sugar to 160°F before whipping, we denature the proteins, creating a stable meringue base that emulsifies effortlessly with butter. This creates a frosting that is smooth, not gritty, and stable enough to hold sharp edges and intricate piping designs.
Why You’ll Love This Recipe
- ✓Reverse creaming method guarantees a tender, flat-baking crumb.
- ✓Real vanilla bean paste provides superior aroma and visual appeal.
- ✓Tart raspberry reduction balances the sweetness of the cake.
- ✓Swiss Meringue Buttercream offers a silky, non-crusting finish.
- ✓Sturdy structure suitable for stacking multiple tiers.
- ✓Can be made ahead and frozen for stress-free event planning.
Equipment You’ll Need
- ✓Three 8-inch round cake pans
- ✓Stand mixer with paddle and whisk attachments
- ✓Kitchen scale
- ✓Candy thermometer
- ✓Saucepan
- ✓Fine-mesh sieve
- ✓Offset spatula
- ✓Bench scraper
- ✓Piping bags and tips
- ✓Cake turntable
- ✓Parchment paper
Ingredients
- ✓3 1/2 cups (420g) cake flour, sifted
- ✓2 cups (400g) granulated sugar
- ✓1 tbsp baking powder
- ✓1/2 tsp baking soda
- ✓1 tsp salt
- ✓1 cup (226g) unsalted butter, room temperature, cubed
- ✓1 cup (240ml) egg whites (approx. 7-8 large eggs), room temperature
- ✓1/2 cup (120ml) sour cream, room temperature
- ✓1 cup (240ml) whole milk, room temperature
- ✓1 tbsp vanilla bean paste
- ✓4 cups (500g) fresh or frozen raspberries (for filling)
- ✓1/4 cup (50g) granulated sugar (for filling)
- ✓1 tbsp cornstarch mixed with 1 tbsp water (slurry)
- ✓1 tbsp lemon juice
- ✓1 1/2 cups (300g) granulated sugar (for buttercream)
- ✓6 large egg whites (180g) (for buttercream)
- ✓2 cups (452g) unsalted butter, slightly cool but pliable, cubed (for buttercream)
- ✓1 tsp pure vanilla extract
- ✓Pinch of salt
Instructions
- 1. Prepare the Oven and Pans: Preheat your oven to 350°F (175°C). Grease three 8-inch round cake pans with butter, line the bottoms with parchment paper, and dust the sides with flour, tapping out the excess.
- 2. Make the Raspberry Filling: In a medium saucepan, combine raspberries, 1/4 cup sugar, and lemon juice. Cook over medium heat until the berries break down (about 10 minutes). Strain through a fine-mesh sieve to remove seeds if desired. Return the juice/pulp to the heat. Stir in the cornstarch slurry and cook for another 2 minutes until thickened. Transfer to a bowl, cover with plastic wrap touching the surface, and refrigerate until completely cool.
- 3. Mix Dry Ingredients: In the bowl of a stand mixer fitted with the paddle attachment, combine the cake flour, 2 cups sugar, baking powder, baking soda, and salt. Mix on low speed for 30 seconds to combine.
- 4. Reverse Creaming: Add the cubed butter to the dry ingredients one piece at a time while the mixer is running on low. Continue mixing until the mixture resembles coarse sand and no large chunks of butter remain.
- 5. Add Wet Ingredients: In a separate jug, whisk together the egg whites, sour cream, milk, and vanilla bean paste. With the mixer on low, slowly pour in half of this liquid mixture. Increase speed to medium-high and beat for 2 minutes to build structure. Scrape down the bowl.
- 6. Finish Batter: Reduce speed to low and add the remaining liquid mixture in two batches, mixing only until just combined. Do not overmix. Give the batter a final stir by hand with a spatula to ensure the bottom is incorporated.
- 7. Bake: Divide the batter evenly among the three prepared pans (use a scale for accuracy). Bake for 30-35 minutes, or until a toothpick inserted into the center comes out clean or with just a few moist crumbs. The cakes should spring back when lightly touched.
- 8. Cool: Let the cakes cool in the pans for 10 minutes, then turn them out onto a wire rack to cool completely. Wrap in plastic wrap and chill in the fridge for 1 hour to make handling easier.
- 9. Make the Buttercream: Fill a saucepan with 2 inches of water and bring to a simmer. In the clean bowl of your stand mixer, whisk together the egg whites and 1 1/2 cups sugar. Place the bowl over the simmering water (ensure the bottom doesn’t touch the water). Whisk constantly until the sugar is fully dissolved and the mixture reaches 160°F (71°C).
- 10. Whip Meringue: Transfer the bowl to the stand mixer fitted with the whisk attachment. Whip on high speed until stiff, glossy peaks form and the bowl feels cool to the touch (about 10-15 minutes).
- 11. Add Butter: Switch to the paddle attachment. With the mixer on low, add the butter one cube at a time, waiting for each to incorporate. Once all butter is added, increase speed to medium and beat until silky and smooth. Add vanilla and salt.
- 12. Assembly: Place one cake layer on a turntable. Pipe a dam of buttercream around the outer edge to hold the filling. Spread a layer of raspberry filling inside the dam. Top with the second cake layer and repeat. Place the final layer upside down for a flat top.
- 13. Crumb Coat and Chill: Spread a thin layer of buttercream over the entire cake to lock in crumbs. Refrigerate for 20 minutes.
- 14. Final Coat: Apply a thick, smooth layer of buttercream over the chilled cake. Use a bench scraper to smooth the sides. Decorate with fresh raspberries or piping as desired.
Expert Cooking Tips
- ✓Ensure all refrigerated ingredients (butter, eggs, milk, sour cream) are at room temperature before starting the batter to prevent curdling.
- ✓Weigh your ingredients, especially the flour, for precision. A cup of flour can vary significantly in weight if scooped.
- ✓Do not rush the cooling of the meringue for the buttercream. If you add butter to warm meringue, it will melt and turn into soup.
- ✓If your buttercream looks curdled after adding the butter, keep whipping! It will come together. If it’s too runny, chill the bowl for 10 minutes then whip again.
- ✓Use a heating core or flower nail in the center of the pans if you are scaling up to larger sizes (10-inch+) to ensure even baking.
- ✓Strain the raspberry filling well if you want a perfectly smooth texture; seeds can add crunch but interrupt the silky mouthfeel.
- ✓Chill the cake layers before stacking; cold cake is firmer and much easier to handle and frost without breaking.
Substitutions and Variations
If you cannot find cake flour, you can make a substitute by measuring 1 cup of all-purpose flour, removing 2 tablespoons, and replacing them with 2 tablespoons of cornstarch. Sift this mixture at least three times to aerate it. For a dairy-free version, use a high-quality plant-based butter stick (not tub margarine) and a plant-based milk like soy or almond, though the texture may be slightly less tender. You can substitute the sour cream with full-fat Greek yogurt. If you prefer a different berry, strawberries or blackberries work excellently with the same reduction method. For the buttercream, if you are intimidated by Swiss Meringue, you can use an American Buttercream or an Italian Meringue Buttercream, though Swiss is preferred for its balance of stability and relative ease. Vanilla bean paste can be substituted with pure vanilla extract, but you will lose the visual appeal of the vanilla specks.
Common Mistakes to Avoid
The most common mistake is overmixing the batter after adding the flour. While the reverse creaming method reduces this risk, mixing too vigorously at the end can still develop gluten, leading to a tough, bread-like cake. Another frequent error is adding the butter to the meringue while it is still warm. This causes the buttercream to become soupy. If this happens, put the bowl in the fridge for 15 minutes and whip again. Similarly, if the butter is too cold, you will get chunks of butter in the frosting. Taking the butter out of the fridge about 30-60 minutes before use is usually ideal. Finally, failing to create a buttercream ‘dam’ around the edge of the cake layers before adding the raspberry filling will result in the filling leaking out the sides, which can ruin the final finish of the cake.
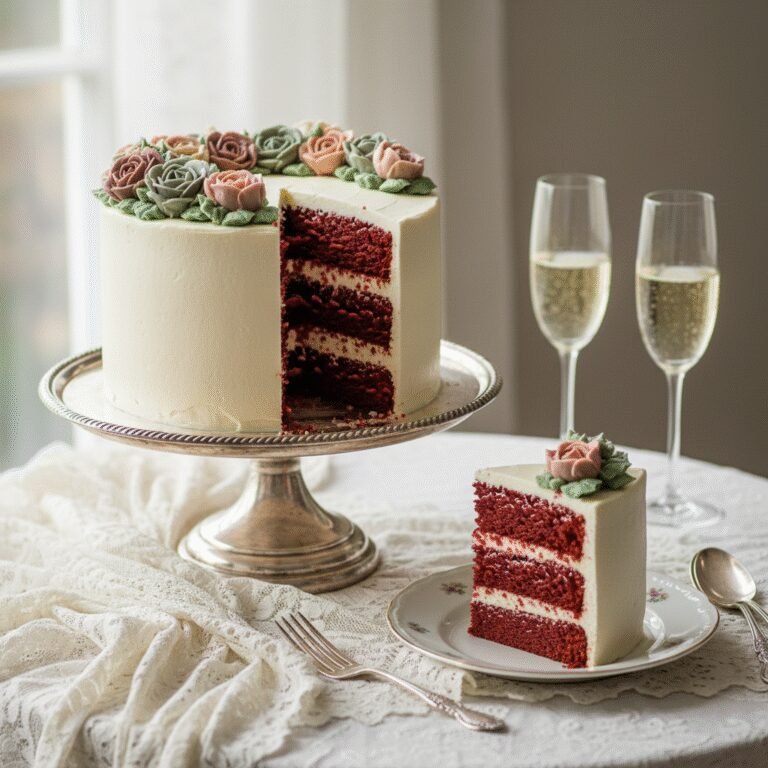
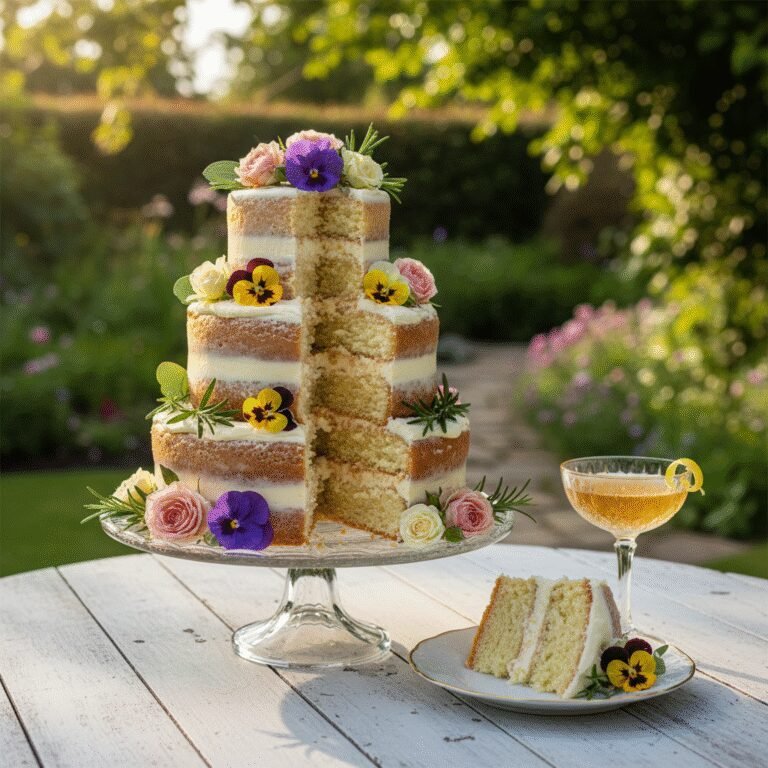
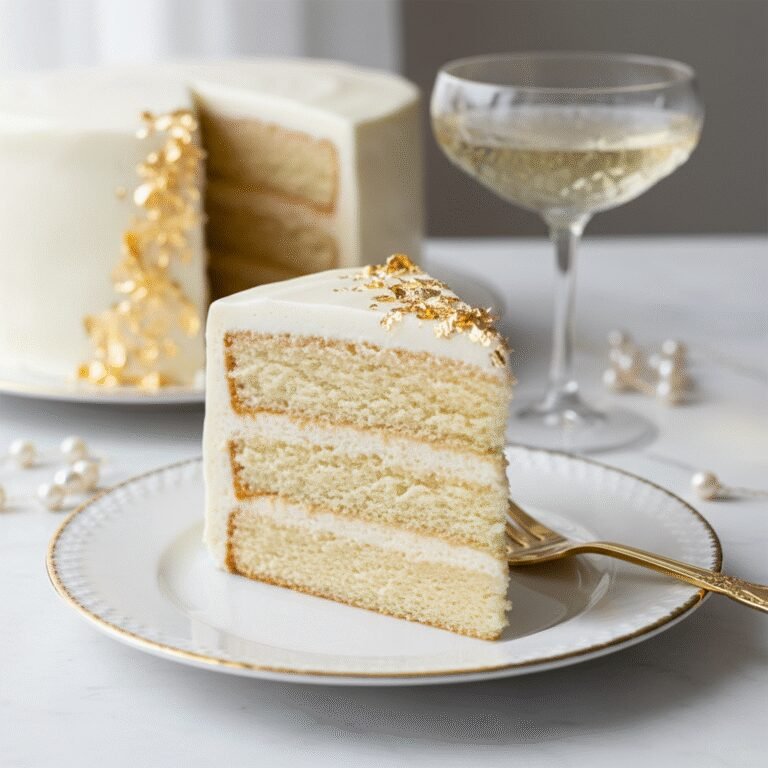
Serving Suggestions
This cake is a showstopper and deserves to be served with elegance. Slice the cake using a sharp, long knife dipped in hot water and wiped clean between cuts for distinct, beautiful layers. Serve each slice on a dessert plate with a garnish of fresh raspberries, a sprig of mint, or even edible flowers like pansies or violas for a romantic touch. A side of lightly sweetened whipped cream or a scoop of vanilla bean ice cream pairs wonderfully, though the cake is rich enough to stand on its own. For beverages, a glass of chilled champagne, prosecco, or a floral tea like Earl Grey complements the vanilla and raspberry notes perfectly. If serving at a wedding, ensure the cake is displayed on a high stand to elevate its presence in the room.
Storage and Reheating Tips
Because of the buttercream and fruit filling, this cake is best stored in the refrigerator, especially in warm weather. It can stay fresh in the fridge for up to 3-4 days. However, buttercream cakes are best eaten at room temperature, so remove slices from the fridge about 30-60 minutes before serving to allow the butter to soften and the flavors to open up. If you have leftover cake, press a piece of plastic wrap directly against the cut surface to prevent it from drying out. For long-term storage, you can freeze individual slices wrapped tightly in plastic wrap and then foil for up to 3 months. Thaw overnight in the refrigerator before bringing to room temperature. Unfrosted cake layers can be wrapped and frozen for up to a month before assembly.
Nutrition Facts (Estimated)
| Serving Size | 1 slice (1/16 of cake) |
| Calories | 650 |
| Fat | 38g |
| Saturated Fat | 24g |
| Unsaturated Fat | 12g |
| Trans Fat | 1g |
| Cholesterol | 110mg |
| Sodium | 320mg |
| Carbohydrates | 72g |
| Fiber | 2g |
| Sugar | 45g |
| Protein | 6g |
Frequently Asked Questions
Can I make this cake ahead of time?
Yes, absolutely. The cake layers can be baked, cooled, wrapped tightly in plastic, and frozen for up to a month. The buttercream can be made a week in advance and stored in the fridge; just bring it to room temperature and re-whip it before using. The raspberry filling can also be made 3-4 days in advance.
Why did my cake sink in the middle?
Sinking usually happens if the oven door was opened too early, causing a sudden temperature drop, or if the cake was underbaked. It can also result from too much leavening (baking powder/soda) or overbeating the batter which incorporates too much air that collapses.
Can I use frozen raspberries for the filling?
Yes, frozen raspberries work perfectly for the reduction. You do not need to thaw them before cooking; just put them directly into the saucepan. They may take a few minutes longer to break down than fresh berries.
How do I get my buttercream white instead of yellow?
Butter naturally has a yellow tint. To get a whiter buttercream, beat the butter for a long time (5-10 minutes) before adding it to the meringue, which lightens the color. You can also add a tiny, pin-prick amount of purple gel food coloring to neutralize the yellow tones.
Is this cake sturdy enough for fondant?
Yes, the reverse creaming method creates a structure that is sturdy enough to support the weight of fondant. Just ensure the cake is well-chilled before covering it.
Can I turn this into cupcakes?
Yes, this batter works for cupcakes. Fill liners 2/3 full and bake for 18-22 minutes at 350°F. You can core the cupcakes to add the raspberry filling inside.
What if my buttercream separates?
Swiss Meringue Buttercream often looks curdled or separated partway through the mixing process. This is normal! Keep whipping, and it will come together. If it stays separated because it’s too cold, warm the bowl slightly with a hairdryer or warm towel while mixing.
Do I have to use a stand mixer?
For Swiss Meringue Buttercream, a stand mixer is highly recommended because it requires long periods of high-speed whipping. A hand mixer can work, but it will be very tiring and take significantly longer.
Conclusion
Creating this Elegant Vanilla Raspberry Wedding Cake is a journey that rewards you with one of the most exquisite desserts you will ever taste. The combination of the flecked vanilla bean sponge, the bright and zesty raspberry filling, and the luxurious, melt-in-your-mouth buttercream creates a symphony of textures and flavors that is truly unforgettable. Whether you are building a tiered masterpiece for a wedding or a single-tier celebration cake for a birthday, the effort you put into each component will shine through in every bite. We hope this recipe inspires you to tackle a bakery-style project with confidence. Happy baking, and may your cake be as beautiful as the memories you create around it!