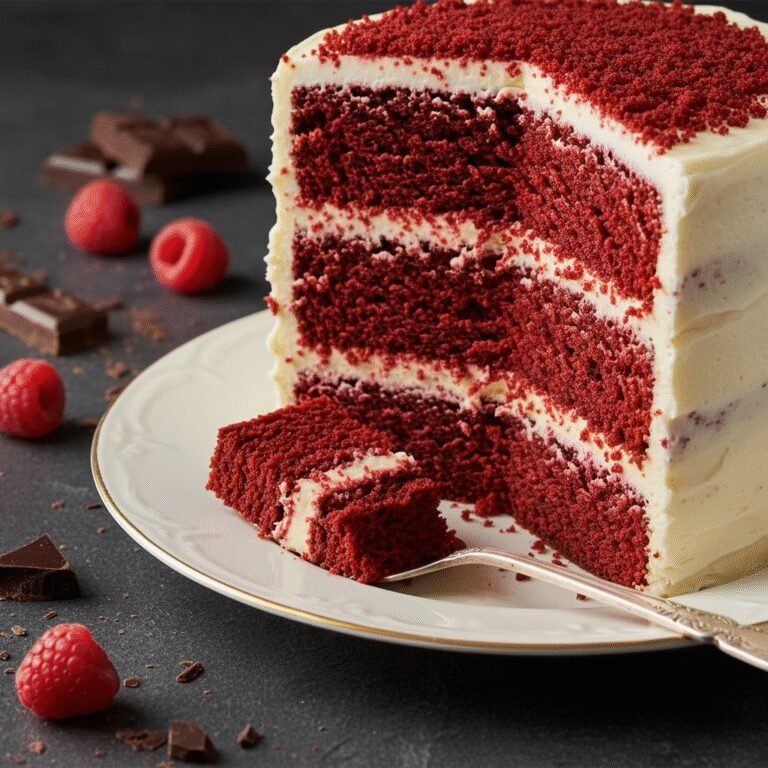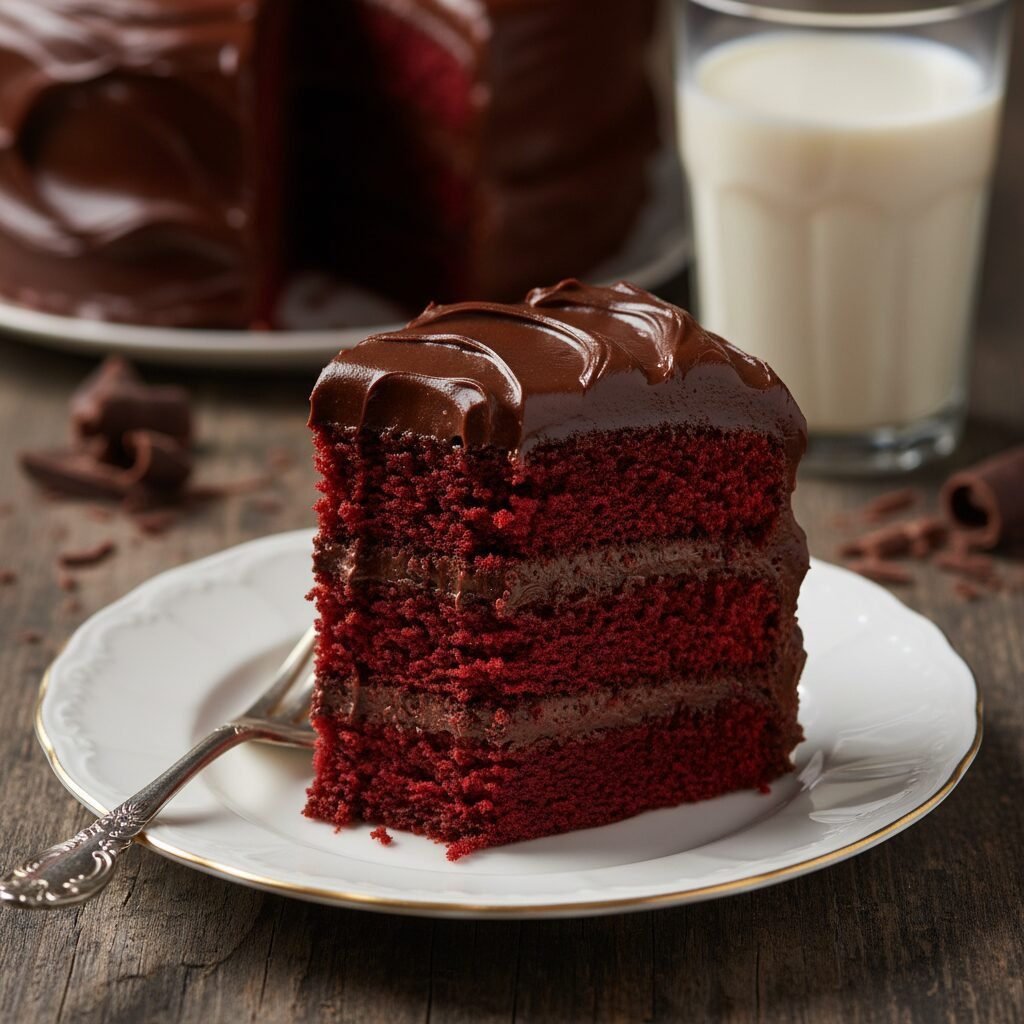
The Ultimate Moist Dairy-Free Red Velvet Cake With Rich Chocolate Frosting
Moist Dairy Free Red Velvet Cake With Dairy Free Chocolate Frosting Recipe
Experience the perfect marriage of velvety texture and rich cocoa flavor with this foolproof dairy-free Red Velvet Cake. Topped with a decadent, silky dairy-free chocolate buttercream, this recipe proves you don’t need butter or eggs to create a show-stopping dessert that stays moist for days.
30 minutes
30 minutes
1 hour 30 minutes
12-14 servings (Two 8-inch or 9-inch rounds)
Dessert
Baking
American
Dairy-Free
Red Velvet Cake is an enigma of the baking world—a dessert that is visually striking, historically significant, and distinctively delicious. For those navigating a dairy-free lifestyle, finding a cake that replicates that signature ‘velvety’ crumb without the use of traditional buttermilk and butter can often feel like a compromise. Too often, dairy-free cakes turn out dense, gummy, or dry. However, this recipe for Moist Dairy-Free Red Velvet Cake with Dairy-Free Chocolate Frosting shatters those stereotypes, delivering a dessert so tender and flavorful that even the most devoted dairy lovers won’t know the difference.
The magic lies in the chemistry of the ingredients. By creating a robust ‘vegan buttermilk’ and utilizing high-quality oil instead of butter, we ensure a crumb structure that is incredibly soft and moist. While traditional Red Velvet is often paired with cream cheese frosting, this version takes a decadent turn with a Dairy-Free Chocolate Frosting. The slight tang of the cake, derived from the interaction between vinegar and cocoa, pairs exceptionally well with the deep, earthy sweetness of the chocolate buttercream. It creates a double-chocolate experience that is sophisticated yet nostalgic.
This cake is more than just a sweet treat; it is a centerpiece. Whether you are celebrating a birthday, Valentine’s Day, or simply craving a slice of comfort, this recipe offers a fail-safe method to achieve bakery-quality results at home. We will guide you through the science of the emulsion, the importance of the cocoa-acid reaction, and the techniques required to whip up a frosting that is smooth, stable, and pipeable. Get ready to bake a cake that is vibrant in color, rich in history, and absolutely divine in taste.
History & Origins
The history of Red Velvet Cake is a fascinating journey through culinary evolution, chemistry, and clever marketing. Its origins can be traced back to the Victorian era, where ‘velvet cakes’ were a distinct category of dessert. These cakes were known for their soft, velvety texture, achieved by using almond flour, cocoa, or cornstarch to break down the protein in flour. During this time, the ‘red’ in the cake wasn’t the result of food coloring. Instead, it was a chemical reaction between unprocessed cocoa powder (which contains anthocyanins) and acidic ingredients like vinegar and buttermilk. This reaction revealed the natural reddish-brown hues of the cocoa, giving the cake a ruddy tint.
As cocoa processing changed—specifically with the introduction of Dutch-processed cocoa which is alkalized—the natural red reaction was lost. The cake might have faded into obscurity if not for the Great Depression and a company called Adams Extract. To boost sales during the economic downturn, the company popularized a recipe that used red food dye and butter extract, marketing it as the modern Red Velvet Cake we recognize today. This version became a staple in American households.
Another famous legend attributes the cake to the Waldorf-Astoria Hotel in New York City, claiming a patron requested the recipe and was charged a hefty fee, leading her to distribute it for free in retaliation. While likely apocryphal, the story cemented the cake’s reputation as a luxury item. In recent decades, the rise of plant-based eating has necessitated a new evolution for this classic. Bakers have had to deconstruct the traditional recipe, replacing eggs with flax or commercial binders, and swapping buttermilk for plant-based alternatives curdled with vinegar. This dairy-free iteration honors the cake’s chemical roots—relying heavily on the acid-base reaction for lift and texture—while adapting it for the modern, conscientious kitchen.
Why This Recipe Works
This recipe succeeds where many other dairy-free adaptations fail because it focuses heavily on moisture retention and the proper chemical leavening balance. First and foremost, the choice of fat is crucial. While butter adds flavor, it is 80% fat and 20% water, and it solidifies at room temperature. Oil, on the other hand, is 100% fat and remains liquid at room temperature. By using a neutral oil, we coat the flour proteins more effectively, inhibiting gluten formation and ensuring the cake remains soft and moist on the counter, rather than drying out.
Secondly, the ‘tang’ that defines Red Velvet usually comes from dairy buttermilk. We replicate this by creating a sour milk substitute using high-protein plant milk (like soy or almond) mixed with apple cider vinegar. This mixture curdles slightly, thickening the liquid and providing the necessary acidity. This acid does two things: it reacts with the baking soda to create carbon dioxide bubbles for a fluffy rise, and it tenderizes the gluten strands for a melt-in-your-mouth texture.
Finally, the frosting technique is designed to mimic the stability of American buttercream without dairy. By using high-quality vegan butter sticks (which have a lower water content than tub margarine) and whipping them with cocoa powder and powdered sugar, we create an emulsion that holds its shape perfectly. The cocoa powder in the frosting acts as a stabilizer, absorbing some moisture and preventing the frosting from ‘weeping’ or melting too quickly, resulting in a professional finish.
Why You’ll Love This Recipe
- ✓Incredibly moist crumb that stays soft for days
- ✓100% Dairy-Free and Egg-Free friendly
- ✓Rich, stable chocolate buttercream frosting
- ✓Vibrant red color without altering the taste
- ✓Simple pantry ingredients available at any grocery store
- ✓Perfect balance of sweet chocolate and subtle tang
Equipment You’ll Need
- ✓Two 8-inch or 9-inch round cake pans
- ✓Stand mixer or handheld electric mixer
- ✓Large mixing bowls
- ✓Whisk
- ✓Rubber spatula
- ✓Parchment paper
- ✓Wire cooling rack
- ✓Offset spatula for frosting
Ingredients
- ✓2 1/2 cups All-Purpose Flour (sifted)
- ✓1 1/2 cups Granulated Sugar
- ✓1 tsp Baking Soda
- ✓1 tsp Fine Sea Salt
- ✓1 tbsp Unsweetened Cocoa Powder (natural or Dutch-processed)
- ✓1 1/2 cups Unsweetened Soy Milk or Almond Milk (room temperature)
- ✓1 tbsp Apple Cider Vinegar
- ✓1 1/2 cups Vegetable Oil or Canola Oil
- ✓1 tsp Vanilla Extract
- ✓1-2 tbsp Red Food Coloring (liquid or gel)
- ✓FOR THE FROSTING:
- ✓1 cup Vegan Butter Sticks (slightly softened, not melted)
- ✓3/4 cup Unsweetened Cocoa Powder
- ✓3 1/2 – 4 cups Powdered Sugar (sifted)
- ✓1 tsp Vanilla Extract
- ✓1-2 tbsp Plant-Based Milk (if needed for consistency)
Instructions
- Preheat your oven to 350°F (175°C). Grease two 8-inch or 9-inch round cake pans with oil and line the bottoms with parchment paper rounds. Dust the sides with a little flour or cocoa powder to prevent sticking.
- In a measuring cup or small bowl, combine the room temperature soy milk (or almond milk) with the apple cider vinegar. Whisk gently and let it sit for 5-10 minutes to curdle. This is your vegan buttermilk.
- In a large mixing bowl, sift together the flour, sugar, baking soda, salt, and 1 tablespoon of cocoa powder. Whisk well to ensure the baking soda is evenly distributed.
- In a separate medium bowl, whisk together the vegetable oil, the prepared vegan buttermilk mixture, vanilla extract, and red food coloring. Add enough food coloring to achieve a deep, vibrant red hue.
- Pour the wet ingredients into the dry ingredients. Using a whisk or electric mixer on low speed, mix until just combined and no large lumps of flour remain. Do not overmix, or the cake will become dense.
- Divide the batter evenly between the two prepared cake pans. Tap the pans gently on the counter to release any large air bubbles.
- Bake in the preheated oven for 28-32 minutes, or until a toothpick inserted into the center comes out clean or with just a few moist crumbs attached.
- Remove the cakes from the oven and let them cool in the pans for 10-15 minutes. Then, carefully invert them onto a wire cooling rack to cool completely before frosting. If the cakes are warm, the frosting will melt.
- While the cakes cool, prepare the frosting. In a large bowl or stand mixer, beat the softened vegan butter until creamy and pale (about 2-3 minutes).
- Add the cocoa powder and vanilla extract to the butter. Mix on low until incorporated.
- Gradually add the powdered sugar, one cup at a time, mixing on low speed until combined. Once all sugar is added, increase the speed to medium-high and whip for 3-4 minutes until fluffy.
- If the frosting is too stiff, add plant-based milk one teaspoon at a time until you reach the desired consistency. If it’s too soft, add a bit more powdered sugar.
- To assemble, place one cake layer on your serving plate. Spread a generous layer of chocolate frosting over the top. Place the second cake layer on top. Frost the top and sides of the entire cake. Use an offset spatula to smooth the sides or create swirls.
Expert Cooking Tips
- ✓Ensure your plant milk is at room temperature before mixing with vinegar to get the best curdling effect.
- ✓Use vegan butter sticks rather than tub margarine for the frosting; tub margarine has too much water and will make the frosting runny.
- ✓Do not skip sifting the flour and cocoa powder; this ensures a light, airy texture without lumps.
- ✓If you want a deeper red color, use gel food coloring instead of liquid, as it is more concentrated.
- ✓Let the cakes cool completely (or even chill them in the fridge for 30 minutes) before frosting to make assembly easier.
- ✓Tap the cake pans on the counter before baking to pop large air bubbles that could cause uneven baking.
- ✓Weigh your flour using a kitchen scale for the most accurate results; scooping with a cup can pack the flour and dry out the cake.
Substitutions and Variations
This recipe is quite versatile. If you need to make it Gluten-Free, swap the all-purpose flour for a high-quality 1:1 Gluten-Free All-Purpose Baking Flour blend (ensure it contains xanthan gum). For the oil, melted coconut oil or grapeseed oil works well if you prefer not to use vegetable oil, though coconut oil may impart a slight flavor. If you are allergic to soy or almonds, oat milk is a fantastic substitute for the buttermilk mixture as it is creamy and reacts well with vinegar. For a natural food coloring alternative, you can use beet powder or beet juice, though be aware this may slightly alter the flavor profile and the color will be more of a rusty brown than a vibrant red. For the frosting, if you prefer the traditional route, you can use a dairy-free cream cheese alternative instead of the cocoa powder to make a vegan cream cheese frosting.
Common Mistakes to Avoid
The most common mistake with dairy-free baking is overmixing the batter. Once the wet and dry ingredients are combined, gluten begins to form. Overmixing leads to a rubbery, dense cake rather than a tender one. Another pitfall is opening the oven door too early. Red velvet cakes rely on a specific chemical reaction for lift; opening the door releases heat and can cause the cake to collapse in the center. Additionally, using melted vegan butter for the frosting instead of softened butter will result in a soupy mess that won’t hold its shape. Ensure your butter is cool room temperature—soft enough to dent with a finger, but not greasy. Finally, failing to line the pans with parchment paper often results in the cake sticking and breaking upon removal.
Serving Suggestions
This cake is a showstopper on its own, but it pairs beautifully with fresh berries. The tartness of raspberries or strawberries cuts through the richness of the chocolate frosting and complements the red color of the crumb. For an extra touch of elegance, shave some dark chocolate curls on top or dust with a little extra cocoa powder. Serve with a cold glass of oat milk or a hot cup of coffee to balance the sweetness. It is perfect for birthdays, Valentine’s Day, Christmas, or Juneteenth celebrations.
Storage and Reheating Tips
Because this cake contains perishable ingredients in the frosting (vegan butter), it is best stored in the refrigerator if your kitchen is warm. However, vegan buttercream can harden in the fridge. For the best texture, store the cake in an airtight container at cool room temperature for up to 2 days. If you must refrigerate it (up to 5 days), let the slices sit on the counter for 20-30 minutes before eating to allow the frosting and crumb to soften. You can also freeze the unfrosted cake layers wrapped tightly in plastic wrap for up to 3 months. Thaw in the refrigerator overnight before frosting.
Nutrition Facts (Estimated)
| Serving Size | 1 slice |
| Calories | 540 |
| Fat | 28g |
| Saturated Fat | 8g |
| Unsaturated Fat | 18g |
| Trans Fat | 0g |
| Cholesterol | 0mg |
| Sodium | 310mg |
| Carbohydrates | 68g |
| Fiber | 3g |
| Sugar | 42g |
| Protein | 5g |
Frequently Asked Questions
Can I make this recipe into cupcakes?
Yes, absolutely! This recipe will yield approximately 24 cupcakes. Bake them at 350°F (175°C) for 18-22 minutes. Check for doneness with a toothpick.
Does this cake taste like vinegar?
Not at all. The vinegar is chemically neutralized by the baking soda during the baking process. You get the lift and the tenderness without any sour taste.
Why is my cake brown and not red?
This can happen if you don’t use enough food coloring or if you use a very dark cocoa powder. For the brightest red, use a standard natural cocoa powder and a high-quality gel food coloring.
Can I reduce the sugar in this recipe?
You can reduce the sugar by about 1/4 cup without major issues, but reducing it further may affect the moisture and texture of the cake, as sugar is a liquid when melted and helps keep the cake soft.
Can I use vinegar other than apple cider vinegar?
Yes, white distilled vinegar works perfectly fine. Lemon juice can also be used in a pinch, though vinegar is more reliable for the curdling effect.
Is red velvet just chocolate cake with food coloring?
Technically, it is a mild cocoa cake, but it has a distinct flavor profile due to the buttermilk (or vegan buttermilk) and vinegar. It is tangier and has a finer, tighter crumb than a standard chocolate cake.
My frosting is too runny, how do I fix it?
If your kitchen is hot or the butter was too soft, put the bowl of frosting in the fridge for 15-20 minutes, then whip it again. You can also add more powdered sugar or cocoa powder to stiffen it up.
Can I use olive oil?
You can, but olive oil has a strong flavor that might clash with the cocoa and vanilla. If you use olive oil, choose a ‘light’ or ‘mild’ variety, not extra virgin.
Do I need a stand mixer?
No, you can make the cake batter by hand with a whisk. However, a hand mixer or stand mixer is highly recommended for the frosting to get it truly light and fluffy.
Conclusion
There is something deeply satisfying about slicing into a tall, vibrant Red Velvet cake and knowing it was made entirely from scratch, without a drop of dairy. This Moist Dairy-Free Red Velvet Cake with Chocolate Frosting is a testament to how plant-based baking has evolved—sacrificing nothing in terms of flavor, texture, or presentation. It’s a recipe that invites you to celebrate, whether it’s a special occasion or just a Tuesday night that calls for chocolate. We hope this cake becomes a staple in your kitchen, proving once and for all that ‘dairy-free’ can be synonymous with ‘decadent.’ Happy baking!