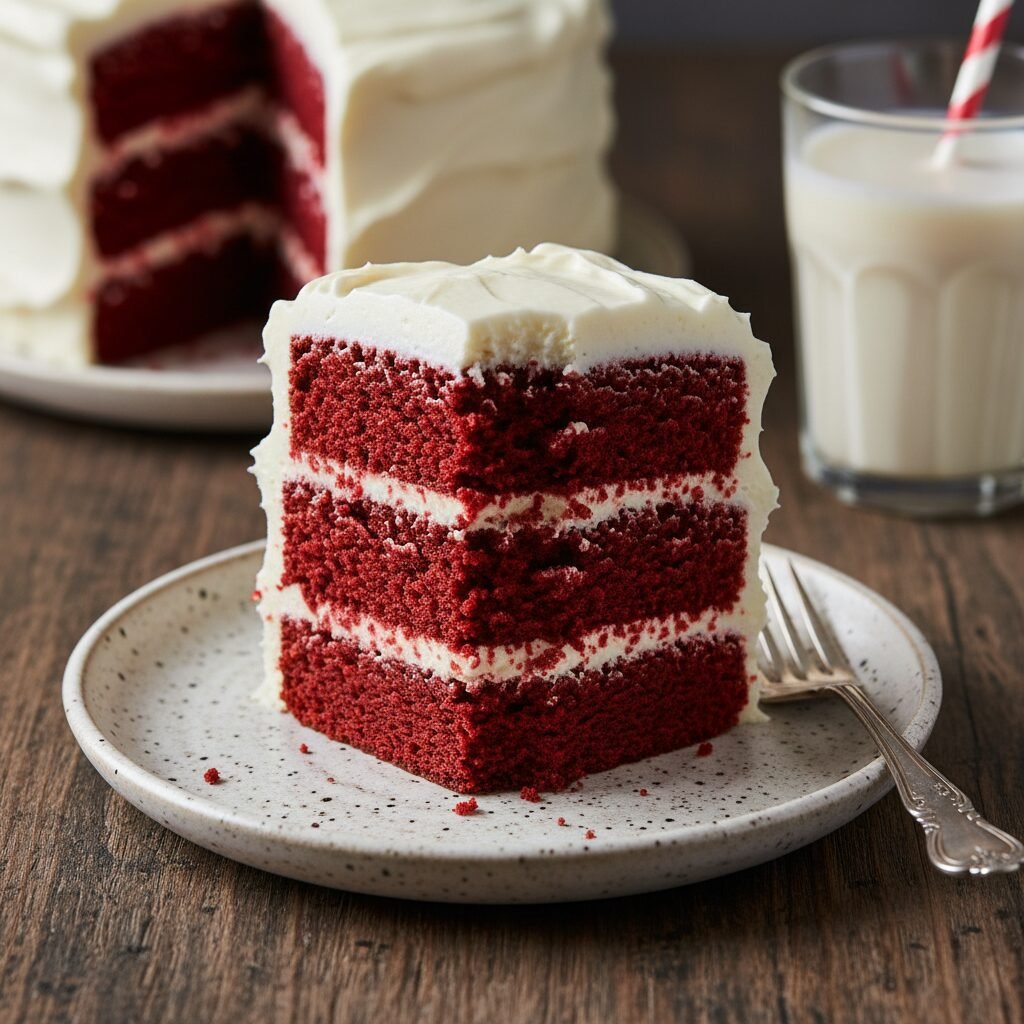
The Ultimate Moist Dairy-Free Red Velvet Cake with Vegan Cream Cheese Frosting
Moist Dairy Free Red Velvet Cake Recipe
Discover the secret to the most velvety, tender, and vibrant red velvet cake that happens to be completely dairy-free. This recipe rivals any bakery classic with its perfect balance of cocoa, vanilla, and tangy vegan buttermilk, topped with a luscious dairy-free cream cheese frosting.
30 minutes
35 minutes
1 hour 30 minutes (includes cooling)
12-14 servings (one 3-layer 6-inch cake or 2-layer 8-inch cake)
Dessert
Baking
American
Dairy-Free
There is something undeniably magnetic about a slice of red velvet cake. It is not just the striking crimson hue that captures the imagination, but the unique texture—a crumb so soft and plush it truly lives up to the name ‘velvet.’ For those avoiding dairy, finding a recipe that replicates this specific texture without the use of traditional buttermilk and butter can be a daunting challenge. Many dairy-free adaptations result in a dry sponge or a gummy texture that lacks the iconic tang. However, this Moist Dairy-Free Red Velvet Cake recipe changes the game entirely. We have meticulously tested ratios to ensure that every bite melts in your mouth, delivering that subtle chocolate flavor paired with the signature acidity that defines a true red velvet. The magic lies in the homemade vegan buttermilk substitute and the use of oil rather than butter in the cake base, which guarantees a moistness that lasts for days. Whether you are baking for a birthday, Valentine’s Day, or just a weekend treat, this cake promises to be a showstopper. It is paired with a silky, tangy vegan cream cheese frosting that is stable enough to pipe and creamy enough to swoon over. Prepare to banish the notion that dairy-free baking means compromising on flavor or texture; this cake is proof that plant-based indulgences can be just as decadent, if not more so, than their traditional counterparts.
History & Origins
The history of red velvet cake is as rich and layered as the cake itself, often shrouded in culinary myths and marketing legends. The concept of a ‘velvet’ cake dates back to the Victorian era, where the term distinguished cakes with a soft, fine crumb from the coarser sponge cakes of the time. This texture was typically achieved using almond flour, cocoa, or cornstarch. The ‘red’ aspect, however, has a more chemical origin. In the early 20th century, unprocessed cocoa powder contained higher levels of anthocyanins. When this raw cocoa reacted with the acidic ingredients in the batter—specifically buttermilk and vinegar—it would turn a reddish-brown hue. This natural reaction is the grandfather of the vibrant red cake we know today. During the Great Depression and World War II, when rationing made baking supplies scarce, some bakers used beet juice to keep their cakes moist and enhance the color, a practice that solidified the association with the color red. The modern, bright red version we recognize today is largely attributed to the Adams Extract company in Texas. In an effort to sell more food coloring and extracts during the Depression, they published a recipe for Red Velvet Cake that utilized a significant amount of red dye. The cake’s popularity exploded, later finding a permanent home in Southern US cuisine. In recent decades, the cake saw a massive resurgence thanks to pop culture and famous bakeries like Magnolia Bakery in New York. Today, we honor this history by maintaining the crucial acidic balance for texture while adapting the ingredients for a modern, dairy-free lifestyle.
Why This Recipe Works
This recipe succeeds where many others fail because it focuses heavily on the science of moisture retention and chemical leavening. Traditional red velvet relies on the reaction between acidic buttermilk, vinegar, and baking soda to create a fluffy, tender lift. To replicate this without dairy, we create a ‘vegan buttermilk’ by curdling high-protein soy milk or almond milk with apple cider vinegar. This not only mimics the flavor profile but provides the necessary acid to react with the baking soda, ensuring the cake rises beautifully. Furthermore, we use a neutral oil instead of vegan butter for the cake batter. While butter contains water that evaporates during baking, oil is 100% fat and remains liquid at room temperature. This coats the flour proteins more effectively, preventing gluten over-development and resulting in a sensationally moist crumb that stays soft even after refrigeration. We also carefully balance the cocoa powder; red velvet is not a chocolate cake, but rather a vanilla cake with a hint of cocoa. Too much cocoa dries out the batter, so we use just enough for flavor depth. Finally, the addition of a small amount of cornstarch helps to soften the flour’s proteins, mimicking the texture of cake flour without requiring a special trip to the store.
Why You’ll Love This Recipe
- ✓Incredibly moist crumb that stays soft for days
- ✓Authentic tangy flavor using vegan buttermilk
- ✓Rich, stable dairy-free cream cheese frosting
- ✓Vibrant red color without affecting the taste
- ✓Simple one-bowl mixing method for the batter
- ✓Perfect for birthdays and special occasions
Equipment You’ll Need
- ✓Three 6-inch cake pans or two 8-inch cake pans
- ✓Large mixing bowl
- ✓Medium mixing bowl
- ✓Whisk
- ✓Electric hand mixer or stand mixer
- ✓Rubber spatula
- ✓Measuring cups and spoons
- ✓Wire cooling rack
- ✓Parchment paper
- ✓Offset spatula
Ingredients
- ✓2 1/2 cups All-purpose flour
- ✓1 1/2 cups Granulated sugar
- ✓1 tsp Baking soda
- ✓1/2 tsp Salt
- ✓2 tbsp Unsweetened cocoa powder (natural, not Dutch-processed)
- ✓1 tbsp Cornstarch
- ✓1 1/2 cups Unsweetened soy or almond milk (room temperature)
- ✓1 tbsp Apple cider vinegar
- ✓1 1/2 cups Vegetable oil or canola oil
- ✓1 tsp Vanilla extract
- ✓1 tbsp Red liquid food coloring or 1 tsp gel paste
- ✓1/2 cup Vegan butter, softened (for frosting)
- ✓8 oz Vegan cream cheese, cold (for frosting)
- ✓4 cups Powdered sugar, sifted (for frosting)
- ✓1 tsp Vanilla extract (for frosting)
Instructions
- Preheat your oven to 350°F (175°C). Grease your cake pans with oil and line the bottoms with parchment paper circles to ensure easy release.
- In a measuring cup, combine the room temperature soy milk and apple cider vinegar. Stir gently and let it sit for 5-10 minutes to curdle and create your vegan buttermilk.
- In a large mixing bowl, sift together the flour, sugar, baking soda, salt, cocoa powder, and cornstarch. Whisk well to ensure the baking soda and cocoa are evenly distributed.
- In a separate medium bowl, whisk together the vegetable oil, the prepared vegan buttermilk mixture, vanilla extract, and red food coloring until fully combined and vibrant.
- Pour the wet ingredients into the dry ingredients. Using a whisk or rubber spatula, mix gently until just combined and no large lumps of flour remain. Do not overmix.
- Divide the batter evenly between the prepared cake pans. Tap the pans gently on the counter to release any large air bubbles.
- Bake in the center of the preheated oven for 30-35 minutes, or until a toothpick inserted into the center comes out clean or with just a few moist crumbs.
- Remove the cakes from the oven and let them cool in the pans for 10 minutes. Then, carefully invert them onto a wire rack to cool completely before frosting.
- While the cakes cool, prepare the frosting. In a large bowl using a hand mixer or stand mixer, beat the softened vegan butter until creamy (about 2 minutes).
- Add the cold vegan cream cheese and beat for another 1-2 minutes until combined. Do not overbeat or the mixture may become runny.
- Gradually add the sifted powdered sugar, one cup at a time, mixing on low speed. Add the vanilla extract.
- Once all sugar is incorporated, increase speed to medium-high and whip for 2-3 minutes until fluffy and smooth.
- Once the cakes are completely cool, level the tops if necessary with a serrated knife. Place the first layer on a serving plate, spread a generous layer of frosting, and repeat with remaining layers.
- Frost the outside of the cake with the remaining frosting and garnish with cake crumbs if desired.
Expert Cooking Tips
- ✓Ensure your baking soda is fresh; since this recipe relies on the acid-base reaction for lift, old soda will result in a dense cake.
- ✓Use room temperature ingredients for the batter, but keep the vegan cream cheese cold for the frosting to maintain stability.
- ✓Don’t skip the parchment paper. Dairy-free cakes can be slightly more delicate when warm, and parchment guarantees a perfect release.
- ✓If you prefer a deeper red color, use gel food coloring instead of liquid, as it is more concentrated and adds less moisture.
- ✓Weigh your flour if possible (approx. 120g per cup) to avoid accidental over-measuring which leads to dryness.
- ✓Do not overmix the batter once the wet and dry ingredients are combined; stop as soon as the flour streaks disappear.
- ✓Chill the frosted cake for 20 minutes before slicing to let the frosting set for cleaner cuts.
Substitutions and Variations
Baking is a science, but there is some room for flexibility in this recipe. If you do not have apple cider vinegar, white distilled vinegar or fresh lemon juice works perfectly well to curdle the milk. For the milk itself, soy milk is the best option because its high protein content creates the thickest ‘buttermilk,’ but almond or oat milk can be used in a pinch. If you want to avoid red food coloring entirely, you can use beet powder or reduced beet puree, though be aware this will change the flavor slightly to be more earthy and the color will be a darker, more rustic brownish-red. For the flour, a high-quality 1:1 gluten-free all-purpose baking flour blend (one that contains xanthan gum) can be swapped directly for the wheat flour to make this cake both vegan and gluten-free. Regarding the oil, melted coconut oil can be used, but it may make the cake denser when chilled; grapeseed oil or avocado oil are excellent neutral alternatives.
Common Mistakes to Avoid
The most common mistake when making this cake is overmixing the batter. Because we are using all-purpose flour, overmixing develops gluten strands that can turn a tender cake into a rubbery or tough one. Mix only until the ingredients are incorporated. Another pitfall is attempting to frost the cake before it is 100% cool. Dairy-free cream cheese frosting is more heat-sensitive than traditional buttercream; if the cake is even slightly warm, the frosting will melt and slide off. A third mistake is using ‘tub’ style vegan cream cheese spreads that are meant for bagels; these often have a higher water content. Look for vegan cream cheese that comes in a brick form or is specifically labeled for baking/cooking if available, or strain your cream cheese if it seems very watery. Finally, do not open the oven door repeatedly during the first 20 minutes of baking, as the fluctuation in temperature can cause the cake to sink in the middle.
Serving Suggestions
This Moist Dairy-Free Red Velvet Cake is a stunner on its own, but you can elevate the presentation for special occasions. Serve each slice on a stark white plate to contrast with the deep red crumb. A side of fresh raspberries or strawberries adds a tart freshness that cuts through the sweetness of the frosting. For a decadent touch, drizzle a little dairy-free dark chocolate ganache over the slice or the whole cake. It pairs beautifully with a hot cup of coffee or an oat milk latte, as the bitterness of the coffee complements the sweet and tangy profile of the cake. If serving for a birthday, coating the sides in vegan sprinkles or crushed pecans adds a lovely textural crunch.
Storage and Reheating Tips
Because of the cream cheese in the frosting, this cake should be stored in the refrigerator. Place it in an airtight cake carrier or cover the cut sections with plastic wrap to prevent them from drying out. It will stay fresh in the fridge for up to 5 days. However, cold cake can taste less flavorful and feel denser, so it is highly recommended to let the cake (or individual slices) sit at room temperature for about 20-30 minutes before eating to revive the soft texture and creaminess of the frosting. For long-term storage, you can freeze individual slices. Wrap them tightly in plastic wrap and then in aluminum foil. They can be frozen for up to 3 months. Thaw in the refrigerator overnight or on the counter for an hour before enjoying.
Nutrition Facts (Estimated)
| Serving Size | 1 slice |
| Calories | 480 |
| Fat | 26g |
| Saturated Fat | 6g |
| Unsaturated Fat | 18g |
| Trans Fat | 0g |
| Cholesterol | 0mg |
| Sodium | 310mg |
| Carbohydrates | 62g |
| Fiber | 2g |
| Sugar | 38g |
| Protein | 4g |
Frequently Asked Questions
Can I make this recipe as cupcakes instead?
Absolutely! This recipe translates perfectly to cupcakes. It will yield approximately 20-24 cupcakes. Bake them at the same temperature (350°F) but reduce the baking time to 18-22 minutes.
Why is my vegan cream cheese frosting runny?
Vegan cream cheese often has a lower melting point and different fat structure than dairy cream cheese. To prevent runny frosting, ensure your butter is not melted (just softened) and your cream cheese is cold. Do not overbeat it. If it gets too soft, refrigerate the bowl for 20 minutes before piping.
Can I use natural cocoa powder or Dutch-processed?
It is best to use natural unsweetened cocoa powder for this recipe. Natural cocoa is acidic, which helps react with the baking soda to provide lift. Dutch-processed cocoa is alkalized (neutralized) and won’t react as strongly, potentially affecting the rise.
Does this cake taste like coconut if I use coconut oil?
If you use unrefined (virgin) coconut oil, yes, it will have a slight coconut flavor. To avoid this, use refined coconut oil, which has a neutral scent and flavor, or stick to vegetable or canola oil.
How do I get the bright red color without an aftertaste?
The bitter aftertaste usually comes from using large amounts of cheap liquid food coloring. Using a high-quality ‘no-taste’ red gel paste allows you to use a much smaller amount to achieve a vibrant color without affecting the flavor.
Can I reduce the sugar in this recipe?
Sugar does more than just sweeten; it provides moisture and structure. Reducing it significantly will result in a drier, tougher cake. You could reduce it by about 1/4 cup safely, but any more might compromise the texture.
Why did my cake sink in the middle?
Sinking usually happens if the oven door was opened too early, letting heat escape, or if the cake was underbaked. It can also happen if there was too much leavening (baking soda) or liquid. Ensure you measure precisely.
Is this cake suitable for nut allergies?
Yes, as long as you use soy milk or oat milk instead of almond milk, and ensure your vegan butter and cream cheese are nut-free (many are coconut or soy-based). always check labels to be safe.
Conclusion
Mastering a dairy-free red velvet cake is a feather in the cap of any home baker, and this recipe is designed to make that victory sweet and simple. By understanding the balance of acids and fats, we have created a dessert that doesn’t just mimic the original—it stands proudly beside it. The result is a striking, velvety, and deeply satisfying cake that welcomes everyone to the table, regardless of dietary restrictions. Whether you are vegan, lactose intolerant, or simply an admirer of great cake, this recipe is bound to become a requested favorite in your kitchen. So grab your whisk, preheat that oven, and get ready to enjoy a slice of pure, plant-based perfection.