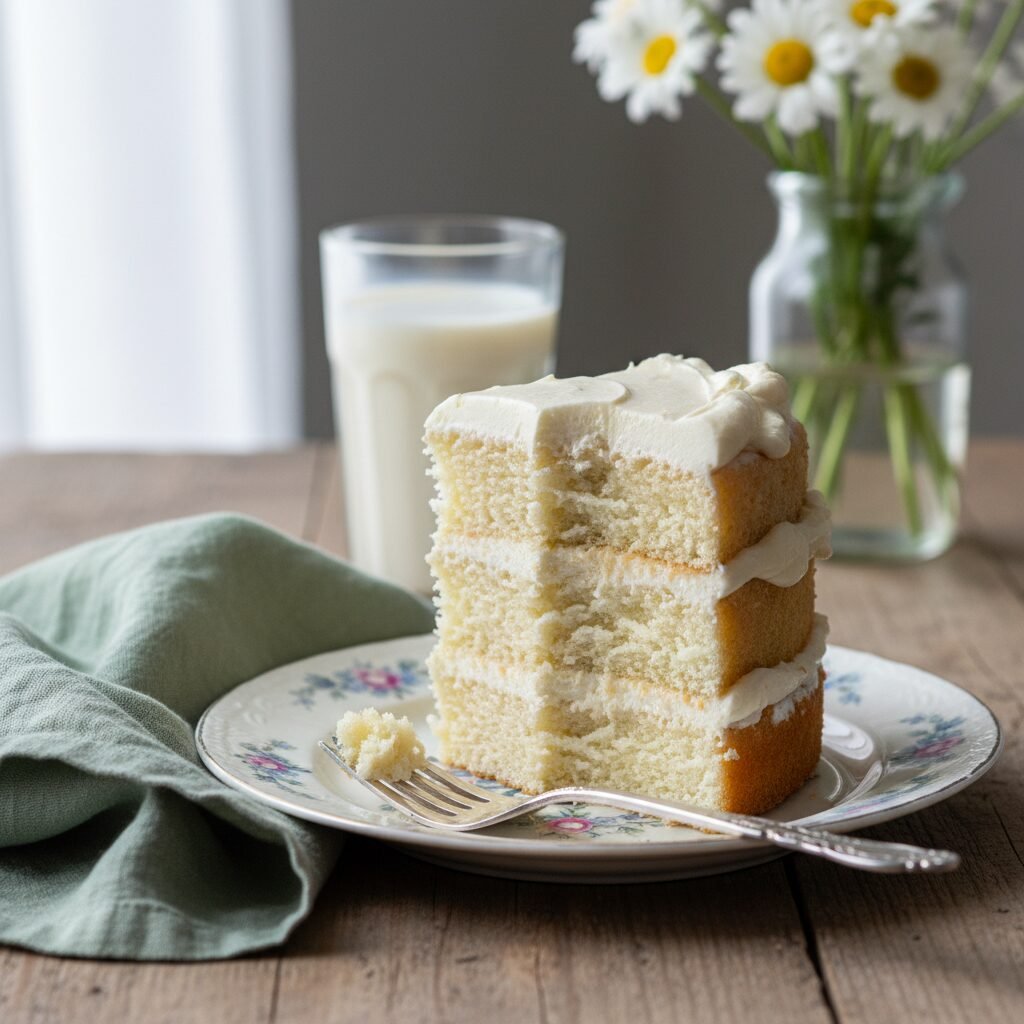
The Ultimate Moist Dairy-Free Vanilla Cake with Creamy Vegan Buttercream
Moist Dairy Free Vanilla Cake With Dairy Free Buttercream Recipe
Discover the secret to a bakery-quality vanilla cake that is completely dairy-free without sacrificing texture or flavor. This recipe yields a tender, velvety crumb paired with a luscious, fluffy buttercream that rivals any traditional recipe.
30 minutes
35 minutes
1 hour 5 minutes
12-14 servings (makes two 8-inch rounds)
Dessert
Baking
American
Dairy-Free
For years, the realm of dairy-free baking was plagued by a reputation for dry, crumbly, or dense textures that simply couldn’t compete with their butter-laden counterparts. If you have been searching for the holy grail of allergy-friendly desserts—a cake that is remarkably moist, structurally sound, and bursting with pure vanilla flavor—your search ends here. This Moist Dairy-Free Vanilla Cake is a triumph of modern baking science, designed specifically to mimic the tender crumb of a classic white cake while strictly avoiding all dairy products. Whether you are baking for a lactose-intolerant family member, a vegan friend, or simply trying to reduce dairy in your diet, this recipe proves that you do not need heavy cream or butter to achieve decadence.
The magic lies in the careful balance of fat and acidity. Unlike traditional cakes that rely on butter for flavor (which can sometimes lead to a drier texture once cooled), this recipe utilizes high-quality neutral oil and a homemade dairy-free ‘buttermilk’ to ensure the crumb stays soft for days. Paired with a Dairy-Free Buttercream that is whipped to ethereal perfection, this cake is versatile enough for birthday parties, weddings, or a simple weekend treat. We have tested this recipe rigorously to ensure that the frosting holds its shape for piping and the cake layers bake up flat and even. Prepare to shock your guests when you reveal that this masterpiece contains absolutely no dairy.
History & Origins
The history of dairy-free cake is deeply rooted in times of necessity and scarcity, specifically dating back to the Great Depression and World War II. During these eras, ingredients like butter, milk, and eggs were often rationed or too expensive for the average household. Home bakers, displaying incredible ingenuity, developed ‘Depression Cake’ or ‘Wacky Cake,’ which relied on vinegar and baking soda for leavening and oil for moisture, completely bypassing the need for dairy and eggs. These early iterations were often chocolate-flavored, as cocoa powder helped mask the lack of rich dairy fats.
As the decades passed and food availability normalized, butter returned to the forefront of baking, and dairy-free recipes were largely relegated to niche dietary needs. However, the cultural landscape of food has shifted dramatically in the 21st century. With the rise of plant-based diets, lactose intolerance awareness, and ethical veganism, the demand for high-quality dairy-free baking has skyrocketed. Modern food scientists and bloggers have revisited those wartime recipes, refining them with better ingredients like almond milk, oat milk, and high-quality vegan butters that mimic the melting point of dairy fat. This specific recipe pays homage to those early ‘Wacky Cakes’ by utilizing the vinegar-milk techinque for lift, but elevates it with modern vanilla aromatics and sophisticated mixing methods to create a dessert that stands tall in the contemporary culinary world.
Why This Recipe Works
This recipe succeeds where many others fail because it prioritizes moisture retention and proper structural integrity through chemical reactions rather than heavy fats. Traditional cakes use butter, which is solid at room temperature; while delicious, butter-based cakes can firm up and feel dry when cool. This recipe uses a neutral oil, which remains liquid at room temperature, guaranteeing that the cake stays sensationally moist and tender on the palate, even days after baking.
Furthermore, we utilize a ‘vegan buttermilk’ technique by combining plant-based milk (such as soy or almond) with apple cider vinegar. This mixture curdles slightly, creating an acidic liquid that reacts vigorously with the baking soda. This reaction produces carbon dioxide bubbles, providing a powerful lift that compensates for the lack of structural support usually provided by dairy proteins. For the buttercream, the use of high-fat vegan butter sticks (rather than tub margarine) is crucial. Tub margarine has too high a water content, leading to runny frosting. By using sticks with a lower water content and whipping them longer than traditional butter, we introduce air pockets that create a stable, creamy emulsion indistinguishable from classic buttercream.
Why You’ll Love This Recipe
- ✓Remains moist for up to 4 days thanks to oil-based batter
- ✓Perfectly flat cake layers ideal for stacking and decorating
- ✓Buttercream is stable enough for intricate piping
- ✓Completely indistinguishable from traditional dairy cake
- ✓Uses simple pantry staples available at most grocery stores
- ✓Versatile base recipe that accepts fruit fillings or sprinkles
Equipment You’ll Need
- ✓Two 8-inch round cake pans
- ✓Electric stand mixer or hand mixer
- ✓Large mixing bowls
- ✓Whisk
- ✓Rubber spatula
- ✓Measuring cups and spoons
- ✓Parchment paper
- ✓Wire cooling rack
- ✓Offset spatula for frosting
Ingredients
- ✓2 1/2 cups All-purpose flour, spooned and leveled
- ✓2 cups Granulated sugar
- ✓1 1/2 tsp Baking powder
- ✓1 tsp Baking soda
- ✓1 tsp Fine sea salt
- ✓1 1/2 cups Unsweetened almond milk or soy milk (room temperature)
- ✓1 tbsp Apple cider vinegar
- ✓1/2 cup Neutral oil (canola, vegetable, or melted coconut oil)
- ✓1 tbsp Pure vanilla extract
- ✓1/2 cup Unsweetened applesauce (acts as a binder)
- ✓1 cup Vegan butter sticks, slightly softened (for buttercream)
- ✓4 cups Powdered sugar, sifted (for buttercream)
- ✓2-3 tbsp Plant-based milk (for buttercream)
- ✓2 tsp Pure vanilla extract (for buttercream)
- ✓Pinch of salt (for buttercream)
Instructions
- Preheat your oven to 350°F (175°C). Grease two 8-inch round cake pans and line the bottoms with parchment paper to ensure easy release.
- In a small bowl or measuring cup, combine the room temperature plant-based milk and apple cider vinegar. Stir gently and let it sit for 5-10 minutes to curdle into vegan buttermilk.
- In a large mixing bowl, whisk together the flour, sugar, baking powder, baking soda, and salt until well combined and no lumps remain.
- Add the oil, vanilla extract, and applesauce to the curdled milk mixture. Whisk the wet ingredients together until fully incorporated.
- Pour the wet mixture into the dry ingredients. Using a hand mixer on low speed or a whisk, mix just until the batter comes together. Do not overmix; stop as soon as the flour streaks disappear to prevent a tough cake.
- Divide the batter evenly between the two prepared cake pans. Tap the pans gently on the counter to release any large air bubbles.
- Bake in the center of the oven for 30-35 minutes, or until a toothpick inserted into the center comes out clean or with just a few moist crumbs.
- Remove the cakes from the oven and let them cool in the pans for 15 minutes. Then, carefully invert them onto a wire rack to cool completely before frosting. They must be 100% cool, or the buttercream will melt.
- To make the buttercream: In a stand mixer fitted with the paddle attachment, beat the softened vegan butter for 5 minutes on medium-high speed until it is pale and creamy.
- Gradually add the powdered sugar, one cup at a time, mixing on low speed until incorporated. Scrape down the sides of the bowl as needed.
- Add the vanilla extract, a pinch of salt, and 1 tablespoon of plant milk. Whip on high speed for another 3-5 minutes until fluffy. Add more milk, one teaspoon at a time, if the frosting is too stiff.
- Frost the cooled cake layers, stacking them carefully. Use an offset spatula to create swirls on the top and sides.
Expert Cooking Tips
- ✓Ensure all ingredients are at room temperature before starting; this helps the emulsion form correctly.
- ✓Do not overmix the batter once the wet and dry ingredients are combined, or the gluten will overdevelop and make the cake rubbery.
- ✓Weighing flour with a kitchen scale is more accurate than cups; if using cups, spoon and level the flour.
- ✓Use vegan butter sticks, not tub margarine, for the frosting to ensure it stabilizes and holds its shape.
- ✓Let the ‘vegan buttermilk’ sit for at least 10 minutes to fully activate the acidity needed for the baking soda.
- ✓If the frosting gets too warm while piping, pop the piping bag in the fridge for 10 minutes to firm up.
- ✓Tap the cake pans on the counter before baking to pop large air bubbles for a uniform crumb.
Substitutions and Variations
Baking is a science, but there is some room for flexibility in this recipe. For the flour, you can substitute a high-quality 1:1 Gluten-Free All-Purpose Baking Flour blend if you need the cake to be gluten-free as well; look for a blend that contains xanthan gum. For the sugar, organic cane sugar works beautifully, though it may darken the crumb slightly compared to white granulated sugar. If you do not have apple cider vinegar, plain white vinegar or fresh lemon juice are perfect 1:1 substitutes for creating the buttermilk. In terms of oil, any neutral oil works, such as grapeseed, canola, or vegetable oil; melted coconut oil works too, but ensure all other ingredients are room temperature so the oil doesn’t solidify upon contact. For the buttercream, if you cannot find vegan butter sticks, sustainable palm shortening mixed with a little butter flavor extract is a very stable alternative for hot weather.
Common Mistakes to Avoid
The most common mistake with dairy-free baking is overmixing the batter. Without eggs to provide structure, overworking the gluten can lead to a gummy, dense texture that feels heavy. Mix only until the dry ingredients are just moistened. Another frequent error is using tub margarine for the frosting. Tub spreads contain high water content and emulsifiers designed for spreading on toast, not for structure; using them will result in a soupy frosting that slides off the cake. Additionally, opening the oven door too early can cause the cakes to collapse in the center. Resist the urge to peek until at least 25 minutes have passed. Finally, frosting the cake before it is completely cool is a recipe for disaster; even a slightly warm core will melt the vegan butter, causing the layers to slide.
Serving Suggestions
This cake is a stunning centerpiece on its own, but it can be dressed up for any occasion. Serve slices on dessert plates garnished with fresh berries like raspberries or strawberries to cut through the sweetness of the buttercream. A sprig of fresh mint adds a lovely pop of color. For a birthday celebration, coat the sides in vegan rainbow sprinkles or use a piping bag to create rosettes on top. If you are serving this at a dinner party, a side of dairy-free coconut whipped cream and a drizzle of raspberry coulis elevates the plating to restaurant quality. It pairs exceptionally well with a hot cup of Earl Grey tea or a dark roast coffee.
Storage and Reheating Tips
Because this cake uses oil and vegan butter, it stores remarkably well. The frosted cake can be kept at room temperature in an airtight cake carrier for up to 2 days, provided the kitchen isn’t too hot. For longer storage, refrigerate the cake for up to 5 days; however, be sure to let the slices come to room temperature for 20-30 minutes before eating to allow the buttercream to soften and the crumb to relax. You can also freeze individual slices wrapped tightly in plastic wrap and foil for up to 3 months. To freeze whole layers for later assembly, wrap the cooled, unfrosted layers in double layers of plastic wrap and freeze flat.
Nutrition Facts (Estimated)
| Serving Size | 1 slice |
| Calories | 480 |
| Fat | 24g |
| Saturated Fat | 6g |
| Unsaturated Fat | 17g |
| Trans Fat | 0g |
| Cholesterol | 0mg |
| Sodium | 310mg |
| Carbohydrates | 62g |
| Fiber | 1g |
| Sugar | 38g |
| Protein | 4g |
Frequently Asked Questions
Can I make this recipe gluten-free?
Yes, you can replace the all-purpose flour with a high-quality 1:1 gluten-free baking flour blend that includes xanthan gum. The texture may be slightly different, but it will still be delicious.
Why did my cake sink in the middle?
Sinking usually happens if the oven door was opened too early, releasing heat, or if the leavening agents (baking soda/powder) were expired. It can also happen if the batter was overmixed.
Can I use coconut milk instead of almond milk?
Absolutely. Canned light coconut milk or carton coconut beverage works well. Full-fat canned coconut milk might make the batter slightly heavier but richer.
My buttercream is grainy, how do I fix it?
Grainy buttercream usually means the sugar wasn’t sifted or the butter was too cold. Keep whipping it on high speed; often, simply beating it longer will dissolve the sugar and smooth it out.
Can I turn this into cupcakes?
Yes! This recipe yields approximately 24 cupcakes. Bake them at 350°F for 18-22 minutes, checking for doneness with a toothpick.
Is granulated sugar vegan?
Some white sugar is processed with bone char. To be 100% certain, buy sugar labeled ‘organic’ or ‘vegan,’ or use beet sugar which is never processed with bone char.
Can I reduce the sugar in the cake?
Sugar provides moisture and structure, not just sweetness. Reducing it by more than 1/4 cup may result in a drier, denser cake.
Why is my cake gummy?
Gumminess is almost always a result of overmixing the flour. Mix gently and stop as soon as the flour disappears.
Conclusion
Mastering a dairy-free vanilla cake that satisfies both vegans and omnivores alike is a true kitchen victory. This recipe breaks down the barriers of allergy-friendly baking, proving that you don’t need dairy to achieve a light, fluffy, and moist dessert. The combination of the tender, oil-based crumb and the rich, aerated buttercream creates a symphony of textures that will have everyone reaching for a second slice. Whether you are an experienced baker or just starting your dairy-free journey, this fail-proof recipe is destined to become a staple in your repertoire. So preheat that oven, whip up that frosting, and get ready to enjoy a slice of pure, vanilla-scented bliss.