The Ultimate Moist Dairy-Free Vanilla Cake with Rich Chocolate Frosting
Moist Dairy Free Vanilla Cake With Dairy Free Chocolate Frosting Recipe
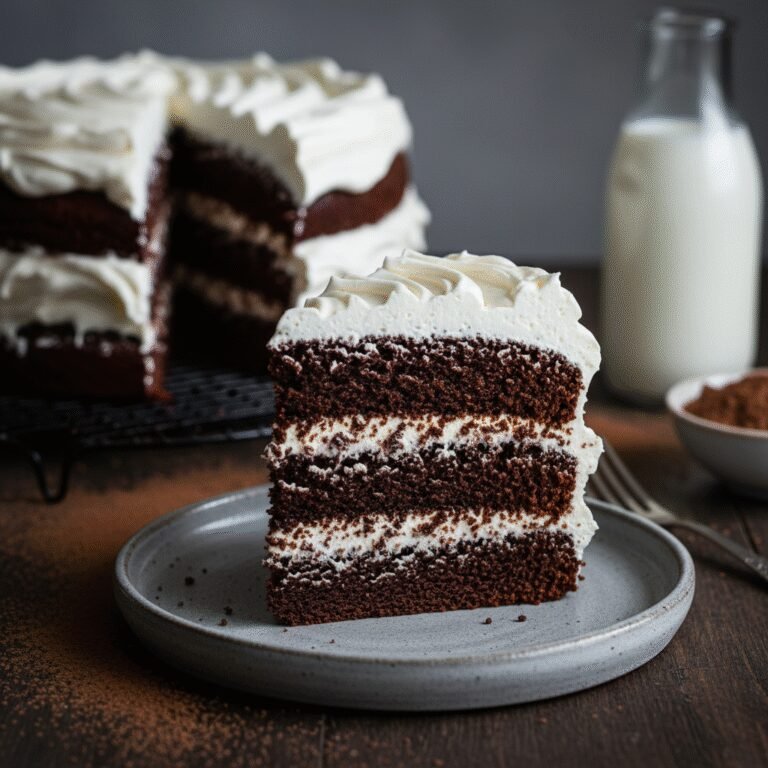
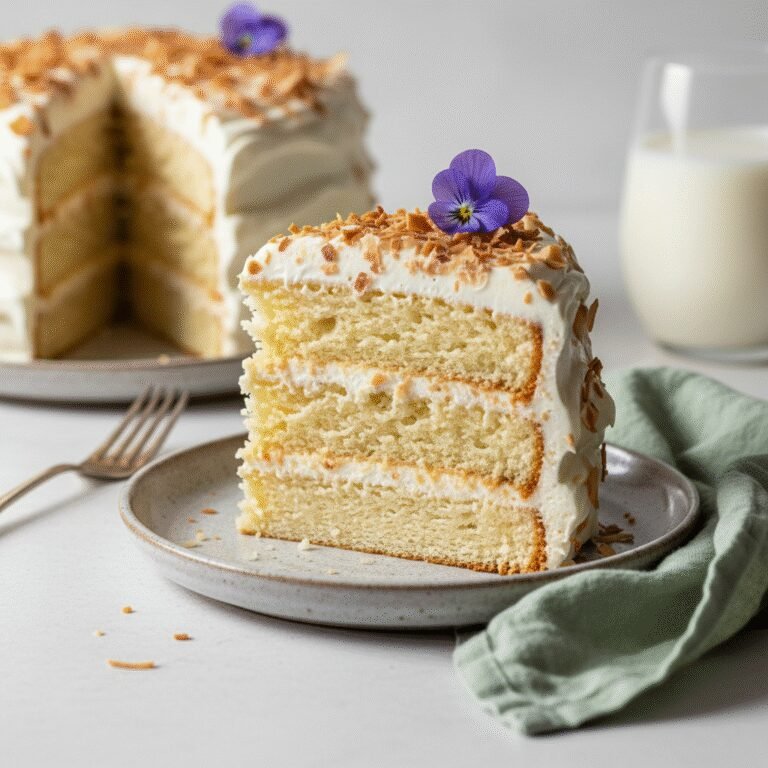
Finally, a dairy-free cake that doesn’t taste like cardboard! This incredibly moist, tender-crumbed vanilla cake is paired with a velvety, dairy-free chocolate buttercream that rivals any traditional bakery treat. It is the perfect allergy-friendly dessert for birthdays and celebrations.
25 minutes
30 minutes
1 hour 30 minutes (includes cooling)
12-14 servings (2 layer 8-inch cake)
Dessert
Baking
American
Dairy-Free
There is something inherently nostalgic about the classic combination of yellow vanilla cake and rich chocolate frosting. It is the quintessential birthday cake, the centerpiece of childhood memories, and the comfort food we all crave. However, for those navigating a dairy-free lifestyle—whether due to lactose intolerance, allergies, or veganism—finding a cake that replicates that specific tender, melt-in-your-mouth texture can be a daunting challenge. Too often, dairy-free baked goods suffer from being overly dense, dry, or having an odd, gummy texture. That stops today. This recipe for Moist Dairy-Free Vanilla Cake is the result of extensive testing to banish the stigma of ‘dietary’ desserts forever.
What makes this cake truly spectacular is its crumb. It is light, fluffy, and incredibly moist, staying soft for days on end. We bypass the need for butter in the batter entirely, relying on high-quality neutral oil and a homemade ‘vegan buttermilk’ mixture to create a lift and tenderness that actually surpasses many butter-based cakes. The vanilla flavor shines through clearly, not masked by the heavy taste of dairy, providing a clean, sweet canvas for the star of the show: the frosting.
And let’s talk about that frosting. This isn’t a waxy, shortening-laden glaze. This is a fluffy, aerated, American-style chocolate buttercream made completely without dairy. It is whipped to perfection, creating a luscious, creamy topping that perfectly balances the sweet vanilla sponge. Whether you are baking for a crowd of mixed dietary needs or just want a killer cake recipe that happens to be plant-based, this dish is a game-changer. Get ready to impress even the most skeptical dessert lovers with a slice of pure, dairy-free heaven.
History & Origins
The history of cake is a long and evolving journey, transforming from ancient bread-like modifications to the light, fluffy sponges we recognize today. The concept of the ‘birthday cake’ as we know it—sugary, frosted, and layered—began to take shape in the mid-19th century. However, the specific pairing of vanilla cake with chocolate frosting became an American staple in the 20th century, largely due to the industrialization of food production which made vanilla extract and cocoa powder accessible pantry staples for the average household.
Dairy-free baking, interestingly, has its own unique historical roots, often born out of necessity rather than choice. During the Great Depression and World War II, rationing of butter, milk, and eggs led to the invention of ‘Wacky Cake’ or ‘Depression Cake.’ These cakes relied on vinegar and baking soda for leavening and oil for moisture, proving that delicious confections didn’t strictly require dairy. While those early iterations were often chocolate-based to mask the lack of rich ingredients, they laid the groundwork for modern plant-based baking science.
In recent decades, the movement has shifted from scarcity to health and ethics. With the rise of veganism and a growing awareness of lactose intolerance (which affects approximately 65% of the human population to some degree), the demand for high-quality dairy-free alternatives has skyrocketed. We are no longer in the era of simply removing ingredients; we are in the era of culinary innovation where almond, soy, and oat milks are engineered to perform just like cow’s milk in baking chemistry. This recipe honors that history, taking the resourcefulness of the past and refining it with modern techniques to create a classic vanilla cake that stands tall in the culinary timeline.
Why This Recipe Works
This recipe succeeds where many others fail because it leverages the specific chemical properties of dairy-free ingredients rather than simply trying to force substitutions into a butter-based method. First, we use oil instead of a dairy-free butter alternative for the cake batter. Butter is about 80% fat and 20% water, whereas oil is 100% fat. This higher fat content coats the flour proteins more effectively, inhibiting gluten formation and resulting in a much more tender crumb. Furthermore, oil remains liquid at room temperature, which means the cake stays moist and soft on the counter, whereas butter-based cakes can firm up and dry out as they cool.
Secondly, we create a ‘vegan buttermilk’ by combining plant-based milk (soy or almond works best due to higher protein content) with apple cider vinegar. The acid in the vinegar curdles the milk proteins, thickening the liquid. more importantly, this acid reacts vigorously with the baking soda. This chemical reaction produces carbon dioxide gas bubbles, which get trapped in the batter structure, providing significant lift and aeration. This mimics the leavening power of eggs and traditional buttermilk.
Finally, the ‘reverse creaming’ method—or a modified version of it used here—ensures a velvety texture. By mixing the dry ingredients thoroughly before introducing the wet, we ensure an even distribution of the leavening agents. For the frosting, using a high-fat vegan butter stick (not tub margarine) ensures the structure holds up at room temperature, allowing for beautiful piping and a mouthfeel that melts just like real buttercream.
Why You’ll Love This Recipe
- ✓Incredibly moist texture that stays soft for days.
- ✓100% Dairy-Free and Vegan-friendly.
- ✓Rich, creamy chocolate frosting that pipes perfectly.
- ✓Simple pantry ingredients—no hard-to-find substitutes.
- ✓Perfect for birthday parties and allergy-conscious events.
- ✓Easy one-bowl method for the cake batter.
Equipment You’ll Need
- ✓Two 8-inch round cake pans
- ✓Large mixing bowl
- ✓Medium mixing bowl
- ✓Electric hand mixer or stand mixer
- ✓Wire cooling rack
- ✓Measuring cups and spoons
- ✓Offset spatula
- ✓Whisk
- ✓Parchment paper
Ingredients
- ✓2 ½ cups All-Purpose Flour
- ✓1 ½ cups Granulated Sugar
- ✓1 ½ tsp Baking Powder
- ✓1 tsp Baking Soda
- ✓½ tsp Salt
- ✓1 ½ cups Unsweetened Almond Milk (or Soy Milk), room temperature
- ✓1 tbsp Apple Cider Vinegar
- ✓½ cup Neutral Oil (Canola, Vegetable, or Grapeseed)
- ✓1 tbsp Pure Vanilla Extract
- ✓1 cup Vegan Butter Sticks, slightly softened (for frosting)
- ✓3 ½ cups Powdered Sugar, sifted (for frosting)
- ✓¾ cup Unsweetened Cocoa Powder, sifted (for frosting)
- ✓2-3 tbsp Unsweetened Almond Milk (for frosting)
- ✓1 tsp Pure Vanilla Extract (for frosting)
- ✓Pinch of Salt (for frosting)
Instructions
- Preheat your oven to 350°F (175°C). Grease two 8-inch round cake pans with oil and line the bottoms with parchment paper rounds. Dust the sides with a little flour to prevent sticking.
- In a liquid measuring cup or small bowl, combine the 1 ½ cups of almond milk with the 1 tablespoon of apple cider vinegar. Stir gently and let it sit for about 5-10 minutes to curdle into vegan buttermilk.
- In a large mixing bowl, whisk together the flour, sugar, baking powder, baking soda, and salt until well combined and no lumps remain.
- Add the oil and vanilla extract to the curdled milk mixture. Whisk wet ingredients together until uniform.
- Pour the wet ingredient mixture into the dry ingredients. Using a whisk or an electric mixer on low speed, mix until just combined. Do not overmix; stop as soon as the flour streaks disappear. The batter should be smooth but not tough.
- Divide the batter evenly between the two prepared cake pans. Tap the pans gently on the counter to release any large air bubbles.
- Bake in the preheated oven for 28-32 minutes, or until a toothpick inserted into the center comes out clean or with just a few moist crumbs attached.
- Remove cakes from the oven and allow them to cool in the pans for 10-15 minutes. Then, carefully run a knife around the edges and invert them onto a wire cooling rack to cool completely. They must be completely cool before frosting.
- While the cakes cool, prepare the frosting. In a large bowl or stand mixer, beat the softened vegan butter until creamy and pale (about 2-3 minutes).
- Gradually add the sifted powdered sugar and cocoa powder, mixing on low speed initially to avoid a dust cloud. Once incorporated, increase speed to medium-high.
- Add the vanilla extract and 1 tablespoon of almond milk. Whip for 3-4 minutes until fluffy. If the frosting is too stiff, add more milk one teaspoon at a time until it reaches a spreadable consistency. Add a pinch of salt to balance the sweetness.
- Once the cakes are fully cooled, place one layer on your serving plate. Spread a generous layer of chocolate frosting over the top. Place the second cake layer on top.
- Frost the top and sides of the cake with the remaining frosting using an offset spatula. Decorate as desired.
Expert Cooking Tips
- ✓Measure flour correctly: Spoon the flour into the measuring cup and level it off with a knife. Scooping directly from the bag packs the flour and leads to a dry cake.
- ✓Room temperature ingredients: Ensure your almond milk is at room temperature to ensure the batter emulsifies properly.
- ✓Don’t overmix: Overmixing develops gluten, which is the enemy of a tender cake. Mix only until the ingredients are combined.
- ✓Sift your cocoa: Cocoa powder is notorious for being lumpy. Always sift it before adding to the frosting to ensure a smooth finish.
- ✓Cool completely: Vegan cakes can be slightly more fragile when warm. Let them cool completely before attempting to stack or frost.
- ✓Vinegar is key: Do not skip the vinegar; it reacts with the baking soda to provide the lift. You won’t taste it in the final product.
Substitutions and Variations
Baking is chemistry, but there is some room for flexibility in this recipe. For the flour, you can substitute a high-quality Gluten-Free 1-to-1 Baking Flour blend if you need the cake to be gluten-free as well as dairy-free; look for a blend that contains xanthan gum. For the milk, soy milk is the best alternative to almond milk because its high protein content creates the best ‘buttermilk’ when mixed with vinegar, but oat milk or coconut milk (carton, not canned) will also work. If you don’t have apple cider vinegar, white vinegar or fresh lemon juice are perfect 1:1 substitutes. For the oil, melted coconut oil can be used, but ensure all other ingredients are room temperature so the oil doesn’t solidify upon contact. In the frosting, if you cannot find vegan butter sticks, you can use high-quality vegetable shortening, though the flavor will be less buttery; adding a splash of butter extract (check that it is vegan) can help.
Common Mistakes to Avoid
The most common mistake with dairy-free cakes is over-baking. Because this cake relies on oil, it retains moisture well, but leaving it in the oven too long will still dry it out. Check it at the 28-minute mark. Another frequent error is using tub margarine instead of vegan butter sticks for the frosting. Tub margarine has a higher water content and will result in a runny frosting that slides off the cake. Always use the sticks which have a lower moisture content. Additionally, rushing the cooling process is a recipe for disaster; if the cake is even slightly warm, the fat in the frosting will melt, causing the layers to slide. Finally, ensure your baking soda is fresh; since this recipe relies heavily on the soda-acid reaction for lift, expired leavening agents will result in a dense, flat puck.
Serving Suggestions
This cake is rich and flavorful, so it pairs beautifully with fresh fruit to cut through the sweetness. Serve a slice with a side of fresh raspberries, strawberries, or a tart berry coulis. For a cozy afternoon treat, it goes perfectly with a hot cup of black coffee or an oat milk latte. If you want to elevate the presentation for a birthday, garnish the top with dairy-free chocolate shavings, sprinkles, or edible flowers. A scoop of dairy-free vanilla bean ice cream on the side turns a simple slice into a decadent sundae experience.
Storage and Reheating Tips
Because this cake is oil-based, it stays moist at room temperature longer than butter cakes. You can store it in an airtight cake carrier on the counter for up to 3 days. If your kitchen is particularly hot or humid, it is safer to store it in the refrigerator for up to 5 days; just be sure to let it come to room temperature before serving for the best texture and flavor. This cake also freezes beautifully. You can freeze individual slices wrapped tightly in plastic wrap and foil for up to 3 months. To freeze the whole cake, place it in the freezer uncovered for an hour to set the frosting, then wrap the whole thing tightly in plastic wrap and foil.
Nutrition Facts (Estimated)
| Serving Size | 1 slice |
| Calories | 480 |
| Fat | 24g |
| Saturated Fat | 6g |
| Unsaturated Fat | 16g |
| Trans Fat | 0g |
| Cholesterol | 0mg |
| Sodium | 310mg |
| Carbohydrates | 64g |
| Fiber | 2g |
| Sugar | 38g |
| Protein | 4g |
Frequently Asked Questions
Can I make this cake gluten-free?
Yes! You can swap the all-purpose flour for a reputable 1-to-1 Gluten-Free Baking Flour blend. Make sure the blend includes xanthan gum for structure.
Why did my cake sink in the middle?
Sinking usually happens if the oven door was opened too early, causing a temperature drop, or if the cake was underbaked. It can also happen if there was too much leavening agent.
Can I use coconut oil instead of canola oil?
Yes, melted refined coconut oil works well. Refined coconut oil has a neutral flavor, whereas unrefined will taste like coconut. Ensure your milk is room temperature so the oil doesn’t harden when mixing.
My frosting is too runny, what do I do?
If the frosting is too soft, add more sifted powdered sugar, 1/4 cup at a time. Also, ensure your vegan butter wasn’t melted, just slightly softened. You can also pop the bowl in the fridge for 10 minutes.
Can I turn this into cupcakes?
Absolutely. This batter will make approximately 20-24 cupcakes. Bake them at 350°F for 18-22 minutes.
Does this cake taste like vinegar?
Not at all. The vinegar reacts completely with the baking soda to create lift, and the remaining acidity is balanced by the sugar and vanilla. It leaves no vinegar taste.
What is the best brand of vegan butter for frosting?
Look for ‘Miyoko’s Creamery’ or ‘Country Crock Plant Butter’ (stick form). Avoid tub margarines as they contain too much water.
Can I use regular milk if I don’t need it to be dairy-free?
Yes, you can use regular cow’s milk and regular butter in the same quantities if you are not restricted to a dairy-free diet.
Conclusion
There you have it—a foolproof guide to making the most Moist Dairy-Free Vanilla Cake with Dairy-Free Chocolate Frosting. This recipe proves that you do not need to compromise on taste, texture, or presentation when baking for dietary restrictions. Whether you are a seasoned vegan baker or just starting to explore dairy-free options, this cake is sure to become a staple in your recipe box. It captures the essence of celebration and comfort in every bite. So preheat that oven, grab your whisk, and get ready to enjoy a slice of pure joy. Happy baking!