The Ultimate Moist Keto Vanilla Cake With Stevia (Gluten-Free & Low Carb)
Moist Keto Vanilla Cake With Stevia Recipe
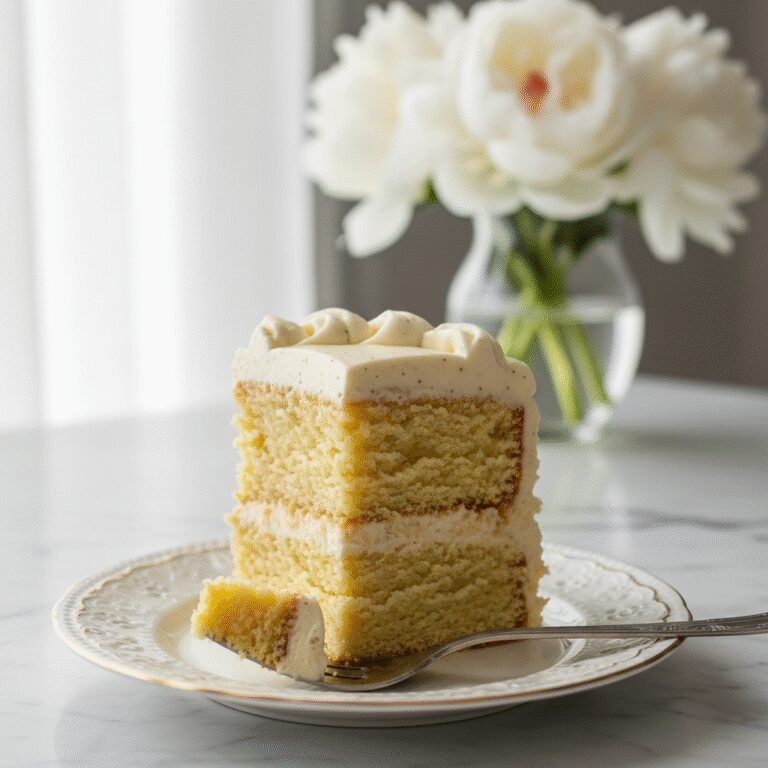
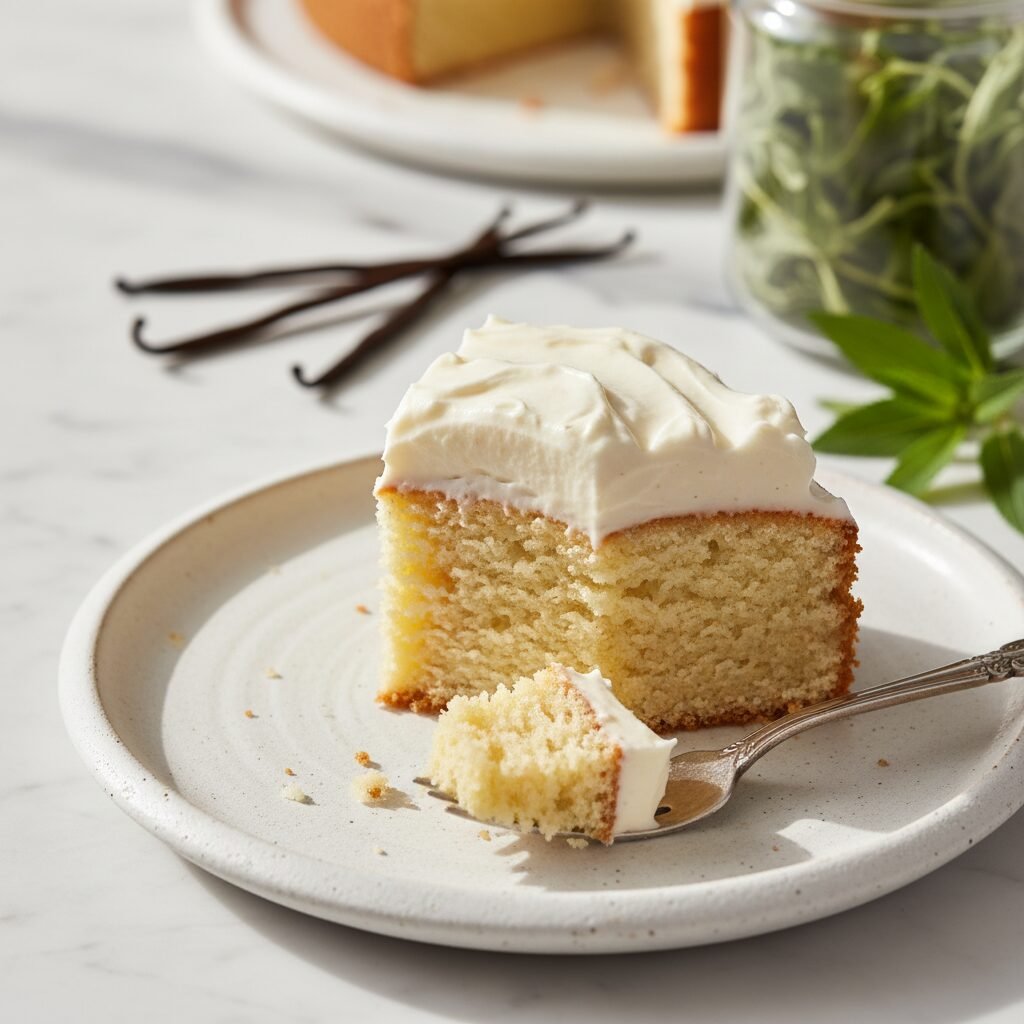
Discover the holy grail of low-carb baking with this incredibly moist Keto Vanilla Cake sweetened with Stevia. It delivers the classic, fluffy texture of a traditional birthday cake without the sugar crash, making it the perfect guilt-free treat for any celebration.
20 minutes
30 minutes
50 minutes
12 servings
Dessert
Baking
American
Gluten-Free
If you have been on a ketogenic journey for any length of time, you know the struggle is real when it comes to finding a decent cake recipe. Far too often, low-carb desserts promise the moon but deliver a dry, crumbly, or egg-heavy disappointment that feels more like an omelet than a treat. That ends today. This Moist Keto Vanilla Cake with Stevia is the result of extensive testing and tweaking to replicate that nostalgic, tender crumb of a classic yellow cake mix, all while keeping the carb count incredibly low.
Vanilla cake is the little black dress of the dessert world; it is timeless, versatile, and beloved by almost everyone. However, sugar and wheat flour play massive structural roles in traditional baking, retaining moisture and creating gluten networks. Removing them requires a careful balancing act of alternative flours and fats. In this recipe, we utilize a specific blend of almond and coconut flours to achieve structure, while sour cream and butter ensure a velvety richness that melts in your mouth.
Furthermore, sweetening with Stevia can be tricky due to its potential aftertaste, but when paired correctly with vanilla and fat, the bitterness disappears, leaving just a clean sweetness. Whether you are celebrating a birthday, prepping for a holiday gathering, or just need a slice of comfort on a Tuesday night, this cake proves that you do not have to sacrifice texture or flavor to stay in ketosis. Get ready to reignite your love for baking with a dessert that satisfies the soul and the macros.
History & Origins
The concept of ‘cake’ has evolved drastically over centuries, transforming from heavy, bread-like yeast cakes of the ancient world to the light, chemically-leavened sponges we know today. The modern vanilla cake owes its existence to the discovery of baking powder in the mid-19th century, which allowed home bakers to create airy, delicate textures that were previously impossible without hours of manual beating. Vanilla, once a rare and exotic spice from Mexico, became the standard flavoring for American cakes by the 20th century, becoming synonymous with celebration and comfort.
Parallel to the history of cake is the history of the low-carb movement. While the ketogenic diet was originally developed in the 1920s to treat epilepsy, it saw a massive resurgence in the late 20th and early 21st centuries as a weight loss and metabolic health tool. Early low-carb baking was rough, often relying on soy flour or heavy doses of artificial sweeteners like saccharin. The ‘Atkins’ era brought sugar alcohols into the mainstream, but many caused digestive distress.
The game-changer for modern keto baking was the popularization of almond flour and coconut flour, along with natural, plant-based sweeteners like Stevia Rebaudiana. Stevia, a plant native to South America, has been used for centuries by the Guaraní people but only gained FDA approval as a food additive in the US in 2008. This recipe represents the culmination of this culinary evolution: marrying the 19th-century ideal of a fluffy vanilla sponge with 21st-century nutritional science and natural ingredients.
Why This Recipe Works
This recipe succeeds where many others fail because it fundamentally understands the chemistry of gluten-free, sugar-free baking. In traditional baking, sugar is hygroscopic, meaning it holds onto water and keeps cakes moist. When you remove sugar, you remove that moisture retention. To combat this, this recipe relies on a ‘fat-first’ approach. By using superfine blanched almond flour, which is high in healthy fats, we create a moist base. However, almond flour alone can be too dense and oily. This is where coconut flour comes in; it is highly absorbent and acts like a sponge, providing the necessary structure to hold the cake together without gluten.
The second secret weapon here is the inclusion of sour cream (or full-fat Greek yogurt). The acidity in the sour cream reacts with the baking powder to create a better rise, while the extra fat content ensures the crumb remains tender days after baking. Regarding the sweetener, Stevia is potent but lacks bulk. Unlike erythritol, which can have a cooling effect, or xylitol, which is toxic to dogs, Stevia is natural and zero-calorie. Because Stevia doesn’t add volume, we adjust the liquid ratios to prevent the batter from being too thick. Finally, separating the eggs (optional but recommended) or beating them thoroughly incorporates air, mimicking the mechanical lift usually provided by creaming sugar and butter, resulting in a lightness that defies the density of nut flours.
Why You’ll Love This Recipe
- ✓Only 3g net carbs per slice
- ✓Incredibly moist crumb that doesn’t dry out
- ✓Sweetened naturally with Stevia – no sugar spikes
- ✓Gluten-free and grain-free
- ✓Perfect base for cupcakes or layer cakes
- ✓Simple one-bowl mixing method available
Equipment You’ll Need
- ✓9-inch round cake pan or 8×8 square pan
- ✓Electric hand mixer or stand mixer
- ✓Large mixing bowl
- ✓Medium mixing bowl
- ✓Rubber spatula
- ✓Parchment paper
- ✓Measuring cups and spoons
- ✓Wire cooling rack
Ingredients
- ✓2 cups superfine blanched almond flour
- ✓1/3 cup coconut flour
- ✓1 tbsp baking powder (gluten-free)
- ✓1/2 tsp sea salt
- ✓1/2 cup unsalted butter, softened
- ✓1/3 cup granulated sweetener blend (Erythritol/Stevia blend) OR 1-2 tsp pure liquid stevia (to taste)
- ✓4 large eggs, room temperature
- ✓1/2 cup full-fat sour cream or Greek yogurt
- ✓1/3 cup unsweetened almond milk (warm)
- ✓1 tbsp pure vanilla extract
Instructions
- Preheat your oven to 350°F (175°C). Grease a 9-inch round cake pan or an 8×8 square pan generously with butter or coconut oil. Line the bottom with parchment paper to ensure easy removal.
- In a medium bowl, whisk together the almond flour, coconut flour, baking powder, and salt. Ensure there are no lumps, especially in the almond flour. Set aside.
- In a large mixing bowl using an electric hand mixer or a stand mixer, cream the softened butter with the sweetener (if using a granular blend) until pale and fluffy, about 2-3 minutes. If using liquid stevia, beat the butter until fluffy first, then mix in the stevia.
- Add the eggs one at a time, beating well after each addition. The mixture may look slightly curdled; this is normal.
- Mix in the vanilla extract and the sour cream (or Greek yogurt) until fully combined.
- Reduce the mixer speed to low. Gradually add the dry ingredient mixture to the wet ingredients in two batches. Mix only until just combined. Do not overmix.
- With the mixer running on low, slowly pour in the warm almond milk. Mix until the batter is smooth and creamy. Let the batter sit for 2-3 minutes to allow the coconut flour to absorb some moisture.
- Pour the batter into the prepared cake pan and smooth the top with a rubber spatula.
- Bake for 25-35 minutes. The time varies depending on your oven and pan material. Start checking at 25 minutes. The cake is done when the top is golden brown and a toothpick inserted into the center comes out clean or with just a few moist crumbs.
- Remove from the oven and let the cake cool in the pan for at least 20 minutes. This step is critical as keto cakes are fragile when hot.
- Gently run a knife around the edges, then invert the cake onto a wire cooling rack to cool completely before frosting or slicing.
Expert Cooking Tips
- ✓Room temperature ingredients are non-negotiable. Cold eggs or butter will cause the batter to seize and affect the rise.
- ✓Measure flour correctly. Ideally, weigh your almond and coconut flour. If using cups, spoon the flour into the cup and level it off rather than scooping, which packs it down.
- ✓Don’t skip the parchment paper. Nut flour cakes can stick more stubbornly than wheat cakes.
- ✓Tent with foil if browning too fast. If the top looks dark but the center is jiggly, cover loosely with aluminum foil for the last 10 minutes.
- ✓Let it cool completely. Almond flour cakes firm up as they cool. Cutting it warm will result in a crumbly mess.
- ✓Adjust sweetness to taste. Stevia brands vary wildly in potency. Taste a tiny bit of the batter (if comfortable with raw eggs) or smell it to gauge sweetness.
Substitutions and Variations
This recipe is versatile, but substitutions must be made carefully in keto baking. **Flours:** Do not try to substitute almond flour with coconut flour at a 1:1 ratio; coconut flour is extremely absorbent and will dry out the cake instantly. If you have a nut allergy, sunflower seed flour can often replace almond flour 1:1, though it may turn green due to a reaction with baking powder (adds a fun color but tastes fine!). **Dairy-Free:** You can replace the butter with coconut oil or a vegan butter stick. Replace the sour cream with thick coconut cream (the solid part from a chilled can) or a dairy-free yogurt alternative. **Sweeteners:** If you dislike Stevia, you can use pure Erythritol, Xylitol, or Allulose. Generally, use about 1/2 to 2/3 cup of granular sweetener to replace the sweetness level, but check the brand’s conversion chart. **Eggs:** Flax eggs usually do not work well in this specific recipe because eggs provide essential lift for the heavy nut flours. It is not recommended to make this egg-free.
Common Mistakes to Avoid
The most common mistake is **overbaking**. Almond flour burns faster than wheat flour, and because it doesn’t harden quite the same way, people often leave it in until it feels ‘firm’ like a wheat cake, by which time it is dried out. Trust the toothpick test. Another mistake is **using the wrong grind of almond flour**. You must use ‘superfine’ blanched almond flour, not almond meal. Almond meal still has the skins and is coarser, which will result in a gritty, heavy cake. Finally, **cutting the cake too soon** is a tragedy. Keto cakes rely on the cooling process to set their structure. If you move it or slice it while hot, it will fall apart.
Serving Suggestions
This cake is a marvelous blank canvas. For a classic birthday vibe, frost it with a Keto Cream Cheese Frosting or a Sugar-Free Buttercream. If you prefer something lighter, serve it with a dollop of unsweetened whipped cream and a handful of fresh berries (strawberries, raspberries, or blackberries are lowest in carbs). For a dessert elegance, dust the top with powdered erythritol and serve with a side of keto-friendly lemon curd. It also pairs beautifully with a bulletproof coffee or an almond milk latte.
Storage and Reheating Tips
Because this cake contains no preservatives and has a high moisture content from the dairy and nut flours, it should be stored in the refrigerator. Wrap it tightly in plastic wrap or store it in an airtight container to prevent it from absorbing fridge odors. It will stay fresh for up to 5-6 days in the fridge.
**Freezing:** This cake freezes exceptionally well. Slice the cooled cake and wrap each slice individually in plastic wrap, then place them in a freezer-safe bag. It can be frozen for up to 3 months. To eat, simply thaw a slice in the fridge overnight or microwave it for 15-20 seconds for a warm treat.
Nutrition Facts (Estimated)
| Serving Size | 1 slice |
| Calories | 245 |
| Fat | 22g |
| Saturated Fat | 8g |
| Unsaturated Fat | 12g |
| Trans Fat | 0g |
| Cholesterol | 85mg |
| Sodium | 180mg |
| Carbohydrates | 6g |
| Fiber | 3g |
| Sugar | 1g |
| Protein | 7g |
Frequently Asked Questions
Why did my cake fall in the center?
This usually happens if the oven door was opened too early during baking, causing a temperature drop, or if the cake was underbaked. It can also happen if too much baking powder was used.
Can I use liquid stevia instead of powdered?
Yes, absolutely. Liquid stevia is very concentrated. Start with 1 teaspoon, mix, and taste the batter. Add more drops as needed. Note that you lose a small amount of bulk, but the recipe accounts for this.
Does this cake taste like coconut?
Even though it uses coconut flour, the amount is small compared to the almond flour, and the butter and vanilla overpower the mild coconut flavor. It tastes primarily of vanilla.
Can I bake this as cupcakes?
Yes! This batter makes excellent cupcakes. Line a muffin tin with paper liners and bake for 18-22 minutes at 350°F. It should yield about 10-12 cupcakes.
Is baking powder keto?
Commercial baking powder often contains cornstarch, which adds a negligible amount of carbs per slice. However, you can buy grain-free baking powder or make your own using cream of tartar and baking soda if you are strict strict keto.
My batter is extremely thick, is that wrong?
Keto batters are generally thicker than traditional cake batter. It should be spoonable and spreadable, not pourable like water. If it’s like cookie dough, add another tablespoon of almond milk.
Can I leave the cake on the counter?
You can for the first 24 hours if your kitchen is cool, but due to the moisture and dairy, the refrigerator is safer to prevent spoilage.
How do I calculate net carbs?
Net carbs are calculated by taking Total Carbohydrates and subtracting Fiber and Sugar Alcohols (if using erythritol). This recipe is roughly 6g Total Carbs – 3g Fiber = 3g Net Carbs.
Conclusion
Baking on a keto diet doesn’t mean you have to settle for second best. This Moist Keto Vanilla Cake with Stevia proves that you can have your cake and eat it too—literally. With its tender crumb, rich buttery flavor, and perfect vanilla aroma, it satisfies the deepest dessert cravings without derailing your health goals. Whether you are a seasoned keto veteran or just looking to reduce your sugar intake, this recipe is a staple you will return to time and time again. So, preheat that oven, grab your mixing bowl, and get ready to enjoy a slice of pure happiness!