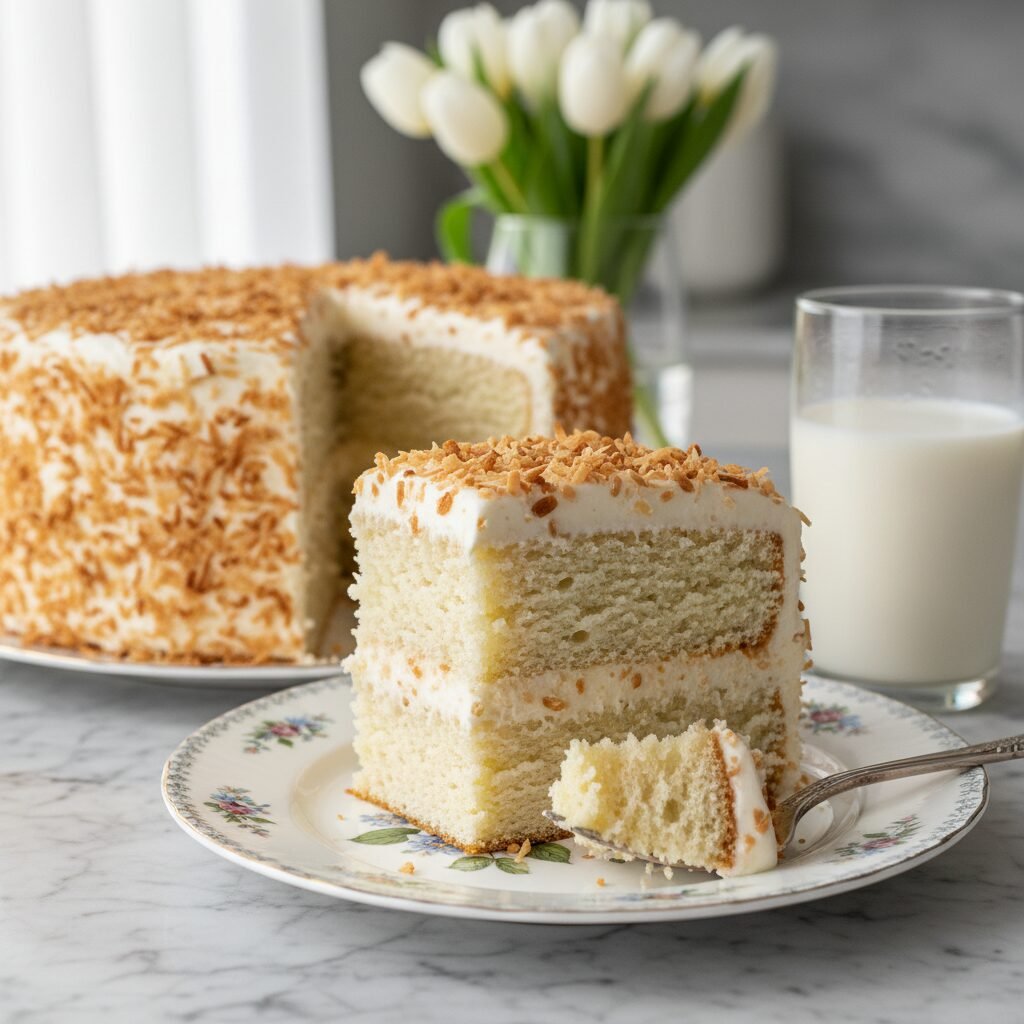
The Ultimate Moist Gluten-Free Coconut Cake with Cream Cheese Frosting
Moist Gluten Free Coconut Cake With Cream Cheese Frosting Recipe
Forget dry, crumbly gluten-free bakes—this coconut cake is exceptionally moist, tender, and bursting with tropical flavor. Layered with a tangy, velvety cream cheese frosting and draped in toasted coconut, it is the perfect showstopper for Easter, birthdays, or any celebration calling for a slice of Southern charm.
30 minutes
35 minutes
1 hour 5 minutes
12-14 servings
Dessert
Baking
American
Gluten-Free
If you have been on a gluten-free diet for any length of time, you are likely familiar with the heartbreak of ‘The Dry Cake.’ You know the one: it looks beautiful on the counter, but the moment you slide a fork through it, it crumbles into a pile of sand, and the texture is reminiscent of cardboard. For years, I thought a truly moist, plush, bakery-style coconut cake was a relic of my gluten-eating past. I am thrilled to report that I was wrong. This Moist Gluten-Free Coconut Cake is the result of endless testing, tweaking, and tasting to achieve the ‘Holy Grail’ of gluten-free baking: a crumb that is soft, springy, and undeniably moist without being gummy.
This recipe channels the spirit of a classic Southern coconut cake. It is unapologetically rich, featuring a batter infused with both full-fat coconut milk and sour cream to ensure moisture retention. The flavor profile is a delicate balance of sweet vanilla and nutty coconut, amplified by a splash of coconut extract that perfumes the kitchen as it bakes. But the cake is only half the story. We pair these tender white cake layers with a luscious, tangy cream cheese frosting that cuts through the sweetness and adds a creamy decadence that buttercream alone simply cannot achieve. Finally, the whole masterpiece is coated in shredded coconut—toasted for a nutty crunch or left raw for a chewy, snow-white finish. Whether you are baking for a Celiac loved one or just want a delicious dessert that happens to be wheat-free, this cake will convert even the most skeptical critics.
History & Origins
The history of the coconut cake is deeply intertwined with the culinary traditions of the American South, though the star ingredient traveled a long way to get there. Coconuts are not native to the continental United States. In the early 19th century, the coconut trade began to flourish as ships traveling from the Caribbean and South America docked in major Southern ports like Charleston, South Carolina, and New Orleans, Louisiana. These exotic, hard-shelled fruits were initially a luxury item, prized for their sweet water and rich meat. By the late 1800s, with the invention of desiccated (dried and shredded) coconut by a Philadelphia miller in 1895, coconut became accessible to home bakers across the nation, sparking a coconut cake craze.
Traditionally, these cakes were high-rising white cakes, often frosted with a ‘seven-minute’ boiled icing or a meringue-based frosting and heavily dusted with fresh grated coconut. It became a staple of Southern hospitality, a centerpiece for Christmas, Easter, and weddings. The transition to gluten-free versions is a much more modern chapter in this history. As awareness of Celiac disease and gluten sensitivity grew in the late 20th and early 21st centuries, bakers struggled to replicate the delicate structure of this high-ratio cake using rice flour and starches. Early attempts were dense and heavy. However, the evolution of hydrocolloids like xanthan gum and the development of sophisticated 1:1 gluten-free flour blends have allowed us to reclaim this historic dessert. This recipe honors that 19th-century Southern tradition while utilizing 21st-century food science to ensure everyone can enjoy a slice of history.
Why This Recipe Works
The primary challenge in gluten-free baking is moisture retention and structure. Wheat flour contains gluten, which creates a web that traps air and holds moisture; without it, cakes tend to be dense or dry out rapidly. This recipe combats that issue with a three-pronged approach: fat, acidity, and protein. First, we use a combination of unsalted butter and oil (or full-fat sour cream). Butter provides the classic flavor, while the liquid fat ensures the cake stays soft even when refrigerated. Unlike water or regular milk, which evaporate easily during baking, the fat content in sour cream and canned coconut milk locks moisture into the crumb.
Secondly, the acidity in the sour cream and cream cheese serves a dual purpose: it tenderizes the proteins in the flour and reacts with the baking soda/powder to create lift, resulting in a fluffy, rather than brick-like, texture. Thirdly, the use of a high-quality 1:1 gluten-free flour blend containing xanthan gum is non-negotiable. The gum mimics the elasticity of gluten, providing the necessary structure to hold the air bubbles created during the creaming method. We also employ the ‘reverse creaming’ technique in spirit by ensuring all ingredients are at room temperature, allowing for a stable emulsion. The result is a cake that is sturdy enough to stack but melts in your mouth.
Why You’ll Love This Recipe
- ✓Incredibly moist texture that stays soft for days.
- ✓Rich, authentic coconut flavor using milk, extract, and shreds.
- ✓Tangy cream cheese frosting balances the sweetness perfectly.
- ✓Stable structure that is easy to slice and stack.
- ✓Naturally nut-free (aside from coconut) and easily adaptable.
Equipment You’ll Need
- ✓Three 8-inch round cake pans
- ✓Stand mixer with paddle attachment or electric hand mixer
- ✓Large mixing bowls
- ✓Rubber spatula
- ✓Wire cooling rack
- ✓Measuring cups and spoons
- ✓Offset spatula for frosting
- ✓Parchment paper
Ingredients
- ✓3 cups Gluten-Free 1:1 Baking Flour (blend with xanthan gum)
- ✓1 tablespoon baking powder
- ✓1/2 teaspoon baking soda
- ✓1 teaspoon salt
- ✓1 cup unsalted butter, softened to room temperature
- ✓1 3/4 cups granulated white sugar
- ✓4 large eggs, room temperature
- ✓2 teaspoons pure vanilla extract
- ✓1 teaspoon coconut extract
- ✓1 cup full-fat canned coconut milk (shaken well)
- ✓1/2 cup full-fat sour cream, room temperature
- ✓1 cup sweetened shredded coconut
- ✓16 oz cream cheese, softened (block style, not tub)
- ✓1/2 cup unsalted butter, softened (for frosting)
- ✓5 cups powdered sugar, sifted
- ✓1 teaspoon vanilla extract (for frosting)
- ✓2 cups sweetened shredded coconut (for decoration, toasted optional)
Instructions
- Preheat your oven to 350°F (175°C). Grease three 8-inch round cake pans with butter or cooking spray and line the bottoms with parchment paper rounds. This is crucial for gluten-free cakes to prevent sticking.
- In a medium bowl, whisk together the gluten-free flour, baking powder, baking soda, and salt. Ensure there are no lumps and set aside.
- In the bowl of a stand mixer fitted with the paddle attachment, beat the 1 cup of softened butter and granulated sugar on medium-high speed for about 3-5 minutes until the mixture is pale, light, and fluffy. Scrape down the sides of the bowl.
- Add the eggs one at a time, beating well after each addition. Add the vanilla extract and coconut extract. Scrape down the bowl again to ensure everything is incorporated.
- In a small bowl or measuring cup, whisk together the canned coconut milk and sour cream.
- Reduce the mixer speed to low. Add the dry ingredients in three parts, alternating with the coconut milk mixture in two parts, starting and ending with the dry ingredients. Mix only until just combined—do not overmix.
- Gently fold in the 1 cup of shredded coconut using a rubber spatula.
- Divide the batter evenly among the three prepared cake pans. Smooth the tops with a spatula.
- Bake for 30-35 minutes, or until a toothpick inserted into the center comes out clean or with just a few moist crumbs. The cakes should spring back lightly when touched.
- Remove from the oven and let the cakes cool in the pans for 15 minutes. Then, carefully invert them onto a wire rack to cool completely before frosting. Do not attempt to frost warm gluten-free cake; it is too fragile.
- To make the frosting: In a large bowl, beat the softened cream cheese and 1/2 cup butter together until completely smooth and creamy.
- Gradually add the powdered sugar, one cup at a time, beating on low speed until incorporated. Add the vanilla extract. Increase to high speed and whip for 2-3 minutes until fluffy.
- To assemble: Place one cake layer on a serving platter. Spread a generous layer of frosting over the top. Repeat with the second and third layers. Frost the outside of the cake with the remaining frosting.
- Press the remaining 2 cups of shredded coconut onto the top and sides of the cake. Serve immediately or refrigerate.
Expert Cooking Tips
- ✓Room temperature ingredients are mandatory. Cold eggs or dairy will curdle the batter and result in a dense cake.
- ✓Weigh your flour if possible. Gluten-free flour is easy to over-measure; 1 cup should weigh approximately 120-140g depending on the brand.
- ✓Use full-fat canned coconut milk, not the refrigerated carton beverage. The fat in the canned version is essential for moisture.
- ✓Let the batter rest for 10-15 minutes before baking. This allows the rice flour to hydrate fully, reducing grittiness.
- ✓Do not skimp on the beating time for the butter and sugar. Aerating the fat is key to a light crumb.
Substitutions and Variations
This recipe is quite versatile, but substitutions should be made with care in gluten-free baking. If you need to be dairy-free, swap the butter for a high-quality vegan butter stick (not tub margarine), the sour cream for a dairy-free coconut yogurt or additional coconut cream, and the cream cheese for a plant-based alternative like Kite Hill or Violife. For the flour, ensure you use a ‘Measure-for-Measure’ or ‘1:1’ blend that includes xanthan gum (like King Arthur or Bob’s Red Mill). If your blend does not have xanthan gum, add 1.5 teaspoons to the dry ingredients. If you prefer a less sweet cake, you can reduce the sugar in the batter by 1/4 cup, but do not reduce it further as sugar aids in moisture retention. You can use unsweetened coconut flakes instead of sweetened if you prefer a more natural coconut flavor.
Common Mistakes to Avoid
The most common mistake is over-baking. Gluten-free flours do not brown as quickly as wheat flour, so the cake might look pale even when it is done. Rely on the toothpick test rather than visual color. Another major error is measuring flour by scooping the measuring cup directly into the bag, which packs the flour down and leads to a dry cake. Always use the ‘spoon and level’ method or a kitchen scale. Finally, rushing the cooling process is fatal for this cake. Gluten-free baked goods are structurally unstable when hot; if you try to turn them out of the pan too early, they will likely break apart. Patience is a key ingredient here.
Serving Suggestions
This cake is a centerpiece dessert, perfect for holidays like Easter, Mother’s Day, or Christmas. Serve it on a white cake stand to let the snowy coconut finish shine. It pairs beautifully with a cup of hot coffee or an Earl Grey tea, which complements the floral vanilla notes. For a summer twist, serve slices with a side of fresh mango coulis or grilled pineapple to enhance the tropical vibe. If you want to add a pop of color, garnish the top with edible flowers, lime zest, or a few fresh raspberries.
Storage and Reheating Tips
Because of the cream cheese frosting and the high moisture content, this cake should be stored in the refrigerator. It will keep well in an airtight cake carrier or covered with plastic wrap for up to 5 days. The cold actually helps firm up the crumb, making it easier to slice. However, for the best texture, let the slice sit at room temperature for 20-30 minutes before eating to soften the butter and cream cheese. This cake also freezes beautifully. You can freeze individual slices wrapped tightly in plastic wrap and foil for up to 3 months. Thaw in the fridge overnight.
Nutrition Facts (Estimated)
| Serving Size | 1 slice |
| Calories | 580 |
| Fat | 34g |
| Saturated Fat | 22g |
| Unsaturated Fat | 10g |
| Trans Fat | 0g |
| Cholesterol | 85mg |
| Sodium | 310mg |
| Carbohydrates | 68g |
| Fiber | 2g |
| Sugar | 42g |
| Protein | 5g |
Frequently Asked Questions
Can I make this cake ahead of time?
Yes! In fact, the flavors often meld better the next day. You can bake the layers, wrap them tightly in plastic wrap, and store them in the fridge for up to 2 days before frosting. Once frosted, the cake keeps for 5 days.
My gluten-free flour blend doesn’t have xanthan gum. What do I do?
You must add it manually. For this recipe, add 1.5 teaspoons of xanthan gum to the dry ingredients. Without it, the cake will crumble and fall apart.
Can I use coconut oil instead of butter?
You can substitute half of the butter with melted coconut oil for a stronger coconut flavor, but keeping at least half the butter is recommended for the best texture and structure.
Why did my cake sink in the middle?
This usually happens if the oven door was opened too early during baking, causing a temperature drop, or if the cake was underbaked. It can also happen if there was too much leavening (baking powder/soda).
Can I make this as cupcakes?
Absolutely. This batter will make approximately 24-28 cupcakes. Reduce the baking time to 18-22 minutes at the same temperature.
Is coconut milk different from coconut cream?
Yes. Coconut cream is much thicker and higher in fat. For this recipe, use standard full-fat canned coconut milk. If you only have coconut cream, water it down slightly to the consistency of whole milk.
How do I toast the coconut for the topping?
Spread the shredded coconut on a baking sheet and bake at 325°F for 5-10 minutes, stirring every 2 minutes, until golden brown. Watch it closely as it burns quickly!
Can I use almond flour?
No, this recipe is designed for a 1:1 rice-flour based blend. Almond flour behaves very differently and requires different ratios of liquid and eggs. Do not substitute 1:1.
Conclusion
There is something undeniably magical about a well-made coconut cake. It evokes memories of warm kitchens, family gatherings, and the simple joy of a sweet treat. With this Moist Gluten-Free Coconut Cake recipe, you no longer have to compromise on texture or flavor just to meet dietary needs. The combination of the plush, tender crumb and the tangy, rich cream cheese frosting creates a dessert experience that is truly second to none. Whether you are an experienced gluten-free baker or trying it for the first time, this recipe is designed to guide you to success. So, grab your mixer, toast that coconut, and get ready to enjoy a slice of tropical heaven right in your own home.