Elegant Red Velvet Anniversary Cake: The Ultimate Romantic Dessert
Elegant Red Velvet Anniversary Cake Recipe
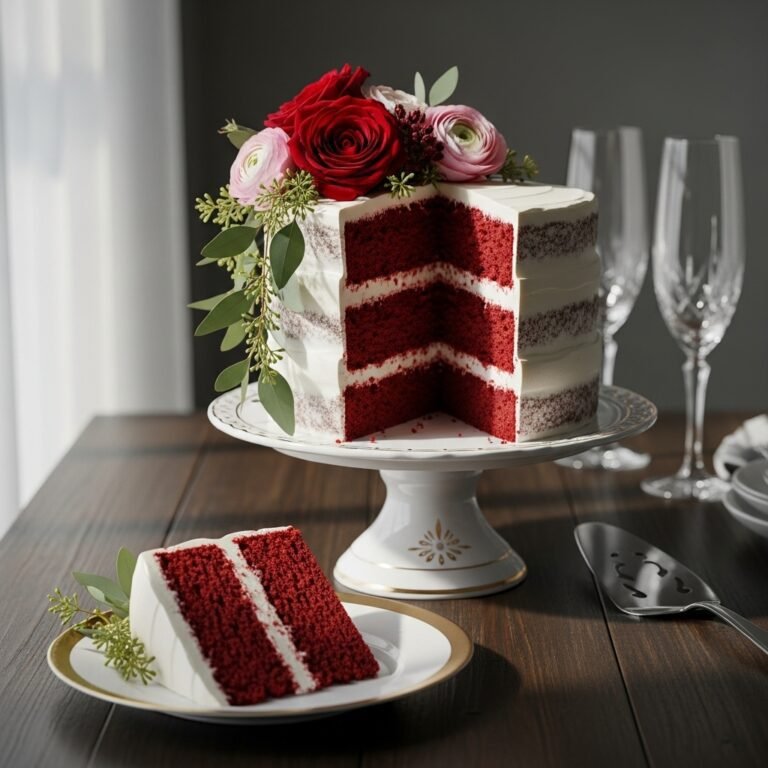
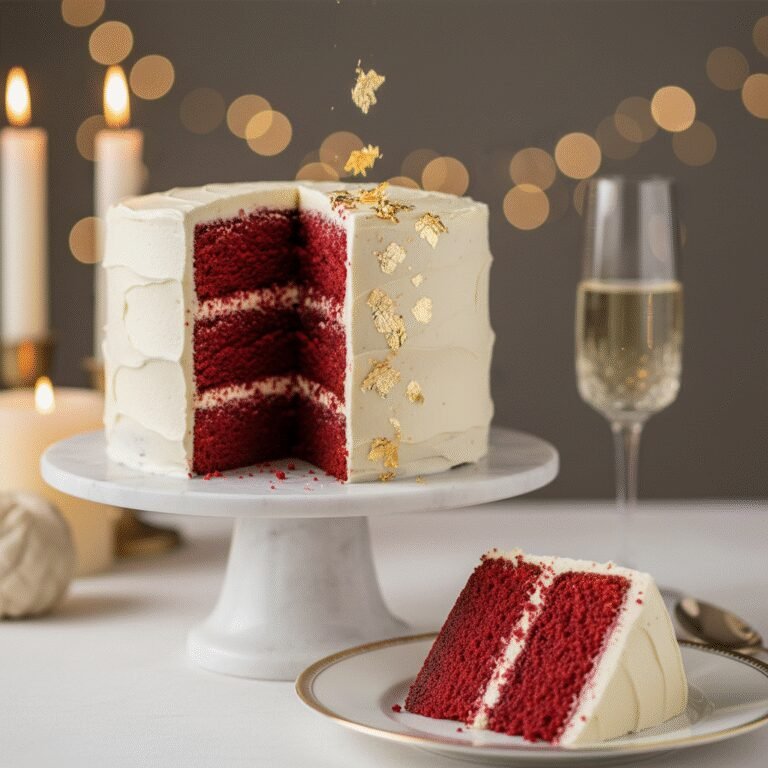
Celebrate love with this stunning Elegant Red Velvet Anniversary Cake, featuring moist, cocoa-infused layers and a tangy, luscious cream cheese frosting. It is the perfect centerpiece for your special day, offering a velvety crumb and a striking red hue that screams romance.
45 minutes
35 minutes
2 hours 30 minutes (includes cooling)
12-16 servings
Dessert
Baking
American
Vegetarian
There is something undeniably magical about a Red Velvet Cake. It is not just a cake; it is a statement piece, a symbol of celebration, and, in my opinion, the most romantic dessert you can place on a table. When planning an anniversary dinner or a special romantic gathering, the dessert course carries the weight of the evening’s finale, and this Elegant Red Velvet Anniversary Cake rises to the occasion with grace and sophistication. The allure of this cake lies in its contradictions: it is deeply flavorful yet light in texture; it possesses a hint of chocolate but is not a chocolate cake; it is vibrant in color but subtle in its cocoa undertones.
The term ‘velvet’ is not merely a marketing descriptor here; it perfectly encapsulates the texture of the crumb. Thanks to the chemical dance between acidic buttermilk, vinegar, and baking soda, the cake achieves a softness that literally melts in your mouth. Unlike dense pound cakes or airy sponges, this recipe strikes a luxurious balance that feels substantial yet tender. The frosting, a classic tangy cream cheese buttercream, cuts through the sweetness of the sponge, providing a creamy counterpoint that makes you crave just one more bite.
Over the years, I have tweaked this recipe to ensure it holds up to the pressure of special occasions. It slices cleanly, revealing those dramatic red layers, and stays moist for days, allowing you to make it ahead of time—a lifesaver when planning a complex anniversary menu. Whether you are celebrating one year or fifty, this cake communicates love and effort in every forkful. It is a timeless classic that demands to be shared with your favorite person.
History & Origins
The history of Red Velvet Cake is as rich and layered as the dessert itself, often shrouded in culinary myth and marketing genius. To understand its origins, we must look back to the Victorian era, where ‘velvet’ cakes were a specific category of luxury desserts. These cakes were defined by their incredibly soft texture, achieved by using almond flour, cocoa, or cornstarch to break down the protein in the flour. During the 1800s, the ‘Mahogany Cake’ and ‘Velvet Cocoa Cake’ were popular precursors, utilizing cocoa powder which, at the time, was not Dutch-processed.
The reddish hue originally wasn’t the result of food coloring. In the early 20th century, raw cocoa powder contained anthocyanins, which are pH-sensitive pigments. When this acidic cocoa was mixed with buttermilk and baking soda, a chemical reaction occurred that turned the batter a reddish-brown or mahogany color. This natural phenomenon gave the cake its name and its distinctive, slightly tangy flavor profile. However, as cocoa processing evolved to include alkalizing agents (Dutch processing) to neutralize acidity, the natural red tint disappeared, leaving a darker, brown powder.
The vibrant red color we know today is largely attributed to the Great Depression and World War II. During times of rationing, bakers used boiled beet juices to enhance the moisture and color of their cakes. However, the modern incarnation exploded in popularity thanks to the Adams Extract company in Texas during the 1920s. To sell more food dyes and flavor extracts, they packaged a Red Velvet recipe with their red food coloring, effectively standardizing the bright scarlet look. Another famous claim comes from the Waldorf-Astoria Hotel in New York City, which asserts it created the cake in the 1930s, originally calling it the ‘Waldorf-Astoria Cake.’ Regardless of whether it was born from chemical reactions, rationing ingenuity, or brilliant marketing, Red Velvet has cemented itself as an icon of American baking.
Why This Recipe Works
This specific recipe for Red Velvet Anniversary Cake succeeds because it meticulously balances the science of baking with the art of flavor. Many red velvet recipes suffer from being too dry or lacking in distinct flavor, often tasting just like vanilla cake with food coloring. This recipe avoids those pitfalls through three key mechanisms: acidity, fat ratios, and the cocoa bloom.
First, the acidity is paramount. We use a combination of commercial buttermilk and white vinegar. This high acid content does two things: it tenderizes the gluten in the flour, preventing the cake from becoming tough, and it reacts vigorously with the baking soda to provide a superior lift, resulting in that signature ‘velvet’ texture.
Second, we use a blend of butter and vegetable oil. Butter provides the rich, creamy flavor that feels high-end, while the oil ensures the cake remains moist even days after baking. Cakes made solely with butter can solidify and feel dry when chilled (which is often necessary for cream cheese frosting), but the oil keeps the crumb soft at cooler temperatures.
Lastly, we use a specific amount of cocoa powder—enough to give that enigmatic hint of chocolate without overpowering the vanilla and tangy buttermilk notes. We also use hot coffee or hot water to ‘bloom’ the cocoa, releasing its full flavor profile before it is mixed into the batter. This technique ensures the chocolate notes are deep and aromatic, providing a sophisticated backdrop to the sweet frosting. The result is a cake that is structurally sound for stacking but incredibly tender to eat.
Why You’ll Love This Recipe
- ✓Incredibly moist crumb thanks to a butter-oil blend.
- ✓Authentic tangy flavor profile using buttermilk and vinegar.
- ✓Stable cream cheese frosting perfect for piping and decorating.
- ✓Vibrant, deep red color that looks stunning when sliced.
- ✓Can be made ahead of time, as the flavor improves after 24 hours.
- ✓Perfect balance of sweet, tangy, and cocoa notes.
Equipment You’ll Need
- ✓Three 8-inch round cake pans or two 9-inch pans
- ✓Stand mixer with paddle attachment
- ✓Large mixing bowls
- ✓Sifter or fine-mesh sieve
- ✓Wire cooling rack
- ✓Offset spatula
- ✓Parchment paper
- ✓Measuring cups and spoons
- ✓Cake turntable (optional but recommended)
Ingredients
- ✓2 1/2 cups Cake flour (sifted)
- ✓2 tbsp Unsweetened cocoa powder
- ✓1 tsp Baking soda
- ✓1 tsp Salt
- ✓1/2 cup Unsalted butter, softened to room temperature
- ✓1 1/2 cups Granulated sugar
- ✓1 cup Vegetable oil (or canola oil)
- ✓2 large Eggs, room temperature
- ✓2 tsp Vanilla extract
- ✓1 tsp Distilled white vinegar
- ✓2 tbsp Red food coloring (liquid or gel)
- ✓1 cup Buttermilk, room temperature
- ✓16 oz Full-fat cream cheese, block style, softened (Frosting)
- ✓1 cup Unsalted butter, softened (Frosting)
- ✓4-5 cups Powdered sugar, sifted (Frosting)
- ✓1 tbsp Vanilla extract (Frosting)
- ✓Pinch of salt (Frosting)
Instructions
- Preheat your oven to 350°F (175°C). Grease three 8-inch cake pans generously with butter or baking spray. Line the bottoms with parchment paper rounds to ensure a clean release.
- In a medium bowl, sift together the cake flour, cocoa powder, baking soda, and salt. Whisk to combine thoroughly and set aside.
- In the bowl of a stand mixer fitted with the paddle attachment, beat the softened butter and granulated sugar on medium-high speed for about 4-5 minutes until the mixture is pale, light, and fluffy.
- With the mixer on medium speed, slowly stream in the vegetable oil. Once incorporated, add the eggs one at a time, beating well after each addition. Scrape down the sides and bottom of the bowl to ensure even mixing.
- Add the vanilla extract, distilled white vinegar, and red food coloring. Mix on low until the color is fully uniform. The batter should be a bright, vibrant red.
- Reduce the mixer speed to low. Add the dry ingredients in three parts, alternating with the buttermilk in two parts (Dry-Wet-Dry-Wet-Dry). Mix only until just combined and no streaks of flour remain. Do not overmix.
- Divide the batter evenly among the prepared cake pans. Use a kitchen scale for precision if available. Tap the pans gently on the counter to release any large air bubbles.
- Bake for 30-35 minutes, or until a toothpick inserted into the center comes out clean or with just a few moist crumbs attached. Avoid opening the oven door too early to prevent sinking.
- Remove cakes from the oven and let them cool in the pans for 10-15 minutes. Then, carefully invert them onto a wire rack to cool completely before frosting.
- To make the frosting: In a clean mixer bowl, beat the softened cream cheese and butter together on medium-high speed until smooth and creamy (about 3 minutes).
- Reduce speed to low and gradually add the sifted powdered sugar, one cup at a time. Once all sugar is added, increase speed to high and beat for 2-3 minutes until fluffy. Add vanilla and a pinch of salt.
- To assemble: Level the tops of the cooled cakes with a serrated knife if they are domed. Place the first layer on a cake stand. Spread a generous layer of frosting on top. Repeat with the remaining layers.
- Apply a thin ‘crumb coat’ of frosting over the entire cake and refrigerate for 20 minutes to set. This locks in the red crumbs.
- Apply the final thick layer of frosting and use an offset spatula to create swirls or smooth sides. Garnish with cake crumbs, sprinkles, or fresh flowers.
Expert Cooking Tips
- ✓Ensure all cold ingredients (eggs, buttermilk, butter, cream cheese) are at room temperature before starting. This creates a smoother emulsion and a better crumb.
- ✓Use ‘cake flour’ rather than all-purpose flour for a lighter, softer texture. If you don’t have it, you can make a substitute with cornstarch and AP flour.
- ✓Do not skip the sifting step, especially for the cocoa powder and powdered sugar, as they tend to clump.
- ✓Be careful not to overmix the batter once the flour is added; overmixing develops gluten and leads to a tough cake.
- ✓For the frosting, use block-style cream cheese, not the spreadable tub kind. The tub variety has too much water content and will make the frosting runny.
- ✓If the cake layers dome significantly, trim them flat before stacking to ensure structural stability.
- ✓Chill the cake layers for 30 minutes before frosting to make them easier to handle and less likely to break.
Substitutions and Variations
If you cannot find cake flour, you can make your own by measuring 1 cup of all-purpose flour, removing 2 tablespoons, and replacing them with 2 tablespoons of cornstarch. Sift this mixture 3-4 times to aerate it. For the buttermilk, you can make a ‘sour milk’ substitute by adding 1 tablespoon of lemon juice or white vinegar to a cup of whole milk and letting it sit for 10 minutes until it curdles. If you prefer a natural coloring agent, you can use roasted beet puree or beetroot powder, though this will alter the flavor slightly, introducing an earthy note. For the vegetable oil, melted coconut oil or canola oil work perfectly well. If you want a less sweet frosting, you can try an Ermine frosting (boiled milk frosting), which is actually the traditional frosting for red velvet before cream cheese became popular.
Common Mistakes to Avoid
The most common mistake with Red Velvet is overbaking. Because the cake is dark red, it is hard to see the browning cues. Rely on the toothpick test and start checking 5 minutes before the timer goes off. Another major error is using cold cream cheese for the frosting, which results in lumps that are impossible to whip out. Conversely, if the butter is too warm or melted, the frosting will be soupy and won’t hold its shape. A frequent mistake in mixing is dumping all the flour in at once; alternating with the buttermilk ensures the batter absorbs the liquid evenly without becoming tough. Finally, skipping the crumb coat often leads to red crumbs streaking through your pristine white frosting, ruining the elegant look.
Serving Suggestions
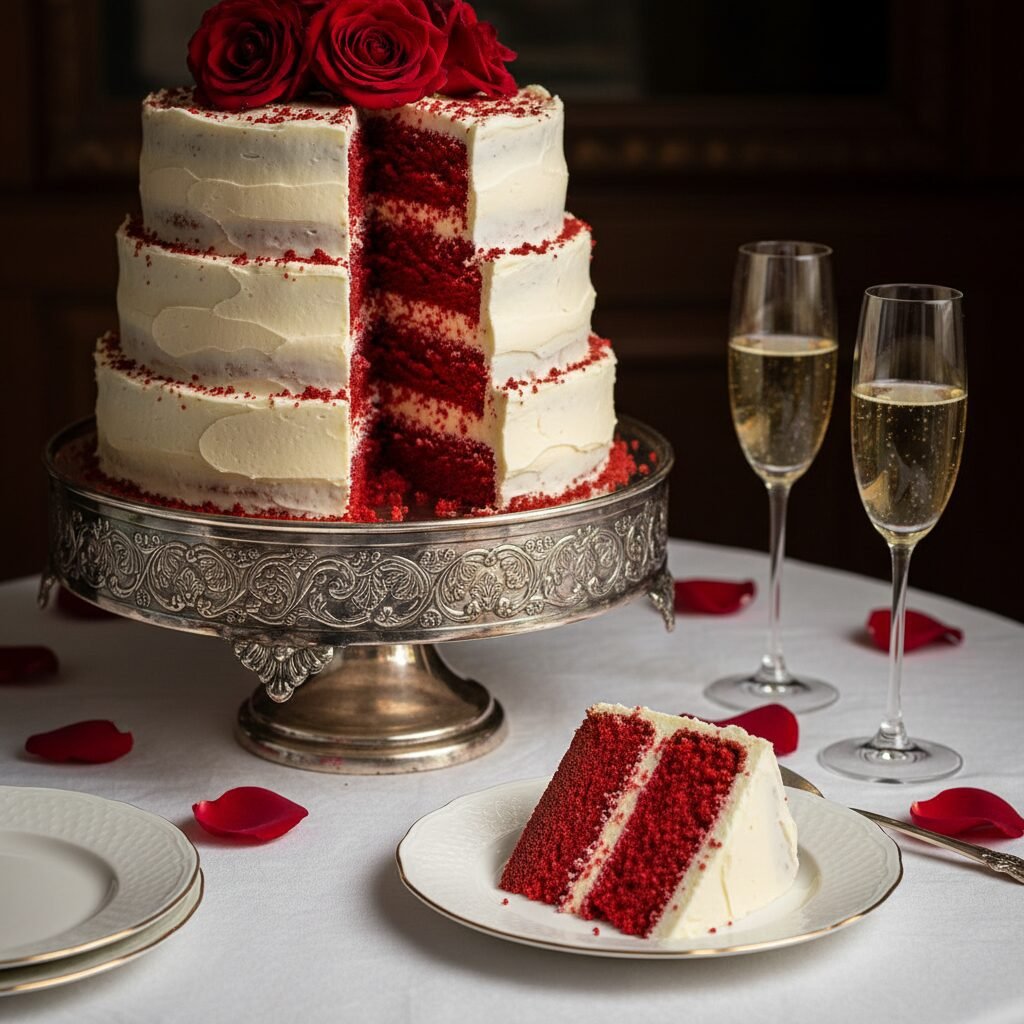
This cake is a showstopper on its own, but for an anniversary, presentation is key. Serve slices on fine china or white ceramic plates to contrast with the red cake. A glass of cold milk is the traditional accompaniment, but for a romantic evening, pair it with a glass of champagne, a dry Prosecco, or a robust Pinot Noir, which complements the cocoa notes. Fresh raspberries or strawberries on the side add a fresh, tart element that cuts through the richness. You can also garnish the plate with a drizzle of chocolate ganache or a sprig of fresh mint for a pop of green.
Storage and Reheating Tips
Because of the cream cheese frosting, this cake should be refrigerated. It can stay at room temperature for up to 2 hours for serving, but for long-term storage, keep it in the fridge in an airtight cake keeper or covered with plastic wrap. It will last for up to 5 days in the refrigerator. The cake actually tastes better the day after baking as the flavors meld. For freezing, you can freeze individual slices wrapped tightly in plastic wrap and foil for up to 3 months. Thaw overnight in the refrigerator before eating. If freezing unfrosted layers, wrap them in plastic wrap while they are slightly warm to trap moisture, then freeze.
Nutrition Facts (Estimated)
| Serving Size | 1 slice |
| Calories | 650 |
| Fat | 34g |
| Saturated Fat | 18g |
| Unsaturated Fat | 14g |
| Trans Fat | 0.5g |
| Cholesterol | 95mg |
| Sodium | 320mg |
| Carbohydrates | 80g |
| Fiber | 2g |
| Sugar | 45g |
| Protein | 6g |
Frequently Asked Questions
Can I make this cake ahead of time?
Absolutely. In fact, Red Velvet cake is one of the few cakes that often tastes better the next day. The moisture redistributes, and the flavors deepen. You can bake the layers up to 2 days in advance, wrap them tightly in plastic, and store them in the fridge. You can also frost the cake the day before and keep it refrigerated.
Why did my cake turn brown instead of red?
This usually happens if you use Dutch-processed cocoa powder without enough food coloring, or if the pH balance is off. Dutch-processed cocoa is alkaline and neutralizes the acids that help keep the color bright. Ensure you are using enough red food dye and consider using natural cocoa powder if you want a more authentic reaction.
Can I turn this recipe into cupcakes?
Yes! This recipe makes approximately 24-30 standard cupcakes. Bake them at 350°F (175°C) for about 18-22 minutes. Watch them closely as cupcakes bake faster than whole cakes.
Is the vinegar really necessary?
Yes, do not skip it. The vinegar reacts with the baking soda to provide leavening (lift) and helps tenderize the crumb. It also contributes to the slight tang that defines the red velvet flavor profile. You will not taste the vinegar in the final product.
My frosting is too runny, how can I fix it?
If your frosting is runny, your butter or cream cheese may have been too warm. Place the bowl in the refrigerator for 20 minutes to firm up the fats, then rewhip. You can also add more sifted powdered sugar, a quarter cup at a time, to stiffen it.
Can I use gel food coloring instead of liquid?
Yes, gel food coloring is actually preferred by many bakers because it is more concentrated. You will need less of it—start with 1-2 teaspoons of gel paste instead of the 2 tablespoons of liquid dye required.
Do I have to use coffee to bloom the cocoa?
While not strictly required, blooming cocoa in hot liquid releases more flavor. If you don’t want to use coffee, you can use hot water. The coffee does not make the cake taste like coffee; it simply intensifies the chocolate flavor.
How do I get perfectly flat layers?
You can use ‘cake strips’ soaked in water and wrapped around the outside of your cake pans. This cools the edges of the pan, allowing the cake to bake more evenly and preventing the center from doming. Alternatively, simply trim the domes off with a serrated knife after cooling.
Conclusion
Creating this Elegant Red Velvet Anniversary Cake is more than just following a recipe; it is an act of love. The time spent sifting, mixing, and frosting culminates in a dessert that is visually breathtaking and incredibly delicious. Whether you are an experienced baker or a novice looking to impress, this recipe is designed to guide you to success. The contrast of the deep red velvet layers against the snowy white cream cheese frosting is a timeless image of romance and celebration. I hope this cake becomes a cherished tradition for your anniversaries and special moments for years to come. Enjoy every bite!