The Ultimate Elegant White Wedding Cake With Fresh Flowers
Elegant White Wedding Cake With Fresh Flowers Recipe
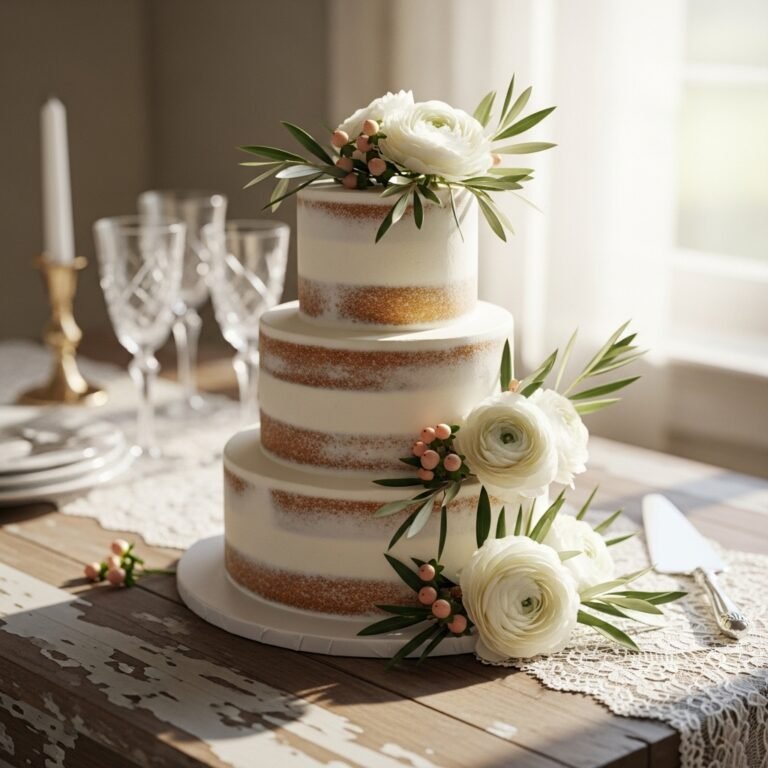
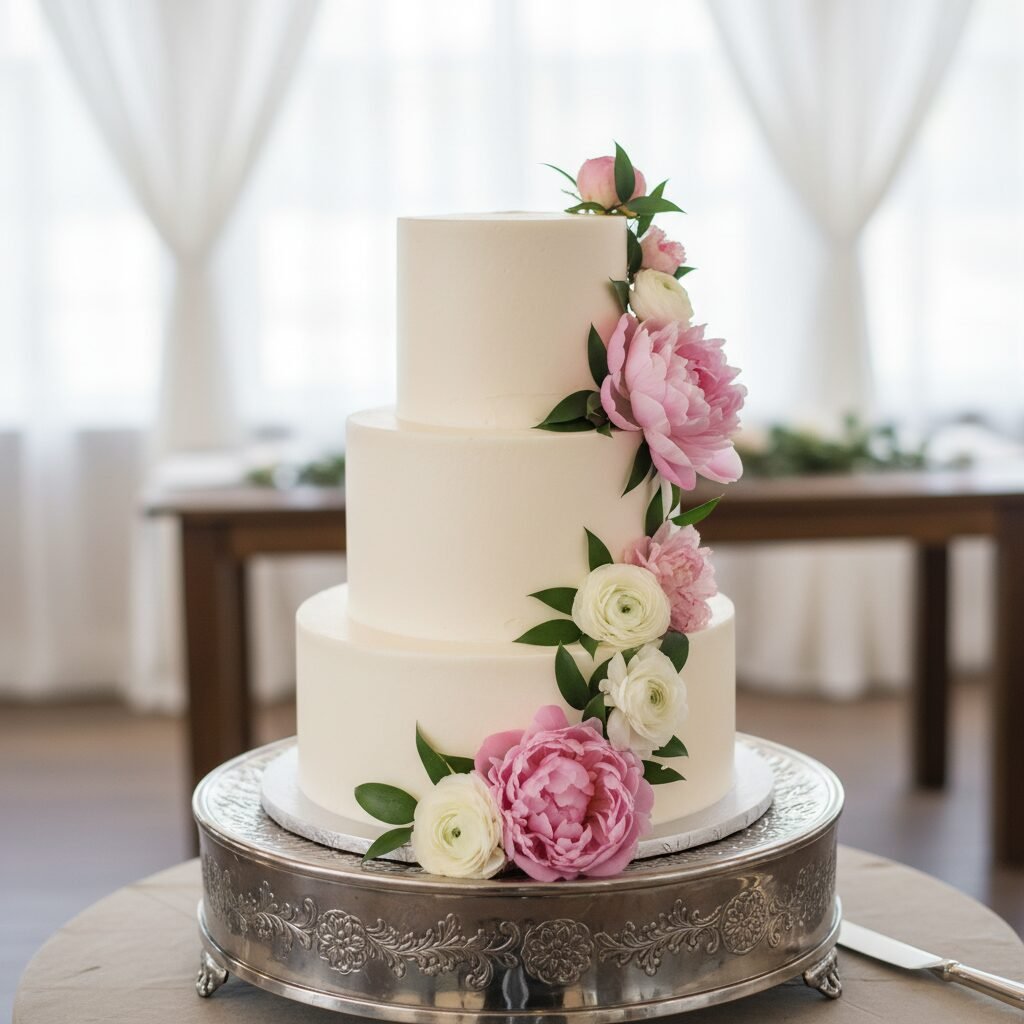
This show-stopping white wedding cake features a tender, velvety crumb and a silky Swiss meringue buttercream, adorned with cascading fresh blooms. It is the perfect balance of structural integrity and melt-in-your-mouth texture, designed specifically for DIY brides and special celebrations.
2 hours
50 minutes
6 hours (includes cooling and assembly)
50 servings (6-inch, 8-inch, and 10-inch tiers)
Dessert
Baking
American / European
Vegetarian
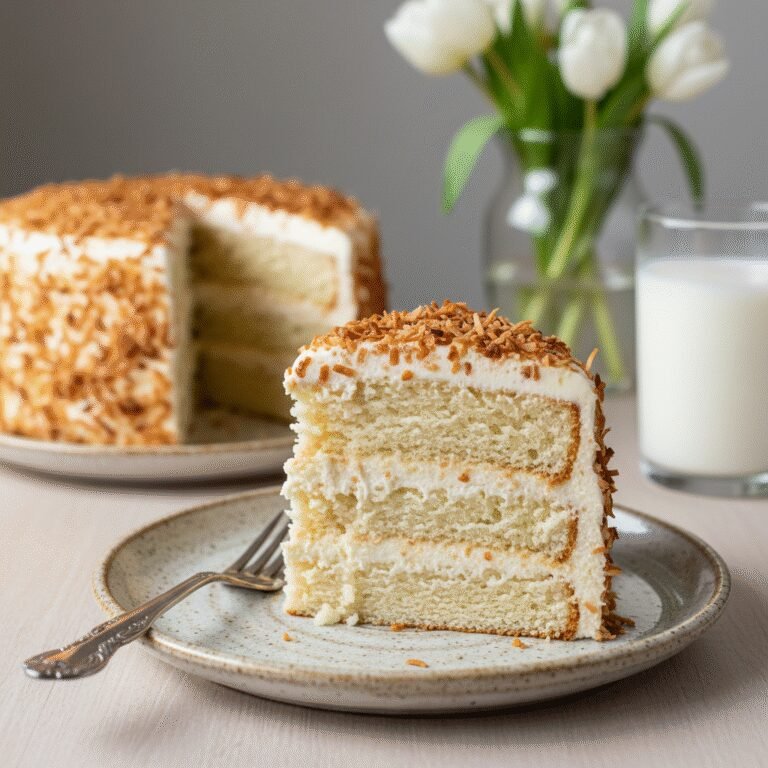
There is something undeniably magical about a white wedding cake. It stands as the centerpiece of the reception, a towering symbol of celebration, love, and new beginnings. While the idea of baking a wedding cake from scratch might seem daunting to the home baker, this recipe is designed to demystify the process, providing you with a professional-grade formula that yields consistent, bakery-quality results. Unlike dense, dry cakes often found at large events, this White Velvet Wedding Cake offers a texture that is incredibly soft and moist, thanks to a specific balance of fats and the reverse creaming method. The flavor is a delicate marriage of pure vanilla bean and a whisper of almond, a classic profile that pleases almost every palate.
What truly elevates this cake from a delicious dessert to a work of art is the decoration. We are bypassing complex fondant work for a modern, sophisticated finish using fresh, organic flowers. The contrast of the pristine white buttercream against the vibrant hues of fresh peonies, roses, or ranunculus creates an aesthetic that is both organic and opulent. This approach allows you to tailor the color palette perfectly to your event theme without needing a degree in sugar artistry. Whether you are a brave bride baking her own cake, a devoted family member gifting your labor of love, or simply a baking enthusiast looking to conquer the ultimate tiered confection, this guide will walk you through every step—from batter to bloom—ensuring your creation is as sturdy as it is stunning.
History & Origins
The tradition of the wedding cake is steeped in centuries of history and folklore, evolving significantly from its humble beginnings. In Ancient Rome, the practice involved breaking a loaf of barley bread over the bride’s head to symbolize fertility and good fortune; guests would then scramble for the crumbs to share in the luck. By the Medieval period in England, this evolved into a tradition where guests would stack small spiced buns as high as possible. If the bride and groom could kiss over the towering stack without knocking it down, it promised a lifetime of prosperity. This stacking tradition is often cited as the precursor to the tiered cakes we know today, and legend has it that a French pastry chef, visiting London, was inspired by the spire of St. Bride’s Church to create the first tiered wedding cake using a broomstick to hold the layers together.
The iconic ‘white wedding cake’ gained prominence in the Victorian era. Before refined sugar became more accessible, white icing was a symbol of extreme wealth and social status, as the ingredients required to achieve a pure white color were incredibly expensive. It became known as ‘royal icing’ after Queen Victoria used it on her wedding cake in 1840. The pure white color symbolized purity and virginity, mirroring the bride’s white dress—another trend popularized by the Queen. Over the decades, the wedding cake has transformed from a fruitcake base (favored for its longevity) to the lighter sponges and butter cakes preferred in modern American celebrations. Today, the inclusion of fresh flowers harkens back to ancient times when brides wore floral garlands, bridging the gap between historical symbolism and modern natural aesthetics.
Why This Recipe Works
This recipe succeeds where many others fail because it prioritizes both physics and chemistry. A tiered wedding cake requires a crumb structure that is sturdy enough to support the weight of multiple layers but soft enough to be enjoyable to eat. We achieve this through the ‘reverse creaming’ method (mixing fat into dry ingredients before adding liquids). This coats the flour proteins in butter, inhibiting gluten formation, which results in a plush, velvety texture that is dense enough to stack but tender on the palate. We also utilize egg whites only, rather than whole eggs; this preserves the pristine white color of the sponge and provides a tighter crumb structure compared to the richness of yolks.
Furthermore, the inclusion of sour cream is a non-negotiable secret weapon. The acidity in the sour cream tenderizes the gluten strands and reacts with the baking powder for a better rise, while its fat content adds moisture that keeps the cake fresh for days—a critical factor when you need to bake layers in advance of the big day. Finally, we pair this with Swiss Meringue Buttercream rather than American Buttercream. Swiss Meringue is far more stable in varying temperatures, holds sharp edges for a professional look, and is significantly less sweet, allowing the delicate vanilla and almond notes of the cake to shine without inducing a sugar coma.
Why You’ll Love This Recipe
- ✓Uses the reverse creaming method for a perfectly flat, sturdy, and tender crumb.
- ✓Features a pure white sponge using egg whites and clear vanilla.
- ✓Swiss Meringue Buttercream offers superior stability and a silky mouthfeel.
- ✓Detailed structural instructions ensure your tiers won’t collapse.
- ✓Customizable with fresh flowers to match any wedding theme.
- ✓Can be baked ahead and frozen, making wedding prep manageable.
Equipment You’ll Need
- ✓Stand mixer with paddle and whisk attachments
- ✓3 round cake pans (6-inch, 8-inch, 10-inch), 3 inches deep
- ✓Parchment paper
- ✓Cake strips (optional but recommended for flat tops)
- ✓Digital kitchen scale
- ✓Cake turntable
- ✓Offset spatula and bench scraper
- ✓Cake boards (cardboard rounds)
- ✓Bubble tea straws or wooden dowels for support
- ✓Floral tape and safety seal (or posy picks)
Ingredients
- ✓6 cups (720g) Cake flour, sifted
- ✓3 1/2 cups (700g) Granulated sugar
- ✓2 tbsp Baking powder
- ✓1 1/2 tsp Salt
- ✓2 cups (450g) Unsalted butter, room temperature, cut into cubes
- ✓2 cups (480ml) Egg whites (approx. 12-14 large eggs), room temperature
- ✓1 1/2 cups (360g) Full-fat sour cream, room temperature
- ✓1 cup (240ml) Whole milk, room temperature
- ✓2 tbsp Clear vanilla extract (for pure white color)
- ✓1 tsp Almond extract
- ✓For the Buttercream: 10 large Egg whites
- ✓For the Buttercream: 5 cups (1000g) Granulated sugar
- ✓For the Buttercream: 3 cups (680g) Unsalted butter, softened but cool
- ✓For the Buttercream: 1 tbsp Vanilla bean paste
- ✓Pinch of salt
- ✓Fresh organic flowers (Roses, Peonies, Eucalyptus, Ranunculus)
Instructions
- 1. Prep the Oven and Pans: Preheat your oven to 335°F (168°C). Grease your 6, 8, and 10-inch cake pans, line the bottoms with parchment paper, and grease the paper. If using cake strips, soak them in water and wrap them around the pans.
- 2. Mix Dry Ingredients: In the bowl of a stand mixer fitted with the paddle attachment, combine the cake flour, sugar, baking powder, and salt. Mix on low speed for 30 seconds to combine.
- 3. Reverse Creaming: Add the cubed, room-temperature butter to the dry ingredients. Mix on low speed until the mixture resembles coarse sand or damp breadcrumbs. There should be no large chunks of butter left.
- 4. Combine Liquids: In a separate large jug, whisk together the egg whites, sour cream, milk, vanilla extract, and almond extract until smooth.
- 5. Add Liquids to Batter: With the mixer on low, slowly pour in half of the liquid mixture. Increase speed to medium and beat for exactly 2 minutes to develop structure. Scrape down the sides and bottom of the bowl.
- 6. Finish Batter: Add the remaining liquid in two batches, mixing on low for 20-30 seconds after each addition. Do not overmix at this stage. Give it one final stir by hand.
- 7. Bake: Distribute batter into the pans (fill about 2/3 full). Bake for 35-50 minutes. The 6-inch will finish first, followed by the 8-inch, then the 10-inch. A toothpick inserted into the center should come out clean or with a few moist crumbs.
- 8. Cool: Let cakes cool in pans for 15 minutes, then turn out onto a wire rack to cool completely. Wrap in plastic wrap and chill in the fridge or freezer to make handling easier.
- 9. Make the Buttercream: Combine egg whites and sugar in a heatproof bowl over a pot of simmering water. Whisk constantly until sugar is dissolved and temp hits 160°F. Transfer to mixer with whisk attachment; whip on high until stiff peaks form and bowl is cool to touch (10-15 mins). Switch to paddle, add butter cube by cube, mixing until silky. Add vanilla and salt.
- 10. Assembly – Crumb Coat: Level the tops of your cakes. Place the 10-inch layer on a cake board. Pipe a dam of frosting, fill (if using filling), and stack. Apply a thin layer of buttercream all over to trap crumbs. Chill for 20 mins. Repeat for 8-inch and 6-inch cakes on their own boards.
- 11. Assembly – Final Coat: Apply a thick, smooth layer of buttercream to all tiers. Use a bench scraper to get smooth sides and sharp edges. Chill again.
- 12. Stacking: Insert dowels or bubble tea straws into the center of the 10-inch cake (cut flush with the top of the cake). Place the 8-inch cake (on its board) on top. Dowel the 8-inch cake. Place the 6-inch cake on top. Insert one long center dowel through the entire cake for stability if transporting.
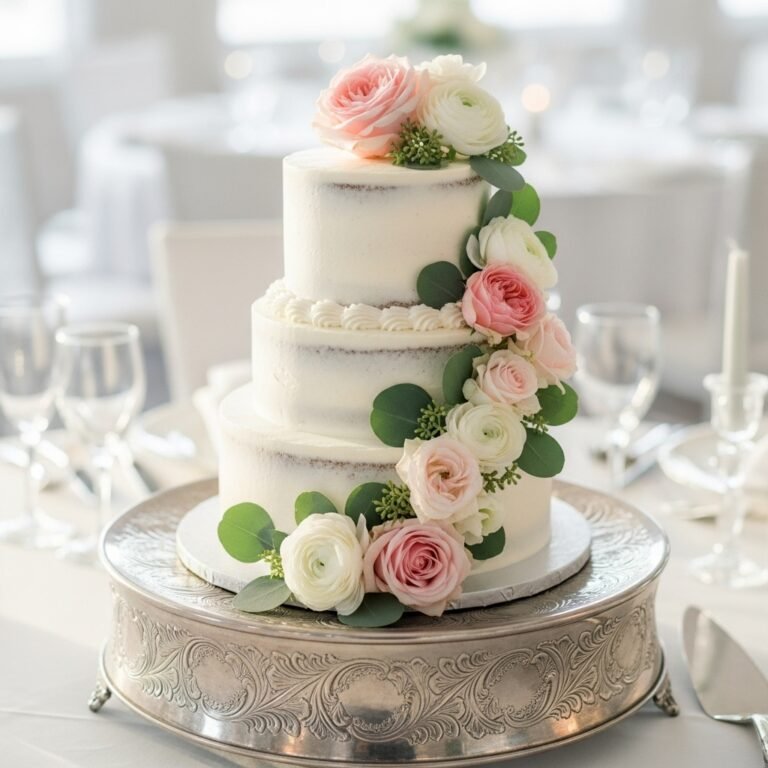
- 13. Decorating: Prepare your flowers by wrapping stems in floral tape or inserting them into posy picks/straws (never stick stems directly into cake). Arrange flowers in a cascading pattern down the side of the cake.
Expert Cooking Tips
- ✓Room Temperature Ingredients: This is crucial. If your butter, milk, or eggs are cold, the batter will curdle and the texture will be dense. Set them out 2 hours before baking.
- ✓Weigh Your Ingredients: For a project this large, cups are too inaccurate. Use a digital scale for the flour and sugar to ensure the chemistry is correct.
- ✓Don’t Overmix: Once the final liquids are added, mix only until combined. Overmixing develops gluten, which leads to a tough cake.
- ✓Use Cake Strips: These fabric strips dampen the heat on the sides of the pan, ensuring the cake rises evenly and flat, minimizing waste when leveling.
- ✓Flower Safety: Ensure flowers are organic and pesticide-free. Even edible flowers should have their stems wrapped or inserted into straws to prevent sap from leaching into the cake.
- ✓Chill Before Stacking: Cold cake layers are much sturdier and easier to stack than room-temperature ones.
Substitutions and Variations
If you cannot find cake flour, you can make a DIY version by removing 2 tablespoons of all-purpose flour from every cup and replacing it with 2 tablespoons of cornstarch, sifting several times. However, real cake flour yields the best results. For the frosting, if you find Swiss Meringue too intimidating, American Buttercream is a sweeter, easier alternative, though it is less stable in heat. If you prefer a different flavor profile, you can omit the almond extract and increase the vanilla, or add lemon zest to the sugar during the creaming phase for a citrus note. For a dairy-free version, use high-quality plant-based butter sticks and a dairy-free sour cream alternative, though be aware that the structural integrity may be slightly less robust than with dairy fats.
Common Mistakes to Avoid
The most common mistake is rushing the cooling process. Warm cakes will melt the buttercream, causing layers to slide and the structure to collapse. Always chill your layers thoroughly before assembly. Another error is insufficient support; never stack tiers without dowels (straws or wooden rods) in the bottom tiers. The cake is heavy, and without support, the bottom layer will be crushed. Regarding the buttercream, if it looks curdled or soupy while mixing, keep whipping! It almost always comes back together. If it’s too cold (curdled), warm the bowl slightly with a hair dryer; if it’s too warm (soupy), pop the bowl in the fridge for 10 minutes.
Serving Suggestions
Serve this elegant cake with a glass of chilled champagne or a dry prosecco to cut through the richness of the buttercream. For a non-alcoholic option, a floral tea like Earl Grey or Jasmine pairs beautifully. When cutting, use a sharp, long knife dipped in hot water and wiped dry between cuts for clean slices. It is customary to save the top tier for the couple’s first anniversary, so plan to serve the bottom two tiers to guests. A side of raspberry coulis or fresh berries on the plate adds a nice tart contrast to the sweet vanilla.
Storage and Reheating Tips
A fully assembled buttercream cake can sit at cool room temperature (below 72°F) for up to 2 days, as the sugar and fat seal the cake. However, if the filling is perishable (like curd or pastry cream), it must be refrigerated. Once cut, press plastic wrap directly against the exposed cake flesh to prevent drying. Leftover slices can be stored in an airtight container in the fridge for 4 days. For long-term storage, wrap individual slices or whole tiers tightly in two layers of plastic wrap and one layer of foil, then freeze for up to 3 months. Thaw in the fridge overnight before eating.
Nutrition Facts (Estimated)
| Serving Size | 1 slice |
| Calories | 650 |
| Fat | 35g |
| Saturated Fat | 22g |
| Unsaturated Fat | 10g |
| Trans Fat | 0g |
| Cholesterol | 95mg |
| Sodium | 320mg |
| Carbohydrates | 78g |
| Fiber | 1g |
| Sugar | 45g |
| Protein | 6g |
Frequently Asked Questions
Can I bake the cake layers ahead of time?
Absolutely. In fact, it’s recommended. Bake the layers up to 3 weeks in advance, wrap them tightly in plastic wrap (double layer), and freeze them. Thaw them in the fridge the night before decorating. This breaks up the workload and actually makes the cake moister.
How do I transport a tiered cake safely?
Transport the cake on a flat surface (like the trunk of an SUV), not on a slanted car seat. Ensure the car is very cool (air conditioning on max). Use a center dowel that goes through all tiers for stability, and place the cake box on a non-slip mat.
What flowers are safe to put on a cake?
Safe flowers include Roses, Pansies, Violets, Marigolds, Hibiscus, and Lavender. Avoid toxic flowers like Hydrangeas, Lilies of the Valley, or Daffodils. Even with safe flowers, wrap stems in floral tape or put them in straws so they don’t directly touch the cake interior.
Why did my buttercream curdle?
This usually happens if the butter was too cold when added to the meringue. Don’t panic! Just keep whipping. If it doesn’t resolve after 5 minutes, warm the outside of the bowl with a hairdryer or hot towel while whipping, and it will emulsify.
Can I make this gluten-free?
Yes, you can substitute the cake flour for a high-quality 1:1 Gluten-Free Baking Flour blend (look for one with xanthan gum). The texture will be slightly different, but still delicious.
How much frosting do I really need?
It is always better to have too much than too little. This recipe makes a generous amount for filling, crumb coating, and final coating a 3-tier cake. If you have leftovers, it freezes perfectly for up to 3 months.
Do I have to use a stand mixer?
For a project of this scale and for Swiss Meringue Buttercream, a stand mixer is highly recommended. A hand mixer will struggle with the volume of batter and the long whipping time required for the meringue.
How do I get the frosting so smooth?
The secret is a metal bench scraper and hot water. Dip your scraper in hot water, wipe it dry, and then glide it over the cake. The heat slightly melts the outer layer of fat, smoothing out air bubbles and ridges.
Conclusion
Creating your own wedding cake is a labor of love that results in a centerpiece far more personal and delicious than anything you could buy. This Elegant White Wedding Cake with Fresh Flowers combines the timeless beauty of nature with the comfort of a homemade, high-quality dessert. While the process requires patience and precision, the result—a towering, floral-adorned beauty with a melt-in-your-mouth texture—is worth every minute. Whether for a grand wedding, an intimate vow renewal, or a milestone anniversary, this cake promises to be as memorable as the occasion itself. Happy baking!